I’ve always been fascinated by the delicate balance of flavors in Russian desserts, and the “Milk Girl” cake (Торт молочная девочка) holds a special place in my heart. This enchanting dessert combines the nostalgic taste of condensed milk with layers of tender sponge cake, creating a symphony of sweetness that reminds me of childhood memories and family gatherings.
The name “Молочная девочка” translates to “Milk Girl” in English, and it’s inspired by the iconic Soviet-era condensed milk brand that featured a young girl on its label. This cake became a beloved dessert across Eastern Europe, representing the comfort and warmth of home baking. What makes this cake truly special is its unique combination of textures and the way the condensed milk cream perfectly complements the soft, airy cake layers.
Understanding the Торт молочная девочка
The Milk Girl cake is fundamentally different from many Western-style cakes. While American cakes often rely on buttercream or cream cheese frostings, this Russian masterpiece uses a condensed milk-based cream that creates an incredibly moist and flavorful result. The cake itself is typically made with a simple sponge base, but the magic happens in the assembly and the overnight soaking process.
Key Components of the Perfect Milk Girl Cake
Sponge Cake Base: The foundation of our cake is a light, airy sponge that’s designed to absorb the creamy filling without becoming soggy. I prefer using a classic biscuit method that incorporates eggs, sugar, and flour in specific proportions.
Condensed Milk Cream: This is where the cake gets its signature flavor. The cream combines condensed milk with butter and sometimes sour cream, creating a rich, smooth texture that penetrates every layer of the cake.
Assembly Technique: The layering process is crucial for achieving the perfect texture. Each layer must be evenly spread and given time to meld with the others.
Essential Ingredients and Their Roles
Understanding each ingredient’s purpose helps create a consistently excellent cake. Here’s my detailed breakdown of what you’ll need and why each component matters:
| Ingredient | Quantity | Purpose | Quality Tips |
|---|---|---|---|
| Eggs | 6 large | Structure and moisture | Room temperature for better volume |
| Sugar | 200g | Sweetness and cake structure | Fine granulated works best |
| Flour | 200g | Cake structure | Sift twice for lightness |
| Condensed milk | 380g (1 can) | Main flavor component | Choose high-quality brand |
| Butter | 200g | Cream richness | Unsalted, room temperature |
| Sour cream | 200g | Tanginess and moisture | 20% fat content ideal |
| Vanilla extract | 2 tsp | Flavor enhancement | Pure extract preferred |
| Baking powder | 1 tsp | Cake rise | Fresh, not expired |
Optional Ingredients for Variations
| Ingredient | Quantity | Purpose |
|---|---|---|
| Cocoa powder | 2 tbsp | Chocolate layer variation |
| Chopped nuts | 100g | Texture contrast |
| Dried fruits | 80g | Additional sweetness |
| Lemon zest | 1 lemon | Citrus notes |
Step-by-Step Preparation Process
Preparing the Sponge Cake
I always start by preparing my workspace and ensuring all ingredients are at room temperature. This simple step makes a significant difference in the final texture of the cake.
Step 1: Creating the Perfect Egg Mixture I begin by separating the eggs, placing the whites in a spotlessly clean bowl. Any trace of fat will prevent proper whipping. I whisk the egg yolks with half the sugar until the mixture becomes pale and creamy, which usually takes about 5 minutes of vigorous whisking.
Step 2: Achieving Perfect Meringue The egg whites need to be whipped to soft peaks before gradually adding the remaining sugar. I add the sugar slowly, continuing to whip until stiff, glossy peaks form. This process typically takes 8-10 minutes with an electric mixer.
Step 3: Gentle Folding Technique I fold one-third of the meringue into the egg yolk mixture to lighten it, then gently fold this mixture back into the remaining meringue. The key is to maintain as much air as possible while ensuring even distribution.
Step 4: Incorporating Flour I sift the flour directly over the egg mixture and fold it in using a large metal spoon or rubber spatula. The motion should be confident but gentle, cutting through the mixture and folding over rather than stirring.
Baking the Perfect Sponge
Temperature and Timing I preheat my oven to 180°C (160°C for fan ovens) and line a 24cm springform pan with parchment paper. The batter goes into the center of the oven, and I resist the temptation to open the door for the first 25 minutes. The cake is done when it springs back lightly when touched and has slightly pulled away from the sides of the pan.
Cooling Process I let the cake cool completely in the pan for 10 minutes before turning it out onto a wire rack. This prevents the delicate sponge from collapsing due to sudden temperature changes.
Creating the Condensed Milk Cream
The cream is what transforms this cake from ordinary to extraordinary. I’ve perfected this technique over years of making this cake for family celebrations.
Step 1: Preparing the Base I ensure my butter is perfectly soft – it should give slightly when pressed but not be melted. I beat it with an electric mixer until it becomes light and fluffy, which takes about 5 minutes.
Step 2: Adding Condensed Milk I add the condensed milk gradually, beating continuously. The mixture might look slightly curdled at first, but continued beating will bring it together into a smooth, glossy cream.
Step 3: Incorporating Sour Cream The sour cream goes in last, beaten just until combined. This adds a subtle tanginess that balances the sweetness of the condensed milk.
Assembly Techniques for Perfect Layers
Slicing the Sponge
I use a long, sharp knife to slice the cooled sponge horizontally into three even layers. I mark the cutting line with toothpicks inserted around the circumference of the cake to ensure even slices.
Layering Strategy
Bottom Layer Foundation I place the bottom layer on my serving plate and brush it lightly with any accumulated cake crumbs mixed with a tablespoon of milk. This adds extra moisture and flavor.
Cream Distribution I spread approximately one-third of the cream evenly over the first layer, using an offset spatula to create smooth, even coverage. The cream should reach almost to the edges but not overflow.
Building Upward Each subsequent layer follows the same process: cake, light brushing, cream. I reserve the smoothest cake layer for the top and use the remaining cream to cover the entire cake.
Professional Finishing Techniques
| Technique | Description | Visual Result |
|---|---|---|
| Smooth sides | Use offset spatula at 45° angle | Clean, professional appearance |
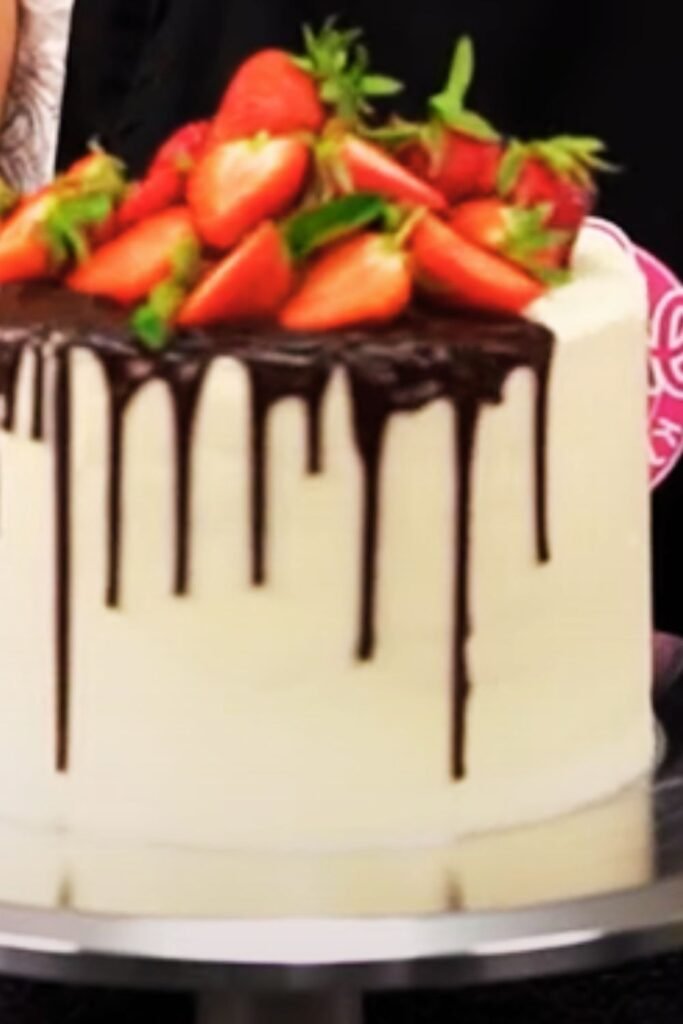
| Decorative top | Create swirls with fork or knife | Textured, homemade charm |
| Border detail | Pipe cream border around base | Polished, bakery-style finish |
The Crucial Resting Period
This is where patience becomes essential. I cover the assembled cake with plastic wrap and refrigerate it for at least 8 hours, preferably overnight. During this time, the cream penetrates the cake layers, creating the characteristic moist, unified texture that makes Торт молочная девочка so special.
What Happens During Resting
Moisture Migration: The cream gradually soaks into the sponge layers, softening them and creating a more cohesive texture.
Flavor Development: The condensed milk flavors intensify and meld with the other ingredients.
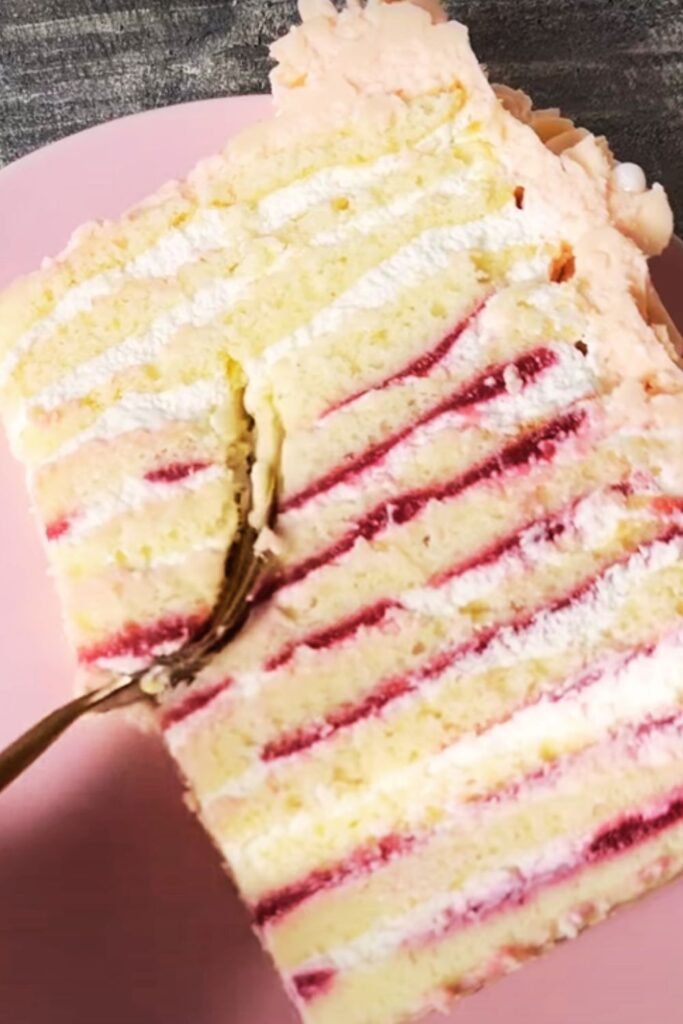
Structural Settling: The layers compress slightly, making the cake easier to slice cleanly.
Variations and Creative Adaptations
Over the years, I’ve experimented with numerous variations of this classic recipe, each bringing its own unique character to the beloved original.
Chocolate Variation
I replace 30g of flour with cocoa powder to create chocolate sponge layers. The result is a more complex flavor profile that appeals to chocolate lovers while maintaining the cake’s essential character.
Fruit-Enhanced Version
I sometimes add a layer of fresh berries or sliced peaches between the cream layers. The fruit adds freshness and creates beautiful color contrasts when the cake is sliced.
Nutty Texture Addition
Chopped walnuts or hazelnuts folded into the cream provide delightful textural contrast. I toast the nuts lightly before chopping to enhance their flavor.
Coffee-Infused Adaptation
A tablespoon of instant coffee dissolved in a small amount of hot water and cooled can be added to the cream for a sophisticated mocha variation.
Nutritional Information and Serving Guidelines
Understanding the nutritional content helps with portion planning and dietary considerations:
| Nutrient | Per Slice (1/12 cake) | Daily Value % |
|---|---|---|
| Calories | 385 | 19% |
| Total Fat | 18g | 28% |
| Saturated Fat | 11g | 55% |
| Cholesterol | 95mg | 32% |
| Sodium | 85mg | 4% |
| Carbohydrates | 52g | 17% |
| Sugars | 45g | – |
| Protein | 8g | 16% |
| Calcium | 180mg | 18% |
Serving Suggestions
I recommend serving this cake at room temperature for the best flavor and texture experience. Here are my favorite accompaniments:
Hot Beverages: Russian tea, coffee, or hot chocolate complement the cake’s richness perfectly.
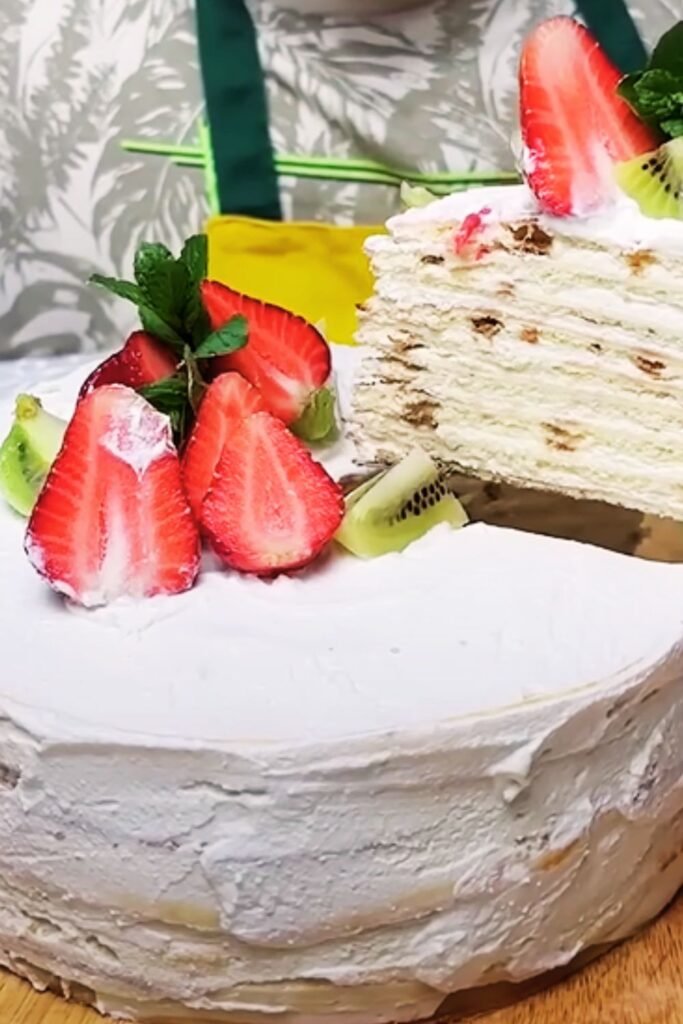
Fresh Fruit: Light, acidic fruits like strawberries or raspberries provide a refreshing contrast.
Whipped Cream: A small dollop of lightly sweetened whipped cream adds an extra layer of indulgence.
Storage and Freshness Tips
Proper storage ensures your Торт молочная девочка maintains its quality and safety:
Short-term Storage (1-3 days)
I keep the cake covered in the refrigerator, where it actually improves in texture and flavor. The cream continues to soften the cake layers, creating an even more delicious result.
Long-term Storage (up to 1 week)
For longer storage, I wrap individual slices in plastic wrap and store them in airtight containers. This prevents the cake from absorbing refrigerator odors while maintaining moisture.
Freezing Guidelines
The cake can be frozen for up to 3 months. I wrap it tightly in plastic wrap and aluminum foil, then thaw it slowly in the refrigerator overnight before serving.
Troubleshooting Common Issues
Through years of making this cake, I’ve encountered and solved various challenges:
Dense or Heavy Cake
Cause: Over-mixing the batter or using cold ingredients Solution: Ensure all ingredients are at room temperature and fold gently
Cream Too Thin
Cause: Butter too warm or ingredients added too quickly Solution: Chill the mixture and re-whip, or add a tablespoon of powdered sugar
Uneven Layers
Cause: Improper slicing technique Solution: Use toothpicks to mark cutting lines and use a long, sharp knife
Cake Falling Apart
Cause: Insufficient resting time or too much moisture Solution: Allow proper resting time and ensure cream consistency is correct
Cultural Significance and History
The Торт молочная девочка represents more than just a dessert; it’s a connection to cultural heritage and family traditions. In Soviet times, when ingredients were often scarce, this cake represented abundance and celebration. The use of condensed milk, a shelf-stable luxury item, made it a special occasion dessert.
I’ve found that making this cake connects me to generations of home bakers who perfected their own versions of this recipe. Each family often has slight variations – some add a layer of jam, others incorporate different spices – but the essential character remains unchanged.
Professional Tips for Perfect Results
Equipment Recommendations
| Tool | Purpose | Quality Impact |
|---|---|---|
| Stand mixer | Consistent mixing | High |
| Offset spatula | Smooth frosting | Medium |
| Springform pan | Easy removal | High |
| Digital scale | Accurate measurements | High |
| Bench scraper | Clean edges | Medium |
Timing Your Preparation
I always plan this cake preparation over two days:
Day 1: Bake the sponge cake and prepare the cream. Assemble the cake in the evening.
Day 2: Allow the cake to rest overnight and serve the following day.
This timing ensures optimal texture and flavor development while managing the workload effectively.
Questions and Answers
Q: Can I make this cake without condensed milk? I don’t recommend substituting the condensed milk as it’s the defining characteristic of this cake. However, you could make a homemade version by slowly cooking milk and sugar until it reaches the proper consistency.
Q: Why is my sponge cake tough? A tough sponge usually results from over-mixing the batter or using too much flour. I always fold the ingredients gently and measure flour by weight rather than volume for consistency.
Q: How far in advance can I make this cake? I actually prefer making this cake 1-2 days ahead as the flavors develop beautifully. It can be stored in the refrigerator for up to a week, though it’s best consumed within 3-4 days.
Q: Can I use low-fat ingredients to make it healthier? While you can substitute some ingredients, the cake’s characteristic texture and flavor depend on the full-fat dairy products. Low-fat substitutions will significantly change the final result.
Q: What’s the best way to slice this cake cleanly? I use a sharp knife dipped in warm water and wiped clean between each cut. This prevents the cream from sticking to the blade and creates clean, professional-looking slices.
Q: Can I freeze individual slices? Yes, individual slices freeze excellently for up to 3 months. I wrap each slice in plastic wrap and store them in freezer bags. They thaw perfectly in the refrigerator overnight.
Q: Why does my cream separate or curdle? Cream separation usually occurs when the butter is too warm or when ingredients are added too quickly. Always ensure your butter is properly softened but not melted, and add condensed milk gradually while beating.
Q: Is there a gluten-free version of this recipe? You can substitute the regular flour with a 1:1 gluten-free flour blend, though the texture will be slightly different. I recommend adding an extra 1/4 teaspoon of xanthan gum if your flour blend doesn’t contain it.
The Торт молочная девочка represents the perfect marriage of simplicity and sophistication. While the technique requires attention to detail, the ingredients are straightforward and accessible. I hope this comprehensive guide helps you create your own perfect version of this timeless Russian dessert. Remember, the key to success lies in patience – both in the preparation process and in allowing the cake to rest and develop its characteristic flavors overnight.
This cake has brought joy to countless family gatherings in my home, and I’m confident it will become a treasured recipe in yours as well. The combination of nostalgic flavors, impressive presentation, and the satisfaction of creating something truly special from simple ingredients makes the Торт молочная девочка a dessert worth mastering.