There’s something absolutely magical about combining two beloved desserts into one spectacular treat. My brownie milkshake recipe transforms the rich, fudgy goodness of homemade brownies into a creamy, indulgent drink that’ll make your taste buds dance with joy. I’ve spent countless hours perfecting this recipe, and I’m thrilled to share every secret with you.
When I first experimented with this concept, I was amazed by how the dense, chocolatey brownies blend seamlessly with premium vanilla ice cream to create a texture that’s both familiar and surprisingly new. The result is a milkshake that captures all the beloved flavors of a warm brownie while delivering the cool, refreshing satisfaction of your favorite ice cream parlor treat.
What Makes This Brownie Milkshake Special
My approach to this brownie milkshake goes beyond simply throwing brownies into a blender. I’ve discovered that the key lies in understanding how different brownie textures interact with ice cream, milk, and various flavor enhancers. The brownies I use have a specific consistency that creates the perfect balance between chunks and smooth blending.
Fudgy Base: I prefer using slightly underbaked brownies because they maintain moisture and create a richer flavor profile when blended.
Temperature Control: The temperature contrast between room-temperature brownies and frozen ice cream creates an ideal blending environment.
Layered Flavors: I incorporate multiple chocolate elements to create depth rather than relying on a single chocolate source.
Essential Ingredients Breakdown
Primary Components
| Ingredient | Quantity | Purpose | Quality Notes |
|---|---|---|---|
| Homemade Brownies | 3-4 pieces (2×2 inch) | Base flavor and texture | Use day-old for best consistency |
| Vanilla Ice cream | 2 cups | Creamy foundation | Premium brands work best |
| Whole Milk | 1/2 cup | Consistency control | Full-fat essential for richness |
| Chocolate Syrup | 3 tablespoons | Flavor enhancement | High-quality cocoa-based preferred |
| Whipped Cream | 1/2 cup | Topping and texture | Fresh whipped recommended |
Flavor Enhancers
| Add-in | Quantity | Impact | When to Use |
|---|---|---|---|
| Vanilla Extract | 1 teaspoon | Aromatic depth | Always include |
| Espresso Powder | 1/4 teaspoon | Chocolate intensifier | For adult versions |
| Sea Salt | Pinch | Flavor balancer | Enhances sweetness |
| Cocoa Powder | 1 tablespoon | Extra chocolate punch | For serious chocoholics |
My Perfect Brownie Recipe for Milkshakes
Before we dive into the milkshake itself, I want to share my go-to brownie recipe that works exceptionally well for this application. These brownies have the perfect density and chocolate intensity.
Brownie Ingredients
Dry Ingredients:
- 1 cup all-purpose flour
- 1/2 cup unsweetened cocoa powder
- 1/2 teaspoon salt
- 1/4 teaspoon baking powder
Wet Ingredients:
- 1/2 cup unsalted butter, melted
- 1 cup granulated sugar
- 2 large eggs
- 1 teaspoon vanilla extract
- 1/2 cup chocolate chips
Brownie Preparation Method
I always start my brownies by preheating my oven to 350°F and lining an 8×8 inch pan with parchment paper. The key to perfect milkshake brownies is achieving that ideal fudgy texture that holds together while blending smoothly.
First, I whisk together all dry ingredients in a medium bowl, ensuring no cocoa lumps remain. In a separate larger bowl, I combine the melted butter with sugar, whisking until the mixture becomes glossy. I add eggs one at a time, followed by vanilla extract, mixing thoroughly after each addition.
The magic happens when I fold the dry ingredients into the wet mixture. I use a gentle folding motion rather than aggressive stirring to prevent tough brownies. Finally, I fold in chocolate chips for extra texture and chocolate bursts.
I bake these brownies for 25-28 minutes, testing with a toothpick that should come out with a few moist crumbs. For milkshake purposes, I prefer them slightly underbaked rather than fully set.
Step-by-Step Milkshake Creation
Preparation Phase
I always begin by ensuring my brownies are at room temperature and my ice cream has softened slightly. This temperature balance is crucial for smooth blending without overworking the mixture.
Step 1: Brownie Preparation I cut my brownies into roughly 1-inch pieces, removing any overly crispy edges that might create unwanted texture in the final drink. The pieces should be substantial enough to provide flavor and texture without being so large that they won’t blend properly.
Step 2: Initial Blending I start my blender on the lowest setting, adding the milk first to create a liquid base. This prevents the ice cream from sticking to the blender blades and ensures smoother operation.
Step 3: Ice Cream Integration I add the softened ice cream in two batches, blending briefly between additions. This gradual approach prevents the formation of ice chunks and creates a more uniform texture.
Step 4: Brownie Incorporation Here’s where my technique differs from most recipes. I pulse the brownies into the mixture rather than running the blender continuously. This preserves some brownie chunks while ensuring proper distribution throughout the milkshake.
Step 5: Flavor Enhancement I add vanilla extract, chocolate syrup, and any additional flavor enhancers during the final blending phase. A brief 10-second blend incorporates these elements without over-mixing.
Texture Perfection Techniques
The ideal brownie milkshake has a consistency that’s thick enough to require a spoon but smooth enough to drink through a straw. I achieve this by controlling the milk content and blending time carefully.
Thickness Control: I start with less milk than I think I need, adding more gradually until I reach the perfect consistency.
Chunk Distribution: I perform a final brief pulse to ensure brownie pieces are evenly distributed without being completely pulverized.
Temperature Check: The final milkshake should be cold but not so frozen that it’s difficult to blend or drink.
Advanced Variations and Flavor Profiles
Salted Caramel Brownie Milkshake
I transform the basic recipe by adding 2 tablespoons of high-quality caramel sauce and a generous pinch of sea salt. The salt enhances both the chocolate and caramel flavors while adding sophisticated complexity.
Additional Ingredients:
- 2 tablespoons caramel sauce
- 1/4 teaspoon sea salt
- Caramel drizzle for garnish
Mint Chocolate Brownie Milkshake
For mint lovers, I incorporate 1/2 teaspoon of pure peppermint extract and a handful of fresh mint leaves. The fresh mint provides natural oils that complement the artificial extract beautifully.
Additional Ingredients:
- 1/2 teaspoon peppermint extract
- 6-8 fresh mint leaves
- Dark chocolate shavings for garnish
Peanut Butter Brownie Milkshake
This variation combines creamy peanut butter with the chocolate base for a classic flavor pairing. I use 3 tablespoons of natural peanut butter for the best flavor integration.
Additional Ingredients:
- 3 tablespoons creamy peanut butter
- 1 tablespoon honey
- Crushed peanuts for garnish

Serving and Presentation Mastery
Glassware Selection
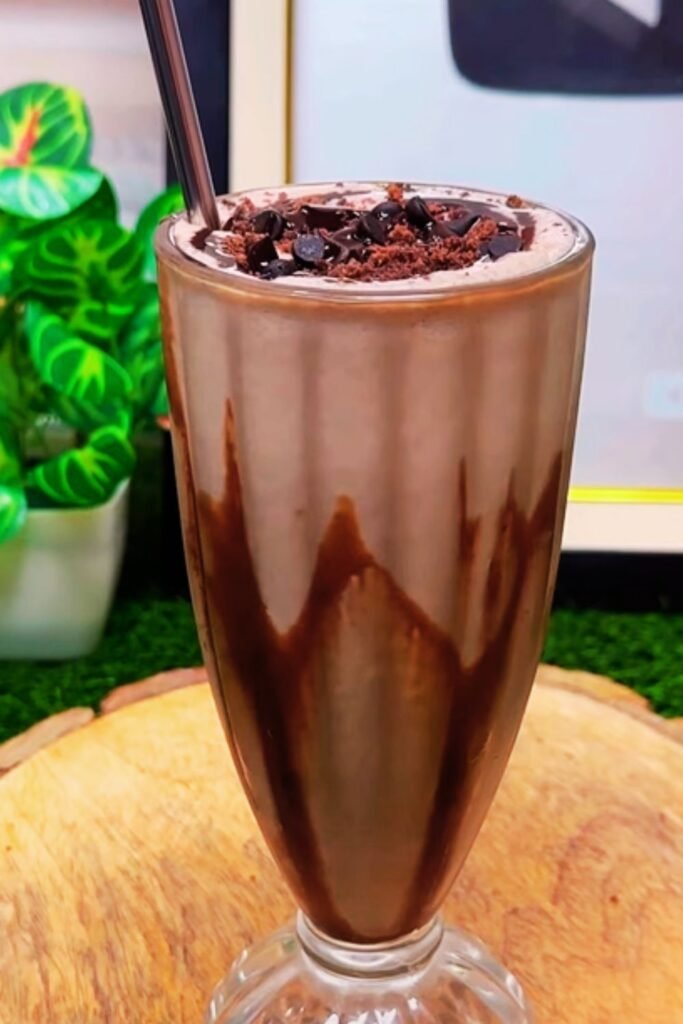
I prefer using tall, clear glasses that showcase the milkshake’s rich color and texture. Mason jars work wonderfully for a rustic presentation, while traditional milkshake glasses provide classic appeal.
Glass Preparation: I chill my glasses in the freezer for 10 minutes before serving to maintain the milkshake’s temperature longer.
Garnish Options
| Garnish Type | Application | Visual Impact | Flavor Contribution |
|---|---|---|---|
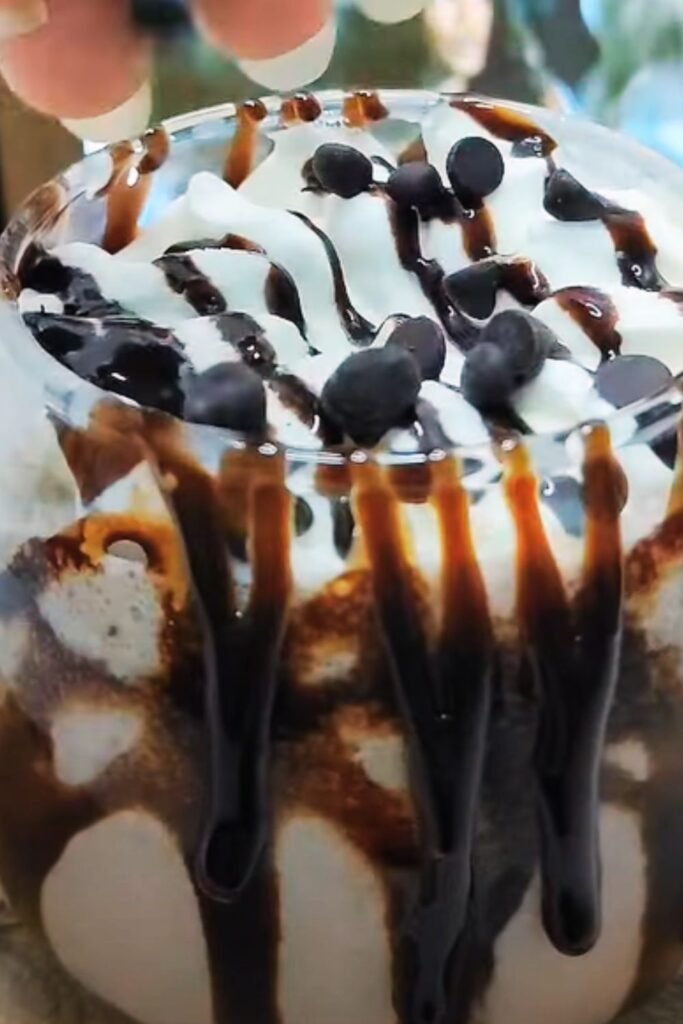
| Whipped Cream | Generous dollop on top | Classic appeal | Creamy contrast |
| Brownie Crumbs | Sprinkled over cream | Textural interest | Reinforces flavor |
| Chocolate Shavings | Delicate curls | Elegant finish | Pure chocolate notes |
| Fresh Berries | Single strawberry or raspberry | Color contrast | Acidic balance |
| Chocolate Drizzle | Spiral pattern | Professional look | Intense chocolate |
Temperature Maintenance
I serve these milkshakes immediately after preparation, but I’ve developed techniques for maintaining quality if brief delays are necessary. Storing the blender pitcher in the freezer for up to 15 minutes preserves texture without freezing solid.
Nutritional Considerations and Dietary Adaptations
Standard Nutritional Profile
| Component | Per Serving | Daily Value % | Notes |
|---|---|---|---|
| Calories | 485 | 24% | Based on 2000 calorie diet |
| Total Fat | 18g | 28% | Primarily from dairy and chocolate |
| Saturated Fat | 11g | 55% | Can be reduced with low-fat alternatives |
| Carbohydrates | 78g | 26% | Natural and added sugars |
| Protein | 9g | 18% | From dairy and eggs in brownies |
| Calcium | 280mg | 28% | Excellent source from dairy |
Healthier Alternatives
I’ve experimented with various substitutions to create lighter versions without sacrificing too much flavor or texture.
Lower Calorie Options:
- Greek yogurt instead of half the ice cream
- Unsweetened almond milk instead of whole milk
- Sugar-free chocolate syrup
- Reduced brownie quantity
Dairy-Free Adaptations:
- Coconut milk ice cream
- Oat milk for liquid base
- Vegan brownies made with applesauce
- Coconut whipped cream
Troubleshooting Common Issues
Texture Problems
Too Thick: I gradually add small amounts of milk while blending until desired consistency is reached. Cold milk works better than room temperature for maintaining proper temperature.
Too Thin: I add more ice cream or place the mixture in the freezer for 5-10 minutes before re-blending briefly.
Lumpy Consistency: This usually indicates insufficient blending or ice cream that was too frozen. I allow ingredients to reach proper temperature and blend longer at higher speeds.
Flavor Imbalances
Not Chocolatey Enough: I add extra chocolate syrup or a tablespoon of unsweetened cocoa powder dissolved in a small amount of warm milk.
Too Sweet: A pinch of salt or a squeeze of fresh lemon juice can balance excessive sweetness without adding conflicting flavors.
Lacks Depth: Vanilla extract or a tiny amount of espresso powder enhances chocolate flavors without adding coffee taste.
Storage and Make-Ahead Strategies
While brownie milkshakes are best enjoyed immediately, I’ve developed methods for partial preparation and short-term storage.
Component Preparation
I often prepare brownies up to two days in advance, storing them covered at room temperature. The slight staleness actually improves their blending properties.
Ice Cream Preparation: I scoop ice cream portions onto a parchment-lined tray and freeze them separately. This pre-portioning speeds up the blending process significantly.
Short-Term Storage
If I need to store prepared milkshakes briefly, I pour them into airtight containers and place them in the freezer for no more than 30 minutes. Before serving, I allow them to soften slightly and give them a quick re-blend.
Perfect Pairings and Serving Suggestions
Complementary Foods
I love serving brownie milkshakes alongside foods that provide textural and flavor contrasts:
Light Accompaniments:
- Fresh fruit salad with mint
- Vanilla wafer cookies
- Lemon shortbread
- Mixed berry compote
Heartier Options:
- Grilled pound cake slices
- Cinnamon sugar churros
- Warm chocolate chip cookies
- Caramel popcorn
Occasion Matching
These milkshakes work beautifully for various occasions, and I adjust presentation and portions accordingly.
Casual Family Dessert: I serve them in mason jars with fun straws and simple whipped cream tops.
Dinner Party Finale: I present them in elegant glasses with sophisticated garnishes and serve alongside petit fours.
Summer Gatherings: I create a milkshake bar with various toppings and let guests customize their drinks.
Seasonal Adaptations
Summer Enhancements
During hot weather, I increase the ice cream ratio slightly and add a handful of ice cubes for extra coldness. I also incorporate seasonal elements like fresh berry swirls or coconut flakes.
Winter Variations
In colder months, I warm the brownies slightly before blending and add warming spices like cinnamon or nutmeg. I might also incorporate seasonal flavors like peppermint or eggnog.
Holiday Versions
For special occasions, I create themed variations using appropriate flavors and decorations. Valentine’s Day versions might include raspberry swirls, while Christmas versions could feature crushed candy canes.
Expert Tips for Professional Results
After making hundreds of these milkshakes, I’ve learned several professional techniques that consistently produce superior results.
Temperature Management: I monitor ingredient temperatures carefully, ensuring ice cream is softened but not melted, and brownies are at room temperature but not warm.
Blending Technique: I use variable speeds, starting low and gradually increasing to prevent ingredient separation and achieve optimal texture.
Quality Ingredients: I invest in high-quality vanilla ice cream and real vanilla extract because these base flavors significantly impact the final product.
Timing: I prepare all garnishes and serving glasses before beginning the blending process to ensure immediate service.
Frequently Asked Questions
Q: Can I use store-bought brownies instead of homemade ones? Yes, you absolutely can use store-bought brownies, though I recommend choosing fudgy varieties over cake-like ones. The texture will be slightly different, but the flavor will still be delicious. I prefer brownies that are dense and moist rather than light and fluffy.
Q: How long can I store leftover milkshake? I don’t recommend storing these milkshakes for more than a few hours because the texture changes significantly. If you must store them, keep them in the freezer for no more than 24 hours and re-blend before serving. The ice cream will separate, but blending usually restores most of the original texture.
Q: What’s the best ice cream flavor to use? While I prefer high-quality vanilla ice cream because it allows the brownie flavor to shine, chocolate ice cream creates an intensely chocolatey result. I’ve also had success with caramel, cookies and cream, and even mint chocolate chip for unique variations.
Q: Can I make this recipe dairy-free? Absolutely! I substitute coconut milk ice cream for regular ice cream and use oat milk or almond milk instead of dairy milk. You’ll also need to use dairy-free brownies. The texture is slightly different but still delicious.
Q: Why is my milkshake too thick to blend properly? This usually happens when the ice cream is too frozen or you’re using too much solid ingredients relative to liquid. Let your ice cream soften for 10-15 minutes before blending, and add milk gradually until you achieve the right consistency.
Q: Can I add alcohol to make an adult version? While I don’t typically include alcohol in my recipes, you could add a tablespoon of chocolate liqueur or bourbon for an adult twist. Add it gradually and taste as you go, as alcohol can thin the mixture considerably.
Q: What’s the secret to getting brownie chunks without making the milkshake lumpy? The key is using the pulse function on your blender rather than continuous blending. I pulse 3-4 times briefly, then check the consistency. This preserves some brownie pieces while ensuring even distribution.
Q: Can I prepare components ahead of time? Yes! I often bake brownies a day ahead and pre-scoop ice cream portions onto a tray in the freezer. This makes assembly much quicker when I’m ready to serve. Just remember to let the ice cream soften slightly before blending.
Q: How do I prevent the milkshake from melting too quickly? I chill my glasses in the freezer beforehand and serve the milkshakes immediately after blending. Using very cold ingredients also helps maintain temperature longer. If you’re serving outdoors, consider using insulated glasses.
Q: What can I do if my milkshake is too sweet? A tiny pinch of salt often balances excessive sweetness beautifully. You can also add a small amount of unsweetened cocoa powder or even a drop of vanilla extract to create more complex flavors that counteract the sweetness.