When I first heard about Oreo lasagna, I thought someone was pulling my leg. How could you possibly turn America’s favorite cookie into a layered dessert that resembles the classic Italian pasta dish? But let me tell you, after making this incredible no-bake dessert dozens of times, I can confidently say it’s one of the most requested treats at every gathering I attend.
This isn’t your grandmother’s lasagna, but it might just become your family’s new favorite dessert tradition. The beauty of Oreo lasagna lies in its simplicity and the way it transforms humble ingredients into something truly spectacular. Each layer tells its own delicious story, from the crunchy Oreo crust to the silky pudding layers that melt in your mouth.
What makes this dessert so special is how it captures the essence of everyone’s beloved chocolate sandwich cookie while presenting it in an entirely new format. I’ve watched kids and adults alike take their first bite with skeptical expressions that quickly transform into pure joy. The combination of textures and flavors creates an experience that’s both familiar and surprisingly sophisticated.
Understanding the Magic Behind Oreo Lasagna
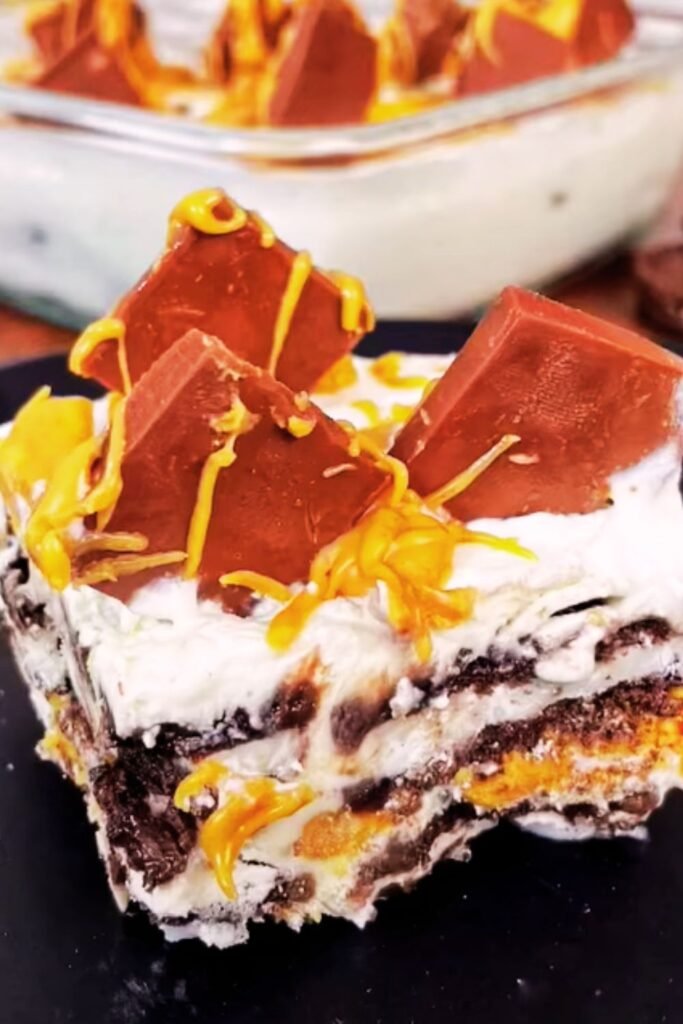
Oreo Lasagna: A layered no-bake dessert that uses crushed Oreo cookies as a base crust, combined with alternating layers of cream cheese mixture, chocolate pudding, and whipped topping, creating a cake-like dessert that resembles traditional lasagna in appearance.
No-Bake Dessert: A type of dessert that requires no oven time, relying instead on refrigeration to set and firm up the layers, making it perfect for hot summer days or when oven space is limited.
Layered Dessert: A dessert construction method where different flavored components are stacked in distinct layers, each contributing unique textures and flavors to create a complex final product.
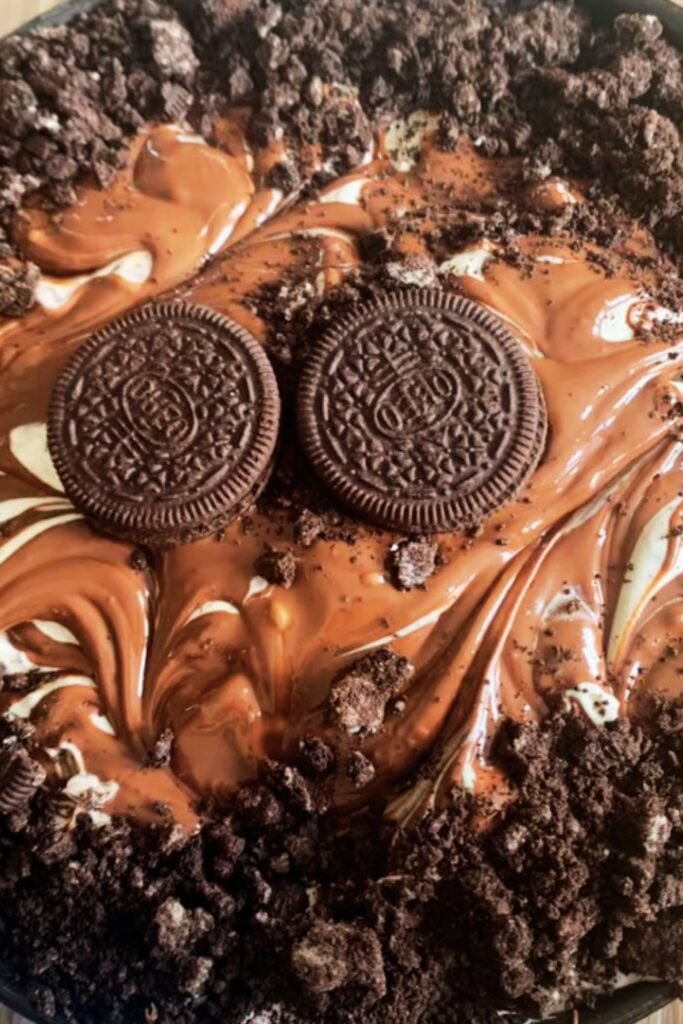
The concept behind Oreo lasagna is brilliant in its simplicity. Instead of pasta sheets, we use crushed Oreo cookies mixed with butter to create our foundation. This chocolate cookie crust provides the perfect contrast to the creamy layers above while maintaining structural integrity that allows for clean slicing.
Each layer serves a specific purpose in the overall composition. The cream cheese layer adds richness and tang that balances the sweetness of the other components. The pudding layer brings that classic chocolate flavor we all associate with Oreos, while the whipped topping adds lightness and visual appeal.
Essential Ingredients Breakdown

| Ingredient | Quantity | Purpose | Substitution Options |
|---|---|---|---|
| Oreo Cookies | 36 cookies (3 sleeves) | Crust base and topping | Chocolate wafers, chocolate graham crackers |
| Butter | 6 tablespoons, melted | Binds crust together | Margarine, coconut oil |
| Cream Cheese | 8 oz, softened | Rich base layer | Mascarpone, Greek yogurt (thicker varieties) |
| Powdered Sugar | 1/4 cup | Sweetens cream cheese layer | Regular sugar (use less), stevia equivalent |
| Cool Whip | 12 oz container | Lightens texture, topping | Homemade whipped cream, whipped coconut cream |
| Instant Chocolate Pudding | 2 packages (3.9 oz each) | Main flavor layer | Vanilla pudding, butterscotch pudding |
| Cold Milk | 3.2 cups | Pudding preparation | Almond milk, oat milk |
The quality of your ingredients directly impacts the final result. I always recommend using name-brand Oreo cookies because their flavor and texture are specifically designed for this type of application. The cream cheese should be at room temperature for easy mixing, and using real butter rather than margarine creates a richer crust.
When selecting your Cool Whip, make sure it’s completely thawed but still cold. I’ve made the mistake of using partially frozen whipped topping, and it creates lumps that never fully incorporate. The instant pudding should be the regular size boxes, not the large family size, as the proportions are calibrated for the standard packaging.
Step-by-Step Preparation Method
Creating the Perfect Crust Foundation
The foundation of any great Oreo lasagna starts with the crust, and I’ve learned through trial and error that the crushing technique makes all the difference. I prefer to place the Oreos in a food processor and pulse them until they reach a consistency similar to coarse breadcrumbs. You want some texture remaining, not a fine powder.
If you don’t have a food processor, placing the cookies in a sealed plastic bag and using a rolling pin works perfectly. I actually prefer this method sometimes because it gives me more control over the final texture. Aim for pieces that range from fine crumbs to small chunks about the size of peas.
Mix the crushed cookies with melted butter until the mixture holds together when pressed. The consistency should be similar to wet sand that clumps when squeezed. Press this mixture firmly into the bottom of a 9×13 inch dish, using the bottom of a measuring cup to ensure even distribution and proper compaction.
Preparing the Cream Cheese Layer
The cream cheese layer requires patience and the right technique. Start with cream cheese that’s been sitting at room temperature for at least an hour. Cold cream cheese will create lumps that are nearly impossible to smooth out completely.
Using an electric mixer, beat the cream cheese until it’s completely smooth and fluffy. This usually takes about 2-3 minutes on medium speed. Gradually add the powdered sugar, continuing to beat until well incorporated. The mixture should be light and airy, not dense or heavy.
In a separate bowl, take 1.5 cups of the Cool Whip and gently fold it into the cream cheese mixture. The key word here is “gently.” Overmixing will deflate the whipped topping and create a dense layer instead of the light, fluffy texture we’re aiming for.
Mastering the Pudding Component
The pudding layer is where many people make critical mistakes that affect the entire dessert. Always use cold milk when preparing instant pudding, and whisk it for exactly two minutes. Less than two minutes and the pudding won’t set properly; more than two minutes and you risk overworking it.
Immediately after whisking, fold in the remaining Cool Whip while the pudding is still soft. This timing is crucial because it allows the whipped topping to incorporate smoothly before the pudding begins to set. Once the pudding starts firming up, adding whipped topping becomes nearly impossible without creating a lumpy texture.
Assembly Techniques for Professional Results
The assembly process requires a systematic approach that ensures each layer maintains its distinct identity while contributing to the overall harmony of the dessert. Start by spreading the cream cheese mixture evenly over the crust using an offset spatula. Take your time with this step, as it creates the foundation for all subsequent layers.
When adding the pudding layer, use a large spoon to dollop the mixture across the surface before gently spreading it. This prevents you from disturbing the cream cheese layer underneath. Work from one end of the pan to the other in smooth, overlapping strokes.
The final whipped topping layer should be applied with the same care. Create gentle swirls or peaks for visual interest, but avoid pressing too hard or you’ll compress the layers beneath. Some people like to pipe the whipped topping using a pastry bag for a more professional appearance.
Chilling and Setting Guidelines
| Chilling Stage | Time Required | Temperature | Key Indicators |
|---|---|---|---|
| Initial Set | 2 hours minimum | 35-38°F | Layers hold shape when touched |
| Overnight Rest | 8-12 hours | 35-38°F | Clean cuts possible, flavors melded |
| Optimal Serving | 12-24 hours | 35-38°F | Perfect texture, easy slicing |
| Maximum Storage | 3-4 days | 35-38°F | Quality maintained, no separation |
The chilling process is perhaps the most critical aspect that many home cooks underestimate. While it might be tempting to serve the lasagna after just a couple of hours, the overnight rest period allows all the flavors to meld together and creates the perfect texture contrast between layers.
During the first few hours, the moisture from the pudding and whipped layers begins to soften the Oreo crust slightly, creating a more cohesive dessert. This is exactly what we want – a crust that maintains structure but isn’t rock-hard against the creamy layers above.
I always make my Oreo lasagna the day before I plan to serve it. This timing ensures optimal flavor development and makes serving much easier. The dessert holds its shape better for clean cuts, and the flavors have had time to create that perfect balance we’re looking for.
Advanced Variations and Flavor Combinations
Over the years, I’ve experimented with numerous variations that have become favorites in their own right. The peanut butter variation involves adding 1/2 cup of creamy peanut butter to the cream cheese layer and using peanut butter Oreos in the crust. This creates an incredible flavor combination that appeals to peanut butter lovers.
For a more sophisticated flavor profile, I sometimes create a mint version using mint Oreos and adding a few drops of peppermint extract to the cream cheese layer. The key is restraint – too much mint extract will overpower the other flavors.
The strawberry variation substitutes strawberry pudding for chocolate and incorporates fresh strawberry pieces between layers. This version is particularly popular during summer months and creates a beautiful pink and brown layered appearance.
Seasonal Adaptations:
- Halloween: Orange-colored pudding with chocolate Oreos
- Christmas: Alternating vanilla and chocolate pudding layers with crushed candy canes
- Valentine’s Day: Strawberry pudding with golden Oreos for color contrast
- Summer: Lemon pudding with regular Oreos for a refreshing twist
Nutritional Considerations and Portion Guidelines
| Serving Size | Calories | Total Fat | Saturated Fat | Sugar | Protein | Fiber |
|---|---|---|---|---|---|---|
| 1 slice (1/12 pan) | 385 | 18g | 12g | 28g | 4g | 2g |
| 1 small slice (1/16 pan) | 289 | 14g | 9g | 21g | 3g | 1.5g |
| 1 large slice (1/8 pan) | 578 | 27g | 18g | 42g | 6g | 3g |
Understanding the nutritional impact helps with portion planning and allows you to make informed decisions about serving sizes. This dessert is definitely an indulgence, but when portioned appropriately, it can fit into most eating plans as an occasional treat.
I typically cut my 9×13 pan into 12 generous servings, which provides a satisfying portion without being overwhelming. For larger gatherings or when serving alongside other desserts, cutting into 16 smaller squares works perfectly.
Serving Suggestions and Presentation Tips
The presentation of Oreo lasagna can elevate it from a simple dessert to the centerpiece of your dessert table. I like to use a sharp, thin knife dipped in warm water between cuts to ensure clean edges. Wipe the knife clean after each cut to prevent dragging ingredients from one slice to another.
For individual servings, consider using clear glass plates that showcase the beautiful layers. A small dollop of additional whipped cream and a few Oreo cookie crumbs on the plate creates an elegant restaurant-style presentation.
Complementary Accompaniments:
- Fresh berries for color contrast and flavor balance
- Chocolate sauce drizzle for extra indulgence
- Chopped nuts for textural interest
- Fresh mint leaves for aromatic appeal
- Vanilla ice cream for temperature contrast
Storage and Make-Ahead Strategies
One of the greatest advantages of Oreo lasagna is its make-ahead friendly nature. The dessert actually improves with time, making it perfect for entertaining when you want to minimize last-minute preparation.
For optimal storage, cover the pan tightly with plastic wrap, ensuring the wrap doesn’t touch the surface of the whipped topping. I often place a layer of parchment paper directly on the surface before adding the plastic wrap to prevent any sticking.
Individual slices can be wrapped and frozen for up to one month. When ready to serve, simply thaw in the refrigerator for several hours. The texture remains remarkably close to fresh, though I notice the crust becomes slightly softer after freezing.
Troubleshooting Common Issues
Problem: Runny pudding layer Solution: Ensure you whisk the pudding for the full two minutes and use cold milk. If the problem persists, refrigerate the pudding for 15 minutes before adding whipped topping.
Problem: Lumpy cream cheese layer Solution: Always use room-temperature cream cheese and beat thoroughly before adding other ingredients. If lumps persist, strain the mixture through a fine-mesh sieve.
Problem: Crust too hard or crumbly Solution: Adjust the butter quantity. Too little butter creates crumbling; too much creates mushiness. The mixture should hold together when pressed but not feel greasy.
Problem: Layers mixing together Solution: Ensure each layer is properly set before adding the next. Don’t overmix when combining components, and use gentle spreading techniques.
Equipment and Tools for Success
| Tool | Purpose | Alternative Options |
|---|---|---|
| 9×13 inch pan | Standard serving size | 8×8 for smaller batches, disposable aluminum pans |
| Food processor | Cookie crushing | Rolling pin and plastic bag, blender |
| Electric mixer | Cream cheese preparation | Hand whisk (more effort required) |
| Offset spatula | Even layer spreading | Regular spatula, large spoon |
| Sharp knife | Clean cutting | Dental floss for cutting layers |
Having the right tools makes the process significantly easier and produces better results. While you can make Oreo lasagna with basic kitchen equipment, a few specialized tools will improve your experience and final product quality.
Q&A Section
Q: Can I make Oreo lasagna without Cool Whip? I absolutely understand wanting to avoid processed ingredients. You can substitute homemade whipped cream, but you’ll need to stabilize it with a bit of gelatin or it will deflate over time. Whip 2 cups heavy cream with 1/4 cup powdered sugar and 1 teaspoon unflavored gelatin (bloomed in water first) until stiff peaks form.
Q: How far in advance can I prepare this dessert? I’ve found that Oreo lasagna tastes best when made 12-24 hours ahead, but it maintains good quality for up to 4 days in the refrigerator. The flavors continue to develop over time, and the texture actually improves as the layers settle together.
Q: Why did my pudding layer turn out runny? This usually happens when the milk wasn’t cold enough or the pudding wasn’t whisked for the full two minutes. Instant pudding needs that full whisking time to activate the thickening agents properly. Always use milk straight from the refrigerator.
Q: Can I use different flavors of Oreos? Absolutely! I’ve had great success with golden Oreos, mint Oreos, peanut butter Oreos, and even the seasonal varieties. Just keep in mind that different flavors will change the overall taste profile, so you might want to adjust your pudding flavor accordingly.
Q: What’s the best way to cut clean slices? I always use a sharp, thin-bladed knife that I dip in warm water between cuts. Wipe the blade clean after each cut to prevent dragging filling from one slice to another. Some people prefer using unflavored dental floss, which works surprisingly well for clean cuts.
Q: Can I freeze Oreo lasagna? Yes, but with some considerations. The texture changes slightly after freezing, with the crust becoming softer and the whipped layers becoming denser. If you do freeze it, wrap individual portions tightly and consume within one month for best quality.
Q: My cream cheese layer has lumps – can I fix it? If you catch it early, you can strain the mixture through a fine-mesh sieve to remove lumps. For future batches, always ensure your cream cheese is at room temperature before mixing, and beat it thoroughly before adding other ingredients.
Q: Is there a lighter version of this recipe? You can reduce calories by using sugar-free pudding, light cream cheese, and sugar-free whipped topping. The texture will be slightly different, but it’s still delicious. You can also use reduced-fat Oreos, though the flavor won’t be quite as rich.
Q: Can I make individual portions instead of one large pan? Definitely! I love making individual servings in clear plastic cups or mason jars. Layer the same components in the same order, just divide everything by the number of servings you want. These individual portions are perfect for parties and portion control.
Q: What should I do if my layers keep mixing together? This usually happens when you’re spreading too aggressively or the previous layer hasn’t set enough. Make sure each layer has had some time to firm up before adding the next one, and use gentle dolloping and spreading motions rather than pressing hard with your spatula.
This incredible dessert has become my go-to choice when I need something that will impress without requiring advanced baking skills. The combination of familiar flavors presented in an unexpected format never fails to delight guests, and the make-ahead nature means I can enjoy the party instead of being stuck in the kitchen. Whether you’re preparing for a family gathering, potluck dinner, or just want to treat yourself to something special, Oreo lasagna delivers satisfaction in every single bite.