When I first discovered the magic of combining Italy’s beloved tiramisu with Belgium’s famous Biscoff cookies, I knew I had stumbled upon something extraordinary. This fusion dessert brings together the creamy, coffee-soaked layers of traditional tiramisu with the warm, caramelized sweetness of Biscoff cookies and spread. The result is a dessert that pays homage to both culinary traditions while creating something entirely new and irresistible.
My journey with this recipe began during a particularly cold winter evening when I was craving something comforting yet elegant. Traditional tiramisu felt too predictable, and I found myself staring at a jar of Biscoff spread in my pantry. The eureka moment came when I realized that the spiced, caramel notes of Biscoff would complement the coffee and mascarpone beautifully, creating a dessert that’s both familiar and surprising.
Understanding the Magic Behind Biscoff Tiramisu
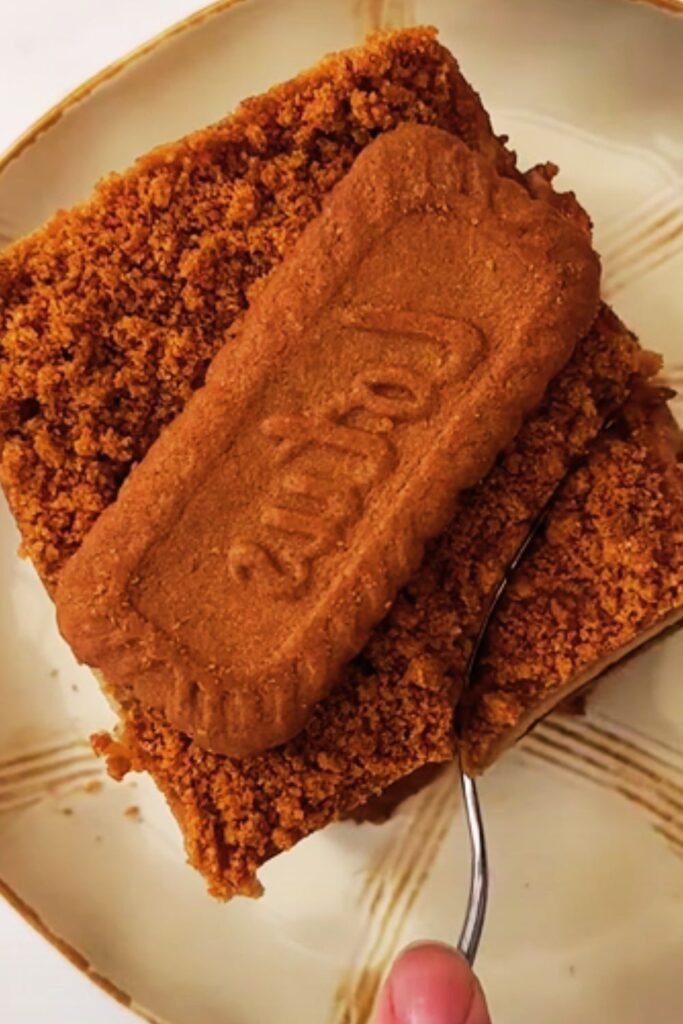
Biscoff cookies, also known as Lotus cookies, originated in Belgium in 1932. These thin, crispy cookies are made with a unique blend of cinnamon and other warming spices that create their distinctive caramelized flavor. When combined with the traditional elements of tiramisu, they add a layer of complexity that transforms the entire dessert experience.
Traditional Tiramisu consists of coffee-soaked ladyfingers layered with a rich mascarpone mixture and dusted with cocoa powder. The name literally means “pick me up” in Italian, referring to the energizing combination of coffee and sugar.
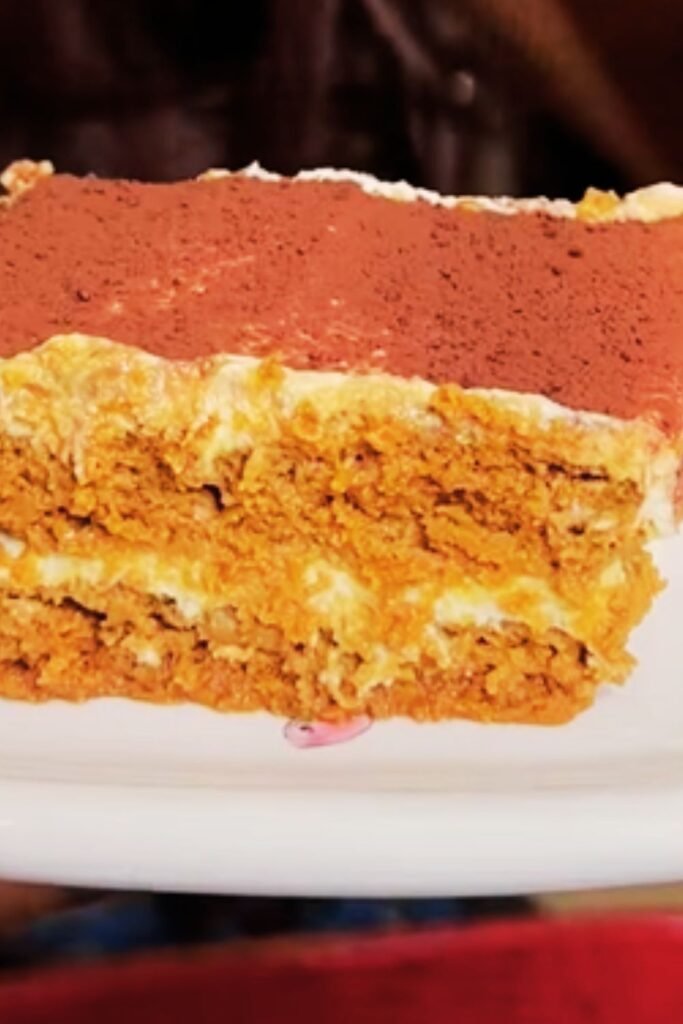
Biscoff Tiramisu marries these two worlds by replacing ladyfingers with Biscoff cookies and incorporating Biscoff spread into the cream mixture. The result is a dessert that maintains the soul of tiramisu while introducing warm, spiced notes that make it perfect for any season.
Essential Ingredients for Perfect Biscoff Tiramisu
Core Components
Biscoff Cookies (200g): The foundation of our dessert. I prefer using the original thin cookies rather than the chunky variety, as they absorb the coffee mixture more evenly and create better layers.
Biscoff Spread (150g): This smooth, creamy spread will be incorporated into our mascarpone mixture. Make sure it’s at room temperature for easy mixing.
Mascarpone Cheese (500g): The heart of any tiramisu. Choose high-quality mascarpone for the best texture and flavor. It should be smooth and creamy, not grainy.
Heavy Cream (300ml): This will be whipped to create lightness in our cream mixture. Use cream with at least 35% fat content for best results.
Strong Coffee (400ml): Freshly brewed and cooled. I recommend using espresso or a dark roast coffee for the most authentic flavor.
Large Eggs (3): We’ll separate these to create a light, airy cream mixture. Make sure they’re fresh and at room temperature.
Granulated Sugar (100g): To sweeten the cream mixture and balance the coffee’s bitterness.
Cocoa Powder (for dusting): Unsweetened cocoa powder for the final touch.
Dark Chocolate (50g): Optional, for additional garnish and flavor depth.
Quality Considerations
| Ingredient | Quality Markers | Storage Tips |
|---|---|---|
| Mascarpone | Smooth texture, no separation, fresh smell | Refrigerate, use within 3-5 days of opening |
| Heavy Cream | High fat content (35%+), not ultra-pasteurized | Keep refrigerated, use before expiration |
| Biscoff Cookies | Crispy texture, aromatic spice scent | Store in airtight container, away from moisture |
| Coffee | Freshly ground, rich aroma | Brew fresh, cool completely before use |
| Eggs | Room temperature, no cracks | Check for freshness, separate carefully |
Step-by-Step Preparation Method
Phase 1: Preparing the Coffee Mixture
I start by brewing a strong cup of coffee using my preferred method. The coffee should be robust enough to cut through the richness of the cream and complement the Biscoff flavors. Once brewed, I let it cool to room temperature. This is crucial because hot coffee will melt our cream layers and ruin the texture.
While the coffee cools, I add a tablespoon of sugar to enhance the coffee’s natural flavors without making it overly sweet. The slight sweetness helps balance the slight bitterness that will permeate through the cookies.
Phase 2: Creating the Biscoff Cream Mixture
This is where the magic happens. I separate my eggs, placing the yolks in a large mixing bowl and the whites in a separate, clean bowl. Room temperature eggs separate more easily and whip better.
To the egg yolks, I add the remaining sugar and whisk vigorously until the mixture becomes pale and slightly thick. This usually takes about 3-4 minutes of continuous whisking. The mixture should fall in ribbons when lifted with the whisk.
Next, I add the mascarpone cheese to the egg yolk mixture. Here’s where technique matters: I add it gradually, whisking constantly to prevent lumps. The mixture should be smooth and creamy.
Now comes the Biscoff integration. I warm the Biscoff spread slightly (10-15 seconds in the microwave) to make it more pliable, then fold it into the mascarpone mixture. The key is to fold, not whisk, to maintain the mixture’s lightness.
Phase 3: Achieving the Perfect Texture
In a separate bowl, I whip the heavy cream to soft peaks. This usually takes 2-3 minutes with an electric mixer. Be careful not to over-whip, as we want it to fold smoothly into our mixture.
I gently fold the whipped cream into the mascarpone-Biscoff mixture using a rubber spatula. The motion should be gentle and from bottom to top, preserving as much air as possible.
In the bowl with egg whites, I whip them to soft peaks. This adds incredible lightness to our final cream mixture. I fold these in last, again using gentle motions to maintain the airy texture.
Phase 4: Assembly Process
I use a rectangular dish, approximately 9×13 inches, for assembly. The process requires patience and attention to detail.
First, I quickly dip each Biscoff cookie into the cooled coffee mixture. The dipping should be brief – just long enough to moisten the cookie without making it soggy. I’ve learned that about 1-2 seconds per side is perfect.
I arrange the coffee-soaked cookies in a single layer at the bottom of my dish. They should fit snugly without overlapping.
Next, I spread half of the Biscoff cream mixture over the cookie layer. I use an offset spatula to ensure even distribution and smooth the surface.
I repeat the process: another layer of coffee-dipped cookies, followed by the remaining cream mixture. The top layer should be smooth and even.
Phase 5: The Crucial Chilling Period
This is perhaps the most important step that many people underestimate. I cover the assembled tiramisu with plastic wrap, ensuring the wrap doesn’t touch the surface, and refrigerate for at least 6 hours. However, I’ve found that overnight chilling (12-24 hours) produces the best results.
During this time, the cookies continue to absorb moisture from the cream, the flavors meld together, and the texture becomes perfectly creamy yet structured.
Nutritional Profile and Serving Information
Understanding the nutritional content helps with portion planning and dietary considerations:
| Nutrient | Per Serving (12 servings) | Daily Value % |
|---|---|---|
| Calories | 285 | 14% |
| Total Fat | 18g | 23% |
| Saturated Fat | 12g | 60% |
| Cholesterol | 95mg | 32% |
| Sodium | 145mg | 6% |
| Total Carbs | 28g | 9% |
| Sugars | 22g | – |
| Protein | 6g | 12% |
| Calcium | 85mg | 8% |
| Iron | 1.2mg | 7% |
Portion Guidelines
I typically cut this dessert into 12 generous servings, though it can easily serve 16 if you prefer smaller portions. Each serving provides a rich, satisfying experience that doesn’t require large portions to feel indulgent.
The caloric density makes this an ideal dessert for special occasions rather than everyday consumption. However, the protein content from eggs and mascarpone provides some nutritional value beyond just the indulgence.
Mastering the Perfect Finish
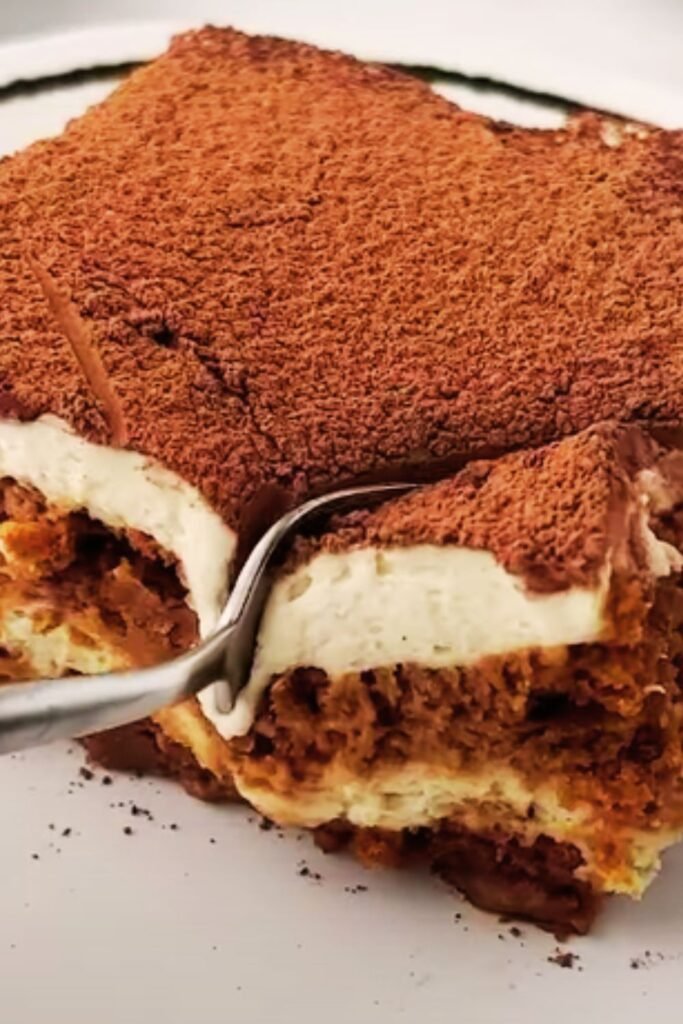
The final presentation can make or break the visual appeal of your Biscoff tiramisu. Just before serving, I dust the surface with unsweetened cocoa powder using a fine-mesh sieve. This creates an elegant, professional appearance and adds a subtle chocolate note that complements both the coffee and Biscoff flavors.
For special occasions, I like to add some texture and visual interest. I crush a few extra Biscoff cookies and sprinkle them around the edges of each serving. Sometimes, I’ll add thin shavings of dark chocolate using a vegetable peeler.
The key to clean, beautiful slices is using a sharp, thin knife that’s been dipped in warm water and wiped clean between cuts. This prevents the creamy layers from sticking to the blade and creates those Instagram-worthy cross-sections that show off all the beautiful layers.
Troubleshooting Common Issues
Problem: Soggy Bottom Layer
Solution: This usually happens when cookies are over-soaked in coffee. Remember, Biscoff cookies are thinner than traditional ladyfingers and absorb liquid faster. Quick dips are essential.
Problem: Grainy Cream Mixture
Solution: This typically occurs when mascarpone is too cold or when ingredients are added too quickly. Ensure mascarpone is at room temperature and add it gradually while whisking constantly.
Problem: Separated Cream Layer
Solution: Over-whipping cream or adding warm ingredients can cause separation. Always use cold cream and fold ingredients gently.
Problem: Weak Coffee Flavor
Solution: Use stronger coffee or add an extra tablespoon of instant espresso powder to intensify the coffee notes.
Seasonal Variations and Adaptations
Winter Warming Spices
During colder months, I like to add a pinch of ground cinnamon or nutmeg to the cream mixture. These spices complement the Biscoff flavors and create an even more warming dessert experience.
Summer Lightness
For summer gatherings, I sometimes reduce the Biscoff spread by 25% and add a tablespoon of lemon zest to brighten the flavors. This creates a lighter version that’s still indulgent but not overwhelmingly rich.
Holiday Presentations
During the holidays, I incorporate seasonal elements like a light dusting of edible gold dust or arrange the crushed Biscoff cookies in decorative patterns. These small touches transform the dessert into a centerpiece-worthy creation.
Storage and Make-Ahead Tips
One of the greatest advantages of Biscoff tiramisu is its make-ahead friendly nature. In fact, I often prepare it 1-2 days before serving, as the extended chilling time only improves the flavor and texture.
Refrigerator Storage: The assembled tiramisu keeps beautifully in the refrigerator for up to 4 days. Cover tightly with plastic wrap or store in an airtight container to prevent absorption of other flavors.
Freezing Guidelines: While not ideal, tiramisu can be frozen for up to 1 month. Wrap individual portions in plastic wrap and place in freezer-safe containers. Thaw overnight in the refrigerator before serving.
Component Preparation: The cream mixture can be prepared up to 1 day ahead and stored separately. The coffee mixture can be made several days in advance and stored in the refrigerator.
Serving Suggestions and Pairings
Beverage Pairings
Coffee Companions: A strong espresso or cappuccino creates a beautiful echo of the dessert’s coffee notes. I particularly enjoy serving it with a cortado, which has the perfect balance of coffee and milk.
Tea Options: Earl Grey or English Breakfast tea provides a sophisticated contrast to the dessert’s richness. The bergamot in Earl Grey particularly complements the spiced notes of the Biscoff.
Non-Caffeinated Options: For evening service, I recommend chamomile tea or a rich hot chocolate. The warmth of these beverages contrasts beautifully with the cool, creamy dessert.
Garnish Ideas
Beyond the traditional cocoa dusting, consider these elegant garnish options:
- Fresh berries (strawberries or raspberries) for color and acidity
- Toasted chopped hazelnuts for textural contrast
- A drizzle of caramel sauce that echoes the Biscoff flavors
- Edible flowers for special occasions
- A small piece of Biscoff cookie as a decorative element
Questions and Answers
Q: Can I substitute regular cookies for Biscoff cookies? A: While you can substitute other cookies, the unique spiced caramel flavor of Biscoff is integral to this recipe’s character. Gingersnaps or speculoos cookies are the closest alternatives, but the result will be noticeably different.
Q: How long does Biscoff tiramisu need to set before serving? A: Minimum 6 hours, but I strongly recommend overnight (12-24 hours) for the best texture and flavor development. The longer setting time allows the cookies to properly soften and the flavors to meld.
Q: Can I make this dessert without raw eggs? A: Yes, you can pasteurize the eggs by heating them gently while whisking, or use pasteurized eggs from the store. Alternatively, you can omit the eggs and use additional whipped cream, though the texture will be slightly different.
Q: What’s the best way to prevent the cream layers from separating? A: Ensure all ingredients are at proper temperatures, fold gently rather than whisking vigorously, and don’t over-whip the cream components. Room temperature mascarpone is crucial for smooth mixing.
Q: Can I reduce the sugar content in this recipe? A: You can reduce the sugar by up to 25% without significantly affecting the texture, though the flavor balance will change. The sugar also helps stabilize the cream mixture, so don’t eliminate it entirely.
Q: How do I know if my mascarpone has gone bad? A: Fresh mascarpone should be smooth, white, and have a mild, slightly sweet smell. If it’s grainy, separated, or has any sour odor, it should be discarded.
Q: Can I make individual portions instead of one large dish? A: Absolutely! Individual glasses or ramekins work beautifully and make for elegant presentation. The assembly process is the same, just scaled down for each serving.
Q: What’s the difference between using smooth and crunchy Biscoff spread? A: Smooth spread integrates more easily into the cream mixture, creating a uniform texture. Crunchy spread adds textural interest but can be more challenging to distribute evenly.
Q: How can I intensify the coffee flavor without making it bitter? A: Add a tablespoon of instant espresso powder to your brewed coffee, or use a coffee liqueur in place of some of the liquid coffee. Both methods deepen the coffee flavor without adding bitterness.
Q: Can I prepare the components separately and assemble later? A: Yes, the cream mixture can be prepared up to 24 hours ahead and stored covered in the refrigerator. The coffee mixture can be made several days in advance. However, once assembled, the dessert should be served within 4 days.
This Biscoff tiramisu represents the beautiful marriage of Italian tradition and Belgian innovation. Every spoonful delivers layers of flavor and texture that evolve as you eat, from the initial coffee hit to the creamy mascarpone middle, finishing with those distinctive warm spices that make Biscoff so beloved. Whether you’re serving it at a dinner party or treating yourself to a special dessert, this recipe never fails to impress and satisfy.
The beauty of this dessert lies not just in its taste, but in its ability to bring people together. I’ve served it at countless gatherings, and it never fails to spark conversations and create lasting memories. The combination of familiar comfort and exotic sophistication makes it approachable yet special, perfect for both intimate dinners and grand celebrations.