I’ve been perfecting this loaded mashed potato balls recipe for years, and I can honestly say it’s become one of my most requested dishes at family gatherings. There’s something magical about transforming leftover mashed potatoes into crispy, golden spheres packed with all your favorite loaded potato toppings. These aren’t just ordinary potato balls – they’re a complete flavor experience that combines the comfort of mashed potatoes with the excitement of your favorite loaded potato skins.
When I first stumbled upon this recipe idea, I was looking for creative ways to use up leftover mashed potatoes from Thanksgiving dinner. What started as a simple experiment has evolved into a go-to appetizer that never fails to impress guests. The beauty of loaded mashed potato balls lies in their versatility – you can customize them with virtually any combination of ingredients that would typically grace a loaded baked potato.
What Makes Loaded Mashed Potato Balls Special
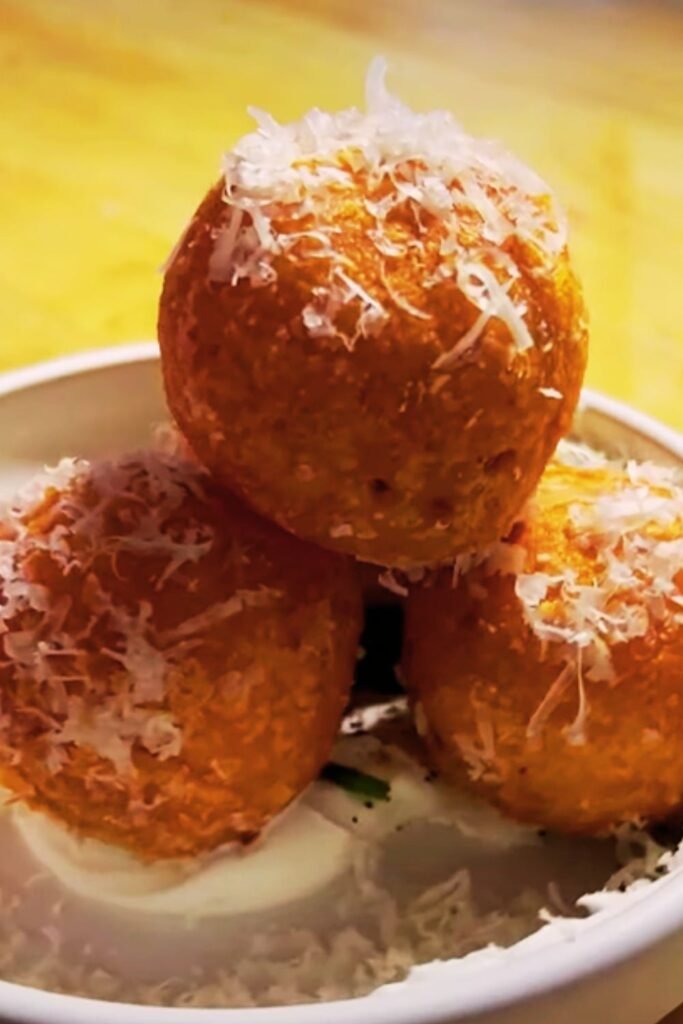
Loaded Mashed Potato Balls are essentially bite-sized versions of loaded baked potatoes, but with a twist. Instead of using a whole potato as the base, I use seasoned mashed potatoes formed into balls, stuffed with delicious fillings, coated in breadcrumbs, and either baked or fried until golden and crispy.
Comfort Food Appeal: These little spheres of joy tap into our deepest comfort food cravings while offering a sophisticated presentation that works equally well for casual family dinners or elegant dinner parties.
Texture Contrast: The magic happens in the contrast between the crispy, golden exterior and the creamy, flavorful interior. Each bite delivers multiple textures and flavors that keep you coming back for more.
Versatility Factor: I love how adaptable this recipe is. You can make them as simple or as elaborate as you want, depending on your mood and the ingredients you have on hand.
Essential Ingredients Breakdown
Creating the perfect loaded mashed potato balls requires understanding each component’s role in the final dish. Here’s my detailed breakdown of what you’ll need and why each ingredient matters.
Base Ingredients
| Ingredient | Quantity | Purpose | Substitution Options |
|---|---|---|---|
| Mashed Potatoes | 4 cups (cold) | Foundation structure | Use any variety, but russets work best |
| Large Eggs | 2 | Binding agent | Flax eggs for vegan option |
| All-Purpose Flour | 1/2 cup | Structural support | Gluten-free flour blend |
| Panko Breadcrumbs | 2 cups | Crispy coating | Regular breadcrumbs or crushed cornflakes |
Loaded Filling Components
| Ingredient | Quantity | Flavor Profile | Notes |
|---|---|---|---|
| Sharp Cheddar Cheese | 1 1/2 cups (shredded) | Rich, tangy base | Use block cheese, shred yourself |
| Crispy Bacon | 8 strips (chopped) | Smoky, salty crunch | Turkey bacon or plant-based alternatives |
| Green Onions | 4 stalks (diced) | Fresh, mild onion flavor | Chives work as substitute |
| Sour Cream | 1/2 cup | Creamy, tangy element | Greek yogurt for healthier option |
Seasoning Blend
I’ve developed this specific seasoning combination over time, and it really makes the difference between good and extraordinary potato balls.
Primary Seasonings:
- Garlic powder (2 teaspoons)
- Onion powder (1 teaspoon)
- Paprika (1 teaspoon)
- Black pepper (1/2 teaspoon)
- Salt (to taste)
Optional Flavor Enhancers:
- Dried ranch seasoning (1 tablespoon)
- Smoked paprika (for extra depth)
- Cayenne pepper (for heat lovers)
Step-by-Step Preparation Method
My approach to making loaded mashed potato balls focuses on proper technique and timing. I’ve learned through trial and error that certain steps are crucial for achieving the perfect texture and preventing the balls from falling apart during cooking.
Phase 1: Preparing the Base Mixture
First, I ensure my mashed potatoes are completely cold – this is absolutely critical. Warm potatoes will make the mixture too soft to handle properly. I typically make my mashed potatoes the day before or use leftovers that have been refrigerated overnight.
In a large mixing bowl, I combine the cold mashed potatoes with the eggs and flour. The key here is gentle folding rather than aggressive mixing. I use a large spoon or spatula to fold the ingredients together until just combined. Overmixing can make the potatoes gluey and difficult to work with.
Next, I fold in about three-quarters of my loaded ingredients – the cheese, bacon, and green onions. I reserve some for garnishing the finished balls. The sour cream gets mixed in at this stage as well, adding moisture and tanginess to the mixture.
Phase 2: Seasoning and Testing
This is where my experience really shows. I always make a small test ball first, cooking it completely to taste for seasoning. This step has saved me countless times from underseasoned or overseasoned batches. I adjust the salt, pepper, and other seasonings based on this test.
Phase 3: Forming the Balls
Using slightly damp hands (this prevents sticking), I scoop about 2 tablespoons of the mixture and roll it into a ball roughly the size of a golf ball. I find that keeping my hands damp throughout this process is essential for smooth, round balls.
I place each formed ball on a parchment-lined baking sheet and refrigerate them for at least 30 minutes. This chilling step is crucial – it helps the balls hold their shape during cooking and prevents them from falling apart.
Phase 4: Coating Process
I set up a standard breading station with three shallow dishes:
- Flour (seasoned with salt and pepper)
- Beaten eggs (with a splash of milk)
- Panko breadcrumbs (mixed with additional seasonings)
Each ball gets rolled first in flour, then dipped in egg, and finally coated thoroughly in seasoned panko. I gently press the breadcrumbs to ensure they adhere well.
Cooking Methods Comparison
I’ve experimented with multiple cooking methods for these potato balls, and each has its advantages. Here’s my detailed comparison to help you choose the best method for your needs.
Baking Method (My Preferred Choice)
Temperature: 425°F (220°C)
Cooking Time: 20-25 minutes
Advantages: Healthier, less messy, more hands-off
Technique: I place the coated balls on a parchment-lined baking sheet, spray lightly with cooking oil, and bake until golden brown, turning once halfway through.
Deep Frying Method
Oil Temperature: 350°F (175°C)
Cooking Time: 3-4 minutes per batch
Advantages: Extra crispy exterior, traditional taste
Technique: I fry in small batches to avoid overcrowding, which can lower oil temperature and result in soggy balls.
Air Fryer Method
Temperature: 380°F (193°C)
Cooking Time: 12-15 minutes
Advantages: Crispy results with less oil, faster than baking
Technique: I cook in single layers, shaking the basket every 5 minutes for even browning.
Pan Frying Method
Heat Level: Medium-high
Cooking Time: 8-10 minutes total
Advantages: Good control over browning, uses less oil than deep frying
Technique: I turn the balls every 2-3 minutes to ensure even browning on all sides.
| Cooking Method | Crispiness Level | Health Factor | Convenience | Time Required |
|---|---|---|---|---|
| Baking | Good (8/10) | Excellent | High | 25 minutes |
| Deep Frying | Excellent (10/10) | Fair | Medium | 15 minutes |
| Air Fryer | Very Good (9/10) | Very Good | High | 15 minutes |
| Pan Frying | Good (8/10) | Good | Medium | 12 minutes |
Creative Variations and Flavor Combinations
Over the years, I’ve developed numerous variations of this basic recipe. Each brings something unique to the table while maintaining the essential appeal of the original loaded potato ball concept.
International Fusion Variations
Mediterranean Style: I replace the bacon with sun-dried tomatoes, use feta cheese instead of cheddar, and add fresh herbs like oregano and basil. A touch of olive oil in the mixture adds authentic Mediterranean flavor.
Mexican Inspired: Pepper jack cheese, chorizo, jalapeños, and cilantro create a spicy, bold variation. I often serve these with avocado crema or salsa verde.
Italian Influence: Parmesan cheese, prosciutto, and fresh herbs transform these into elegant appetizers perfect for dinner parties.
Dietary Modification Options
Vegetarian Version: I substitute the bacon with crispy fried mushrooms or caramelized onions. Smoked paprika adds depth that compensates for the missing bacon flavor.
Vegan Adaptation: Using cashew-based cheese, nutritional yeast, and coconut bacon creates surprisingly satisfying vegan loaded potato balls.
Gluten-Free Option: Almond flour or gluten-free breadcrumbs work perfectly as coating alternatives without compromising texture.
Keto-Friendly Version: I replace regular potatoes with mashed cauliflower and use pork rinds as the coating for a low-carb alternative.

Serving Suggestions and Presentation Ideas
The way you present loaded mashed potato balls can elevate them from simple comfort food to restaurant-quality appetizers. I’ve learned several presentation tricks that never fail to impress.
Sauce Pairings
Classic Combinations:
- Ranch dressing (the traditional choice)
- Sour cream with chive garnish
- Spicy sriracha mayo
- Honey mustard for sweetness contrast
Gourmet Options:
- Chipotle aioli for smoky heat
- Herb-infused olive oil for drizzling
- Balsamic reduction for elegant occasions
- Garlic parmesan sauce for Italian flair
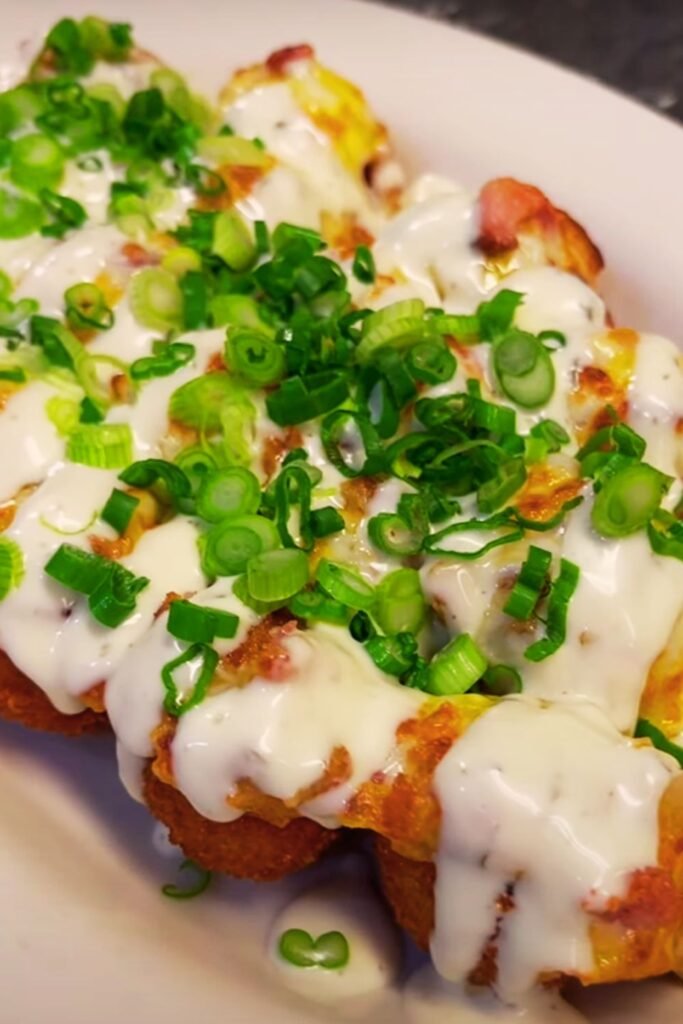
Plating Techniques
For casual serving, I arrange the balls on a rustic wooden board with small bowls of various dipping sauces. For more formal occasions, I plate them individually on small appetizer plates with a drizzle of sauce and microgreen garnish.
Temperature Considerations: These balls are best served hot, but they hold well in a warm oven (200°F) for up to 30 minutes without losing their crispy exterior.
Nutritional Information and Health Considerations
Understanding the nutritional profile of loaded mashed potato balls helps you make informed decisions about serving sizes and frequency of enjoyment.
Per Serving Breakdown (Based on 6 balls per serving)
| Nutrient | Amount | % Daily Value |
|---|---|---|
| Calories | 285 | 14% |
| Total Fat | 14g | 18% |
| Saturated Fat | 6g | 30% |
| Cholesterol | 65mg | 22% |
| Sodium | 520mg | 23% |
| Total Carbohydrates | 32g | 12% |
| Dietary Fiber | 3g | 11% |
| Protein | 12g | 24% |
Health Benefits
Despite being indulgent comfort food, these potato balls do offer some nutritional benefits. Potatoes provide vitamin C, potassium, and fiber. The cheese contributes calcium and protein, while the eggs add high-quality protein and essential amino acids.
Portion Control Tips: I recommend serving 4-6 balls as an appetizer portion, or 6-8 balls as a main course when paired with a fresh salad.
Storage and Reheating Guidelines
Proper storage techniques ensure your loaded mashed potato balls maintain their quality and safety for future enjoyment.
Short-Term Storage
Refrigerator Storage: Cooked balls can be stored in the refrigerator for up to 3 days in an airtight container. I place parchment paper between layers to prevent sticking.
Make-Ahead Strategy: You can form and coat the balls up to 24 hours before cooking. Store them covered in the refrigerator, then cook directly from cold.
Long-Term Storage
Freezing Instructions: These balls freeze beautifully. I freeze them on a baking sheet first, then transfer to freezer bags once solid. They keep for up to 3 months.
Freezing Tips:
- Label with date and contents
- Freeze both cooked and uncooked versions
- Don’t thaw before reheating cooked ones
Reheating Methods
| Method | Temperature | Time | Results |
|---|---|---|---|
| Oven | 350°F | 8-10 minutes | Best texture retention |
| Air Fryer | 350°F | 5-6 minutes | Crispiest results |
| Microwave | Medium power | 1-2 minutes | Quick but softer |
| Stovetop | Medium heat | 3-4 minutes per side | Good control |
Troubleshooting Common Issues
Through years of making these potato balls, I’ve encountered and solved various problems that home cooks commonly face.
Problem: Balls Fall Apart During Cooking
Causes and Solutions:
- Too warm mixture: Always use completely cold mashed potatoes
- Insufficient binding: Add an extra egg or more flour
- Overmixing: Fold ingredients gently to maintain structure
- Skipping chill time: Always refrigerate formed balls before cooking
Problem: Soggy or Soft Exterior
Causes and Solutions:
- Oil temperature too low: Maintain proper frying temperature
- Overcrowding: Cook in smaller batches
- Insufficient coating: Ensure complete breadcrumb coverage
- Not draining properly: Use paper towels to absorb excess oil
Problem: Bland Flavor
Causes and Solutions:
- Under-seasoning: Always taste-test a sample ball
- Cold serving: Serve hot for maximum flavor impact
- Low-quality ingredients: Use sharp cheese and crispy bacon
- Missing acid component: Sour cream or lemon juice brightens flavors
Questions & Answers
Q: Can I make loaded mashed potato balls with instant mashed potatoes?
While fresh mashed potatoes work best, you can use instant mashed potatoes in a pinch. Make them slightly thicker than the package directions suggest, and let them cool completely before proceeding. The texture won’t be quite as good, but they’ll still be delicious.
Q: How do I prevent the cheese from leaking out during cooking?
The key is using the right amount of cheese and ensuring it’s evenly distributed rather than concentrated in one spot. I also find that using block cheese that I shred myself holds better than pre-shredded cheese, which has anti-caking agents that can affect melting.
Q: Can I prepare these ahead for a party?
Absolutely! You can form and coat the balls up to 24 hours in advance and store them covered in the refrigerator. You can also freeze them completely assembled for up to 3 months. Cook them straight from frozen, adding a few extra minutes to the cooking time.
Q: What’s the best way to ensure even cooking?
Size consistency is crucial. I use a small ice cream scoop or measuring spoon to ensure all balls are roughly the same size. Also, don’t overcrowd your cooking surface – whether baking, frying, or air frying, give each ball space for hot air circulation.
Q: How do I know when they’re fully cooked?
The exterior should be golden brown and crispy. For baked versions, they should feel firm when gently pressed. The internal temperature should reach 165°F if you want to be precise, but visually, they’re done when the coating is golden and the balls hold their shape well.
Q: Can I make mini versions for cocktail parties?
Yes! I often make smaller versions using about 1 tablespoon of mixture per ball. Reduce the cooking time by about 25-30% and watch them carefully to prevent overcooking. These mini versions are perfect for elegant appetizer spreads.
Q: What should I do if my mixture is too wet to form balls?
Add flour gradually, one tablespoon at a time, until the mixture holds together. You can also refrigerate the mixture for an additional 30 minutes to firm it up. Sometimes adding a bit more mashed potato (if you have extra) can help absorb excess moisture.
Q: Are there any ingredients I should avoid adding to the mixture?
Avoid ingredients with high water content like fresh tomatoes or raw onions, as they can make the mixture too wet. Also, be careful with salty ingredients like olives or pickles – they can make the final product too salty when combined with cheese and bacon.
This loaded mashed potato balls recipe has become a cornerstone of my comfort food repertoire, and I’m confident it will become a favorite in your kitchen too. The combination of crispy exterior, creamy interior, and bold flavors creates an irresistible treat that works for any occasion. Whether you’re looking to transform leftovers or create something special from scratch, these loaded potato balls deliver satisfaction in every bite.