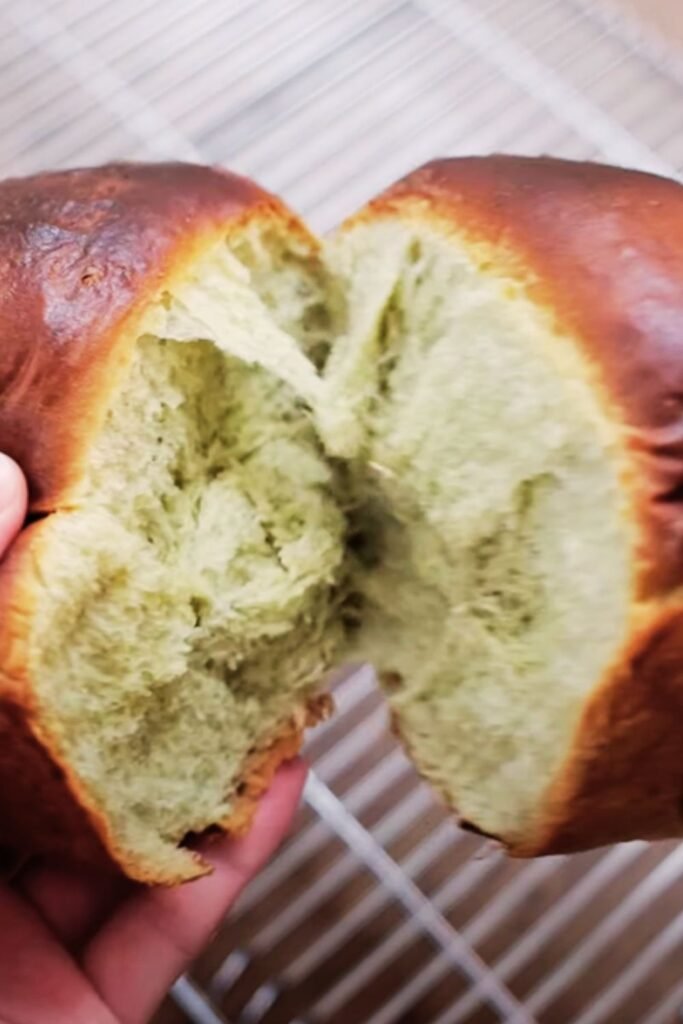
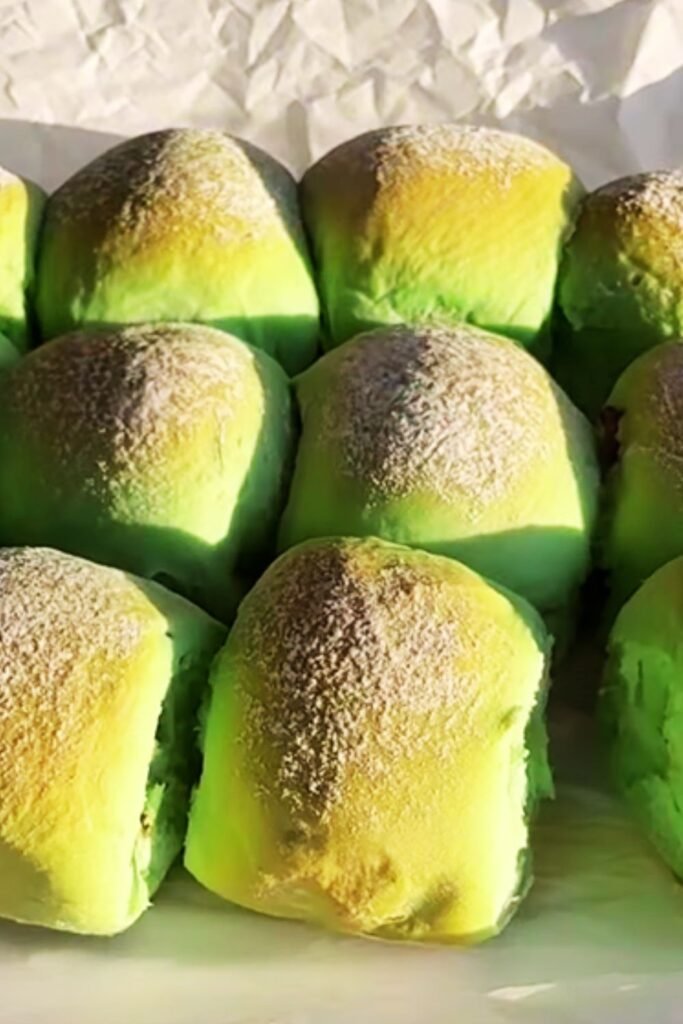
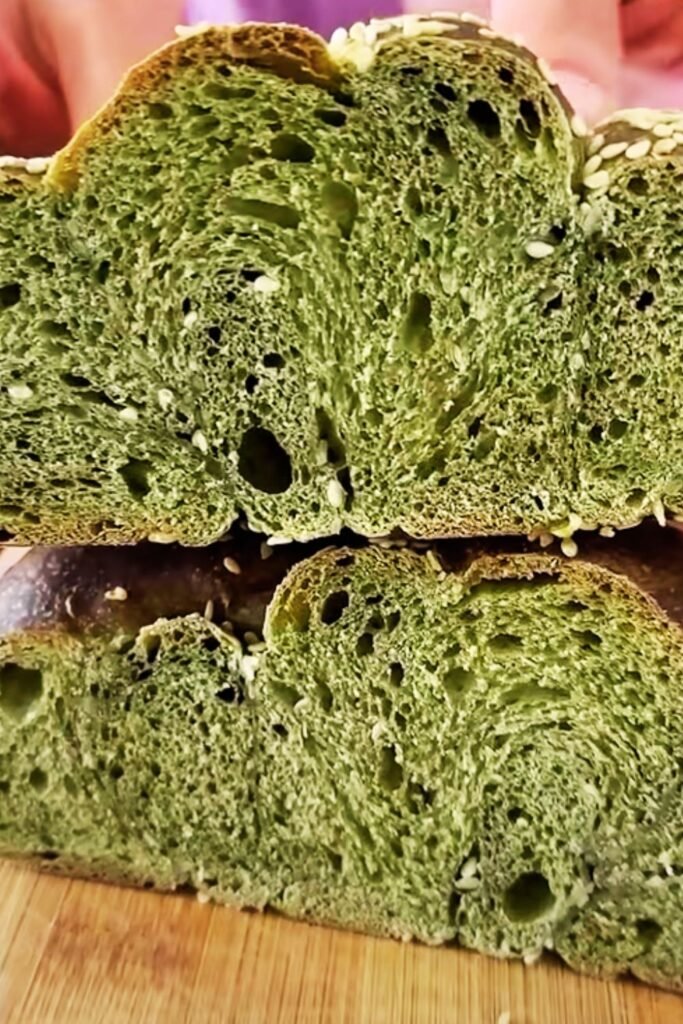
There’s something absolutely magical about the earthy, slightly bitter taste of matcha combined with the comforting warmth of freshly baked bread. I’ve been experimenting with matcha bread recipes for years, and I can confidently say that once you master this technique, you’ll never want to go back to plain bread again.
Matcha bread isn’t just a trendy Instagram-worthy treat – it’s a genuinely delicious fusion of Japanese tea culture and Western baking traditions. The vibrant green color alone is enough to make anyone stop and stare, but the complex flavor profile is what keeps people coming back for more.
Understanding Matcha: The Heart of Your Bread
Before I dive into the actual bread-making process, let me explain what makes matcha so special and why choosing the right type matters enormously for your final product.
Ceremonial Grade Matcha: This is the highest quality matcha available, traditionally used in Japanese tea ceremonies. It has the most delicate flavor and vibrant color, but it’s also the most expensive option.
Culinary Grade Matcha: This is what I recommend for baking. It’s specifically designed for cooking and baking applications, offering excellent flavor and color while being more affordable than ceremonial grade.
Commercial Grade Matcha: The most budget-friendly option, but it tends to have a more bitter taste and less vibrant color. I only recommend this if you’re experimenting or baking large quantities.
The key difference lies in the processing and the parts of the tea plant used. Higher grades use younger leaves and more careful processing, resulting in better flavor and color retention during baking.
Essential Ingredients and Their Roles
Creating perfect matcha bread requires understanding how each ingredient contributes to the final product. Here’s my detailed breakdown:
| Ingredient | Amount (Standard Loaf) | Purpose | Quality Tips |
|---|---|---|---|
| Bread Flour | 500g | Provides structure and chewiness | Choose high-protein flour (12-14%) |
| Matcha Powder | 15-20g | Flavor and color | Sift before using to prevent clumps |
| Sugar | 50g | Feeds yeast, adds sweetness | Granulated white sugar works best |
| Salt | 8g | Enhances flavor, controls yeast | Fine sea salt preferred |
| Active Dry Yeast | 7g | Leavening agent | Check expiration date |
| Warm Milk | 300ml | Moisture and richness | 105-110°F for yeast activation |
| Butter | 40g | Texture and flavor | Room temperature, unsalted |
| Egg | 1 large | Binding and richness | Room temperature |
| Honey | 2 tablespoons | Subtle sweetness, moisture retention | Optional but recommended |
My Step-by-Step Matcha Bread Method
After countless trials and some spectacular failures, I’ve developed this foolproof method that consistently produces beautiful, flavorful matcha bread.
Phase 1: Preparing Your Matcha Base
The secret to evenly distributed matcha flavor starts with proper preparation. I always begin by sifting my matcha powder through a fine-mesh strainer at least twice. This prevents those frustrating green clumps that can ruin the texture of your bread.
Next, I create what I call a “matcha paste” by mixing the sifted matcha powder with just enough warm milk (about 3 tablespoons) to create a smooth, lump-free mixture. This technique ensures the matcha distributes evenly throughout the dough.
Phase 2: Activating the Yeast
In a small bowl, I combine the warm milk with a pinch of sugar and sprinkle the yeast over the surface. The milk temperature is crucial here – too hot and you’ll kill the yeast, too cold and it won’t activate properly. I use a thermometer to ensure it’s between 105-110°F.
After about 5-10 minutes, you should see the mixture become foamy and bubbly. If this doesn’t happen, your yeast might be dead, and you’ll need to start over with fresh yeast.
Phase 3: Building the Dough

In a large mixing bowl, I combine the bread flour and salt, making sure to keep them on opposite sides of the bowl initially. Salt can inhibit yeast if they come into direct contact too early.
I create a well in the center of the flour mixture and add the activated yeast mixture, the matcha paste, beaten egg, softened butter, and honey. Using a wooden spoon, I begin mixing from the center outward, gradually incorporating the flour.
Once the mixture becomes too thick to stir, I switch to using my hands. The dough will be sticky at first – resist the urge to add more flour immediately. Proper bread dough should be slightly tacky.
Phase 4: Kneading to Perfection
This is where the magic happens. I turn the dough out onto a lightly floured surface and begin kneading. My technique involves pushing the dough away from me with the heel of my hand, then folding it back over itself and rotating it a quarter turn.
The kneading process typically takes 8-10 minutes by hand, or 5-6 minutes with a stand mixer using the dough hook. You’ll know it’s ready when the dough becomes smooth, elastic, and springs back when poked gently.
During kneading, the matcha will distribute more evenly, and you’ll start to see the beautiful green color develop throughout the dough.
Phase 5: First Rise
I place the kneaded dough in a lightly oiled bowl, turning it to coat all surfaces. Cover with a damp kitchen towel or plastic wrap and let it rise in a warm, draft-free area.
The first rise typically takes 60-90 minutes, depending on the temperature of your kitchen. The dough should roughly double in size. I like to use the “poke test” – gently poke the dough with your finger. If the indentation remains, it’s ready.
Phase 6: Shaping and Second Rise
After the first rise, I gently punch down the dough to release the gas bubbles. On a lightly floured surface, I shape it into a loaf by flattening it into a rectangle, then rolling it tightly from one short end to the other.
I place the shaped loaf seam-side down in a greased 9×5 inch loaf pan. Cover again and let it rise for another 45-60 minutes until it crowns about an inch above the rim of the pan.

Phase 7: Baking to Golden Perfection
Preheat your oven to 375°F (190°C) during the last 15 minutes of the second rise. Just before baking, I brush the top of the loaf with beaten egg for a beautiful golden crust.
I bake the bread for 30-35 minutes, rotating the pan halfway through for even browning. The bread is done when it sounds hollow when tapped on the bottom and reaches an internal temperature of 190°F (88°C).
Troubleshooting Common Matcha Bread Issues
Through my years of baking matcha bread, I’ve encountered nearly every problem you can imagine. Here are the solutions to the most common issues:
Problem: Uneven Green Color
- Cause: Insufficient mixing of matcha paste or adding matcha powder directly to flour
- Solution: Always create a smooth matcha paste first and knead thoroughly
Problem: Bitter Taste
- Cause: Too much matcha powder or poor-quality matcha
- Solution: Reduce matcha to 15g for milder flavor, invest in better quality matcha
Problem: Dense, Heavy Texture
- Cause: Over-kneading, insufficient rising time, or dead yeast
- Solution: Check yeast freshness, allow proper rising time, knead until just smooth
Problem: Pale Color After Baking
- Cause: Matcha quality or excessive heat degrading chlorophyll
- Solution: Use culinary-grade matcha, avoid over-baking
Flavor Variations and Creative Twists
Once you’ve mastered the basic recipe, the possibilities for customization are endless. Here are some of my favorite variations:
Matcha White Chocolate Bread: Add 100g of chopped white chocolate during the final minutes of kneading. The sweetness balances the earthiness of matcha beautifully.
Matcha Red Bean Bread: Incorporate 150g of sweetened red bean paste (anko) by spreading it over the flattened dough before rolling into a loaf shape.
Matcha Swirl Bread: Create a marbled effect by dividing the dough in half after the first rise. Leave one portion plain and add extra matcha to the other, then twist them together before shaping.
Matcha Sesame Bread: Add 2 tablespoons of toasted sesame seeds for a nutty flavor that complements the matcha perfectly.
Storage and Serving Suggestions

Proper storage is crucial for maintaining the flavor and texture of your matcha bread. I wrap cooled loaves tightly in plastic wrap or store them in airtight containers. At room temperature, the bread stays fresh for 2-3 days.
For longer storage, I slice the bread and freeze individual portions in freezer bags. Frozen slices can be toasted directly from the freezer, making them perfect for quick breakfasts.
Serving Ideas:
- Toasted with butter and a drizzle of honey
- As French toast with a dusting of powdered sugar
- Sliced thin for afternoon tea sandwiches
- Cubed and used in bread pudding
- Grilled with cream cheese and fresh berries
Nutritional Benefits of Matcha Bread
Beyond its delicious taste, matcha bread offers several nutritional advantages over regular bread:
| Nutrient | Benefit | Amount per Slice |
|---|---|---|
| Antioxidants (Catechins) | Anti-inflammatory properties | 25-30mg |
| L-Theanine | Promotes calm focus | 15-20mg |
| Chlorophyll | Detoxification support | 5-8mg |
| Vitamin C | Immune system support | 2-3mg |
| Fiber | Digestive health | 2g |
| Protein | Muscle maintenance | 4g |
The combination of L-theanine and small amounts of caffeine in matcha provides sustained energy without the jitters associated with coffee, making matcha bread an excellent breakfast choice.
Advanced Techniques for Perfect Results
After years of perfecting my technique, I’ve discovered several advanced methods that can elevate your matcha bread from good to exceptional:
Temperature Control: I use an instant-read thermometer throughout the process – for milk temperature, dough temperature (should be around 78°F after kneading), and final internal temperature.
Autolyse Method: Mix flour and milk first, let rest for 20 minutes before adding other ingredients. This develops gluten structure and improves texture.
Steam Injection: Place a pan of hot water on the bottom oven rack during the first 10 minutes of baking for a crispier crust.
Scoring: Make shallow diagonal cuts across the top of the loaf before baking to control where the bread expands and create an attractive pattern.
Pairing Matcha Bread with Beverages
The complex flavor profile of matcha bread pairs wonderfully with various beverages. I’ve experimented extensively and found these combinations particularly delightful:
Hot Beverages:
- Earl Grey tea (the bergamot complements the earthiness)
- Japanese sencha or gyokuro tea
- Chai latte (spices balance the matcha)
- Hot chocolate (creates a dessert-like experience)
Cold Beverages:
- Iced matcha latte (double the matcha experience)
- Cold brew coffee (surprising but delicious contrast)
- Milk or oat milk (classic and comforting)
Seasonal Adaptations
I love adapting my matcha bread recipe to reflect different seasons and occasions:
Spring Version: Add lemon zest and poppy seeds for a fresh, bright flavor that celebrates the season.
Summer Variation: Incorporate fresh berries like strawberries or blueberries for a fruity twist.
Fall Adaptation: Mix in chopped walnuts and a touch of cinnamon for warming autumn flavors.
Winter Special: Add crystallized ginger and orange zest for a festive holiday version.
Professional Tips from My Kitchen
Through trial and error, I’ve learned several professional techniques that make a significant difference:
- Weigh your ingredients rather than using volume measurements for consistent results every time.
- Keep detailed notes about what works and what doesn’t. I maintain a baking journal with observations about each loaf.
- Invest in quality tools: A kitchen scale, instant-read thermometer, and bench scraper are game-changers.
- Practice patience: Good bread cannot be rushed. Allow proper rising times even if it means starting earlier.
- Understand your environment: Humidity and temperature affect rising times significantly.
Q&A Section
Q: Can I substitute all-purpose flour for bread flour in matcha bread? I don’t recommend this substitution if you want the best results. Bread flour has a higher protein content (12-14%) compared to all-purpose flour (10-12%), which creates better gluten development and a chewier texture that’s characteristic of good bread. If you must substitute, add 1 tablespoon of vital wheat gluten per cup of all-purpose flour.
Q: Why does my matcha bread sometimes turn brown instead of staying green? This browning occurs when matcha is exposed to high heat for extended periods, causing the chlorophyll to break down. To prevent this, avoid over-baking and consider reducing your oven temperature by 25°F and extending the baking time slightly. Also, ensure you’re using fresh, high-quality matcha powder.
Q: Can I make matcha bread without eggs for a vegan version? Absolutely! I’ve successfully made vegan matcha bread by replacing the egg with a flax egg (1 tablespoon ground flaxseed mixed with 3 tablespoons water, let sit for 5 minutes) and using plant-based milk and vegan butter. The texture will be slightly different but still delicious.
Q: How much matcha should I use for a stronger flavor? I recommend starting with 15g of matcha powder for a mild flavor and gradually increasing to 25g for a more intense taste. However, be cautious – too much matcha can make the bread bitter and may affect the yeast’s performance.
Q: Can I add matcha powder to any regular bread recipe? While it’s possible, I don’t recommend simply adding matcha to existing recipes without adjustments. Matcha affects both flavor and moisture content, so you may need to reduce other dry ingredients slightly and adjust liquid ratios. It’s better to use a recipe specifically developed for matcha bread.
Q: What’s the best way to store leftover matcha bread? For short-term storage (2-3 days), wrap the cooled bread tightly in plastic wrap and store at room temperature. For longer storage, slice the bread and freeze individual portions in freezer bags for up to 3 months. Frozen slices can be toasted directly from the freezer.
Q: My matcha bread didn’t rise properly. What went wrong? Several factors could cause poor rising: expired or dead yeast, water temperature too hot (which kills yeast) or too cold (which doesn’t activate it), too much salt in direct contact with yeast, or insufficient rising time due to cold kitchen temperature. Always check your yeast’s expiration date and test water temperature with a thermometer.
Q: Can I make matcha bread in a bread machine? Yes, but you’ll need to adjust the recipe slightly. Add ingredients in the order recommended by your bread machine manufacturer (usually liquids first, then dry ingredients, with yeast on top). Use the basic white bread setting, and make sure to create your matcha paste separately before adding it with the wet ingredients.
Making perfect matcha bread is both an art and a science, requiring patience, practice, and attention to detail. The reward, however, is a uniquely delicious bread that brings the sophisticated flavors of Japanese tea culture to your everyday meals. Whether you’re enjoying it as morning toast or serving it to impressed guests, matcha bread never fails to create a memorable experience.
Remember, every baker’s journey is different, and what works in my kitchen might need slight adjustments in yours. Don’t be discouraged if your first loaf isn’t perfect – even my early attempts had their challenges. Keep practicing, take notes, and most importantly, enjoy the process of creating something beautiful and delicious with your own hands.