When I first tasted authentic quiche Lorraine in a small bistro in Nancy, France, I understood why this dish has captivated food lovers for centuries. The silky custard, smoky bacon, and buttery pastry created a harmony that spoke directly to my soul. Today, I’m sharing everything I’ve learned about creating the perfect quiche Lorraine – from the traditional techniques passed down through generations to modern adaptations that make this classic accessible to home cooks everywhere.
Quiche Lorraine isn’t just another egg dish; it’s a testament to French culinary mastery. This savory tart represents the essence of comfort food while maintaining an elegant sophistication that makes it equally at home at a casual brunch or formal dinner party. What makes my approach different is focusing on the fundamental techniques that ensure success every single time.
Understanding Quiche Lorraine: More Than Just Eggs and Bacon
Quiche Lorraine : A traditional French savory tart originating from the Lorraine region, consisting of a pastry crust filled with a custard of eggs, cream, and lardons (bacon pieces)
Custard Base : The creamy filling made from eggs, cream, and sometimes milk that gives quiche its characteristic texture
Lardons : Small strips or cubes of bacon or salt pork, traditionally used in French cooking
Pâte Brisée : The classic French short pastry used for quiche crusts, known for its tender, flaky texture
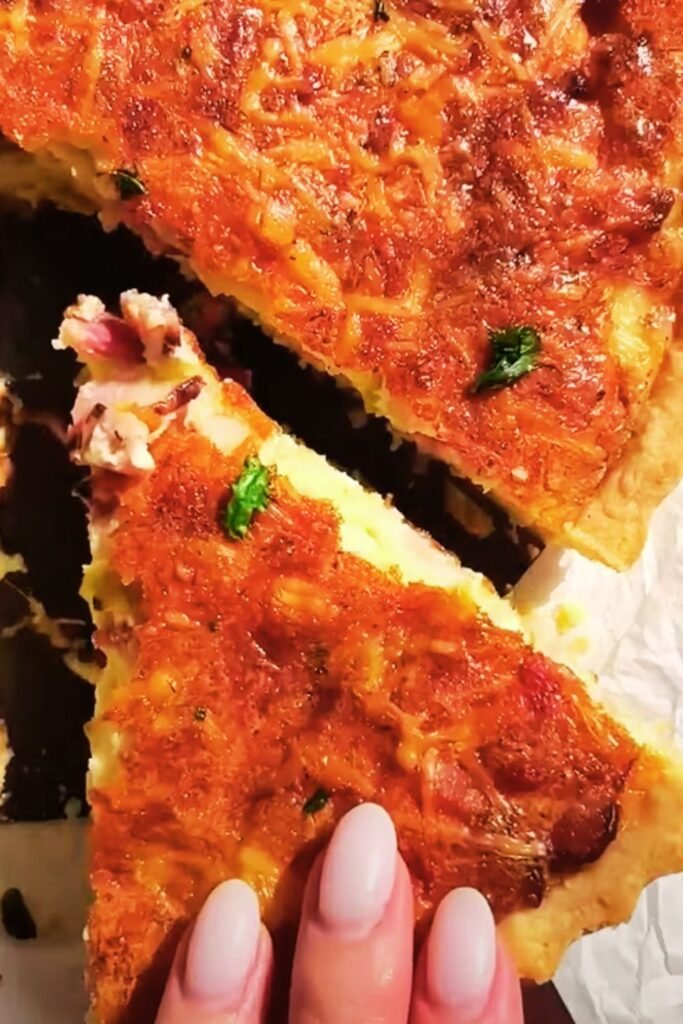
The beauty of quiche Lorraine lies in its simplicity. Unlike modern variations loaded with vegetables and multiple cheeses, traditional quiche Lorraine contains only eggs, cream, and bacon in a pastry shell. This restraint allows each component to shine, creating a dish where technique matters more than ingredient quantity.
The Essential Components Breakdown
Creating exceptional quiche Lorraine requires understanding each element’s role in the final dish. I’ve spent years perfecting my approach, and these insights will transform your quiche-making experience.
The Perfect Pastry Foundation
My pastry technique centers on temperature control and gentle handling. Cold ingredients create the flaky layers we crave, while overworking develops gluten, resulting in tough crust. I always keep my butter cubed and chilled until the moment I incorporate it into the flour.
The key ratios I use ensure consistent results:
| Ingredient | Amount | Purpose | Temperature |
|---|---|---|---|
| All-purpose flour | 1¼ cups | Structure and body | Room temperature |
| Unsalted butter | 6 tablespoons | Flavor and flakiness | Cold, cubed |
| Salt | ½ teaspoon | Flavor enhancement | Room temperature |
| Ice water | 3-4 tablespoons | Binding agent | Ice cold |
| Egg yolk | 1 large | Richness and color | Room temperature |
Custard Composition Mastery
The custard makes or breaks your quiche. I’ve experimented with countless ratios, and my formula delivers that perfect balance between richness and stability. Too many eggs create a rubbery texture, while too much cream can prevent proper setting.
| Component | Quantity | Fat Content | Function |
|---|---|---|---|
| Large eggs | 4 whole | Variable | Binding and structure |
| Heavy cream | 1 cup | 36-40% | Richness and smoothness |
| Whole milk | ½ cup | 3.25% | Texture balance |
| Salt | ¾ teaspoon | 0% | Flavor enhancement |
| White pepper | ¼ teaspoon | 0% | Subtle heat |
| Nutmeg | Pinch | 0% | Traditional flavoring |
Bacon Selection and Preparation
Not all bacon works equally well in quiche. I prefer thick-cut, applewood-smoked bacon because it maintains texture during baking while contributing robust flavor. The bacon needs sufficient fat rendering to prevent greasiness in the final dish.

My bacon preparation method ensures optimal results every time. I start with cold bacon in a cold pan, allowing gradual rendering that preserves texture while eliminating excess fat. This technique prevents the common problem of soggy quiche bottoms.
Step-by-Step Preparation Method
Phase One: Pastry Preparation
I begin by combining flour and salt in a large mixing bowl. The cold butter gets cut into small cubes – about ½-inch pieces work perfectly. Using a pastry cutter or two knives, I work the butter into the flour until the mixture resembles coarse breadcrumbs with some larger butter pieces remaining.
The ice water addition requires careful attention. I start with three tablespoons, adding the fourth only if needed. The dough should just hold together when pressed – never sticky or wet. I form it into a disk, wrap tightly in plastic, and refrigerate for at least one hour.
Rolling requires patience and technique. On a lightly floured surface, I roll from the center outward, rotating the dough quarter-turns to maintain even thickness. The finished circle should measure about 12 inches in diameter, providing enough overhang for proper crimping.
Phase Two: Blind Baking Excellence
Blind Baking : Pre-baking pastry shells without filling to ensure crisp bottoms and prevent soggy crusts
Blind baking prevents the dreaded soggy bottom that plagues many home cooks. I line my tart pan with the rolled pastry, ensuring no air bubbles underneath. The edges get trimmed to leave about one inch overhang, which I fold under and crimp decoratively.
Parchment paper covers the pastry, filled with pie weights or dried beans. This weight prevents puffing during the initial baking phase. My blind baking schedule follows this precise timing:
| Baking Phase | Temperature | Duration | Purpose |
|---|---|---|---|
| Initial blind bake | 425°F | 15 minutes | Structure setting |
| Weights removed | 425°F | 5 minutes | Bottom crisping |
| Egg wash applied | 425°F | 2 minutes | Seal coating |
| Final preparation | 350°F | Ready for filling | Temperature adjustment |
Phase Three: Bacon and Custard Assembly
While the crust bakes, I prepare the bacon in a cold skillet over medium heat. This gradual cooking process renders fat slowly, creating perfectly crispy pieces without burning. The bacon should be golden brown and crispy but not brittle – about 8-10 minutes total cooking time.
The custard requires gentle whisking to incorporate air without creating foam. I start by whisking eggs until just combined, then gradually add cream and milk. The seasonings get whisked in last, ensuring even distribution throughout the mixture.
Temperature control becomes crucial during assembly. The baked crust should be warm but not hot, while the custard mixture should be at room temperature. This temperature compatibility prevents curdling and ensures smooth integration.
Advanced Techniques for Professional Results
Temperature Management Throughout Process
Professional kitchens succeed through precise temperature control, and home cooks can apply these same principles. I use an instant-read thermometer to monitor custard temperature – it should never exceed 160°F during mixing to prevent premature coagulation.
The oven temperature sequence I follow ensures even cooking:
| Cooking Stage | Temperature | Duration | Internal Target |
|---|---|---|---|
| Initial high heat | 375°F | 15 minutes | Setting edges |
| Reduced heat | 325°F | 25-30 minutes | Even cooking |
| Final minutes | 300°F | 5-10 minutes | Gentle finish |
| Doneness test | N/A | Visual check | 165°F center |
Texture Optimization Methods
Achieving the perfect custard texture requires understanding protein coagulation. Eggs begin setting around 140°F, but the ideal texture develops between 160-165°F. I test doneness by gently shaking the pan – the center should have a slight jiggle, similar to barely set gelatin.
My texture enhancement techniques include:
- Straining the custard mixture through fine mesh to remove any lumps
- Allowing ingredients to reach room temperature before combining
- Whisking just until combined to prevent tough texture from overbeaten eggs
- Adding cream gradually to prevent temperature shock
- Using a water bath for exceptionally delicate texture when desired
Troubleshooting Common Challenges
Preventing Soggy Bottoms
Soggy bottoms frustrate even experienced cooks, but my prevention methods eliminate this issue completely. The blind baking process creates an initial barrier, while the egg wash application seals microscopic holes in the pastry.
Egg Wash Technique : Brushing beaten egg over partially baked pastry to create moisture barrier
I apply egg wash using a pastry brush, ensuring complete coverage without pooling. This creates an invisible shield that prevents custard from penetrating the crust during baking.
Managing Custard Consistency
Custard problems usually stem from temperature issues or incorrect ratios. If your custard curdles during mixing, strain it through fine mesh and whisk gently to restore smoothness. For future batches, ensure all ingredients reach room temperature before combining.
Signs of properly mixed custard include:
- Smooth, homogeneous appearance
- No visible egg streaks or lumps
- Light yellow color throughout
- Pourable consistency without thickness
- No foam or bubbles on surface

Nutritional Profile and Dietary Considerations
Understanding quiche Lorraine’s nutritional content helps with meal planning and dietary accommodations. My standard recipe serves eight generous portions, making it economical for feeding groups.
| Nutrient | Per Serving | Daily Value % | Notes |
|---|---|---|---|
| Calories | 385 | 19% | Moderate calorie density |
| Total Fat | 28g | 43% | Primarily from cream and eggs |
| Saturated Fat | 15g | 75% | High due to dairy content |
| Cholesterol | 195mg | 65% | From eggs and dairy |
| Sodium | 520mg | 23% | From bacon and added salt |
| Carbohydrates | 18g | 6% | Mainly from pastry crust |
| Protein | 16g | 32% | High-quality complete protein |
| Calcium | 180mg | 18% | From dairy ingredients |
Dietary Adaptations
While traditional quiche Lorraine doesn’t accommodate all dietary restrictions, I’ve developed modifications that maintain the dish’s essential character:
Gluten-Free Option: Substitute almond flour and tapioca starch for regular flour in a 2:1 ratio. Add xanthan gum for binding.
Lower Fat Version: Replace heavy cream with half-and-half and reduce bacon quantity. This cuts calories by approximately 25% per serving.
Vegetarian Alternative: Substitute bacon with sautéed mushrooms or caramelized onions for umami depth without meat.
Storage and Reheating Strategies
Proper storage extends quiche Lorraine’s enjoyment beyond initial serving. I’ve perfected methods that preserve texture and flavor during storage and reheating.
Refrigeration Guidelines
Fresh quiche stores beautifully in the refrigerator for up to four days when properly covered. I wrap individual slices in plastic wrap or store the whole quiche covered with aluminum foil. The key is preventing moisture loss while avoiding condensation buildup.
Freezing Techniques
Freezing requires special consideration to maintain quality. I freeze individual slices wrapped in plastic wrap, then aluminum foil, for up to three months. Whole quiches can be frozen using the same double-wrap method.
| Storage Method | Duration | Quality Level | Best Use |
|---|---|---|---|
| Room temperature | 2 hours | Excellent | Immediate service |
| Refrigerated covered | 4 days | Very good | Planned leftovers |
| Frozen individual slices | 3 months | Good | Quick meals |
| Frozen whole quiche | 2 months | Good | Future entertaining |
Reheating for Optimal Results
Reheating requires gentle methods that preserve custard texture. I never use microwave heating, which creates rubbery texture and uneven heating. Instead, I reheat in a 300°F oven for 15-20 minutes until warmed through.
For frozen quiche, I thaw overnight in the refrigerator before reheating. This gradual thawing prevents texture damage from rapid temperature changes.
Serving Suggestions and Accompaniments
Quiche Lorraine’s versatility shines through various serving contexts. I’ve served this dish at elegant brunches, casual family dinners, and outdoor picnics with equal success.
Classic Pairings
Traditional French service emphasizes simplicity that doesn’t compete with the quiche’s delicate flavors. My favorite accompaniments include:
- Mixed green salad with light vinaigrette
- Fresh fruit compote or seasonal berry medley
- Crusty French bread or buttery croissants
- Herbed roasted potatoes for heartier appetites
- Sparkling water with fresh lemon or cucumber
Modern Presentation Ideas
Contemporary serving styles can elevate quiche Lorraine for special occasions. Individual tartlets create elegant presentation for cocktail parties, while rustic family-style service works perfectly for casual gatherings.
I often garnish with fresh herbs – chives, parsley, or thyme – that complement without overwhelming. A light dusting of paprika adds visual appeal and subtle flavor enhancement.
Questions and Answers
Q: Can I make the pastry crust ahead of time? Absolutely! I often prepare pastry dough up to three days in advance. Wrap it tightly in plastic wrap and refrigerate. For longer storage, freeze the wrapped dough for up to three months. Just remember to thaw frozen dough overnight in the refrigerator before rolling.
Q: Why does my quiche sometimes curdle or separate? Curdling usually results from temperature shock or overcooking. Ensure all custard ingredients reach room temperature before mixing, and avoid overbaking. The custard continues cooking from residual heat after removal from oven, so slight undercooking prevents separation.
Q: What’s the best way to tell when quiche is perfectly done? I use the gentle shake test – the center should have a slight jiggle, similar to barely set gelatin. An instant-read thermometer inserted in the center should read 165°F. The edges will be set and lightly golden, while the center appears just slightly wet on top.
Q: Can I substitute different types of bacon or omit it entirely? Traditional quiche Lorraine uses lardons, but thick-cut bacon works excellently. For different flavors, try pancetta or Canadian bacon. For vegetarian versions, sautéed mushrooms or caramelized onions provide savory depth, though the result won’t be traditional quiche Lorraine.
Q: How do I prevent my crust from shrinking during blind baking? Crust shrinkage occurs from gluten development or insufficient chilling. Always chill your dough thoroughly before rolling, and avoid overworking. When lining the pan, don’t stretch the dough – let it settle naturally. Using pie weights during blind baking also prevents shrinkage.
Q: What causes a soggy bottom crust, and how can I prevent it? Soggy bottoms result from moisture penetration during baking. My prevention methods include thorough blind baking, applying egg wash to seal the crust, and ensuring the crust is warm (not hot) when adding custard. Some bakers place the filled quiche on a preheated baking stone for extra bottom heat.
Q: Can I add cheese to traditional quiche Lorraine? Historically, authentic quiche Lorraine contains no cheese – that’s a modern addition. However, a small amount of Gruyère or Swiss cheese complements the traditional flavors beautifully without overwhelming the delicate custard. Use no more than ½ cup grated cheese for best results.
Q: How far in advance can I prepare quiche for entertaining? I often prepare quiche completely the day before serving. Store covered in the refrigerator and reheat gently before serving. For same-day preparation, assemble the quiche up to four hours ahead and bake when needed. The flavors actually improve with a few hours of resting.
Q: What’s the difference between quiche and frittata? Quiche features a pastry crust and higher cream-to-egg ratio, creating a more delicate, custard-like texture. Frittatas are crustless, with higher egg content and firmer texture. Quiche is baked entirely in the oven, while frittatas often start on the stovetop and finish under the broiler.
Q: Why does my custard sometimes have a grainy texture? Graininess usually indicates overcooking or too-high baking temperature. The proteins in eggs coagulate rapidly at high temperatures, creating grainy texture. Bake at moderate temperature (325-350°F) and remove when center still has slight jiggle. Straining the custard mixture before baking also helps achieve smooth texture.
Mastering quiche Lorraine requires patience, practice, and attention to detail, but the rewards are immense. This classic French dish brings elegance to any table while providing comfort that transcends cultural boundaries. Whether you’re preparing for a special brunch or creating a memorable family dinner, these techniques will ensure your quiche Lorraine achieves restaurant-quality results every time.
The beauty of this dish lies not just in its taste, but in its ability to bring people together around the table. Each slice represents centuries of French culinary tradition, yet remains perfectly at home in modern kitchens worldwide. With these methods and insights, you’re well-equipped to create your own memorable quiche Lorraine experiences.