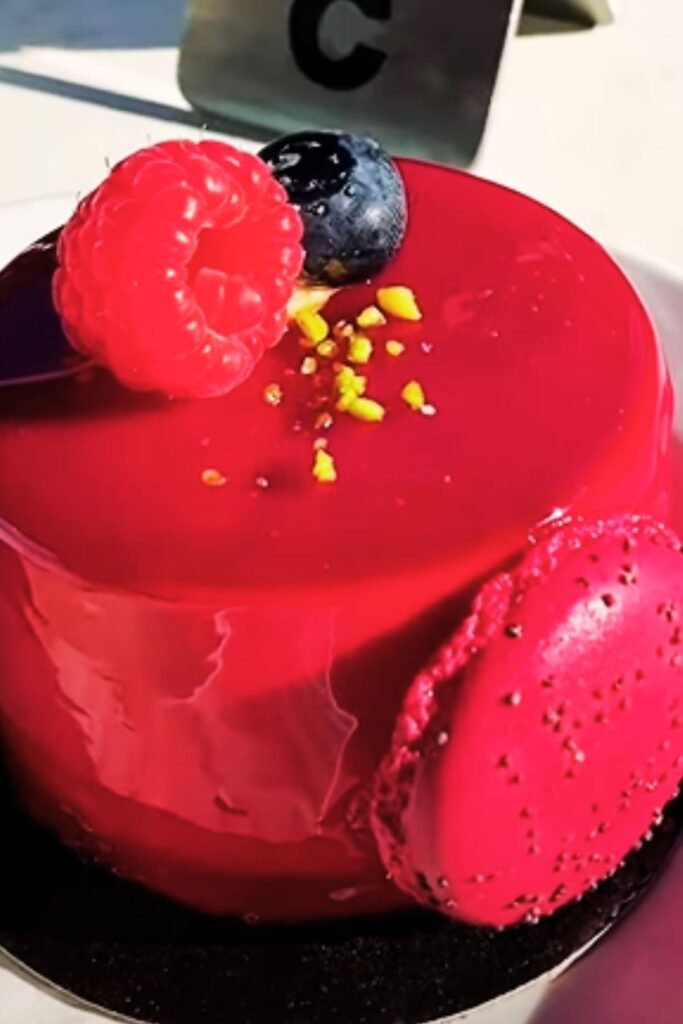
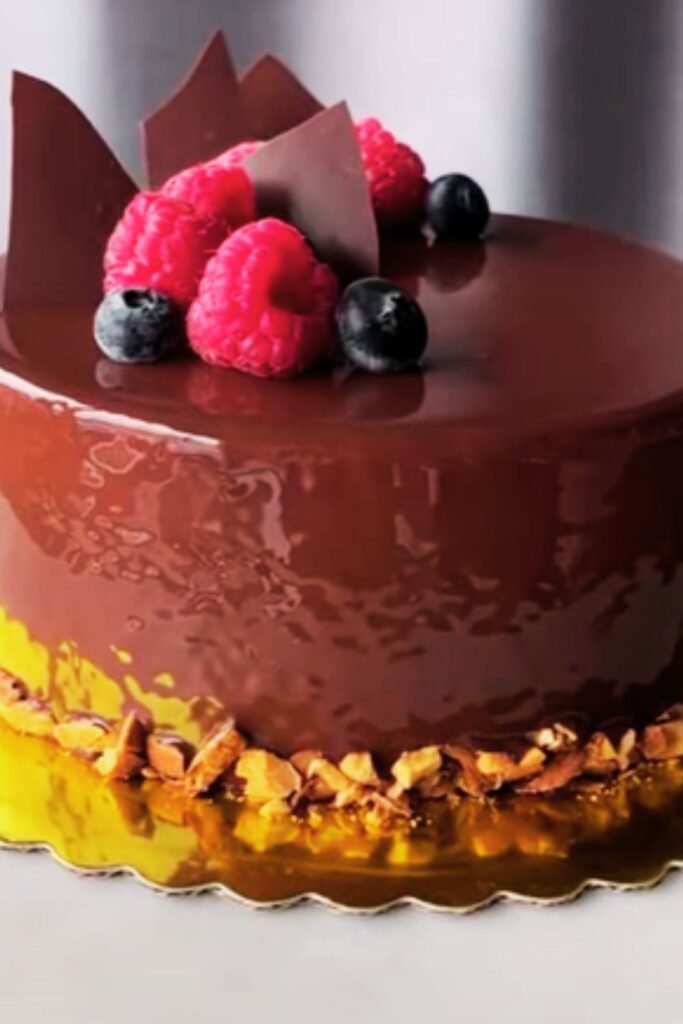
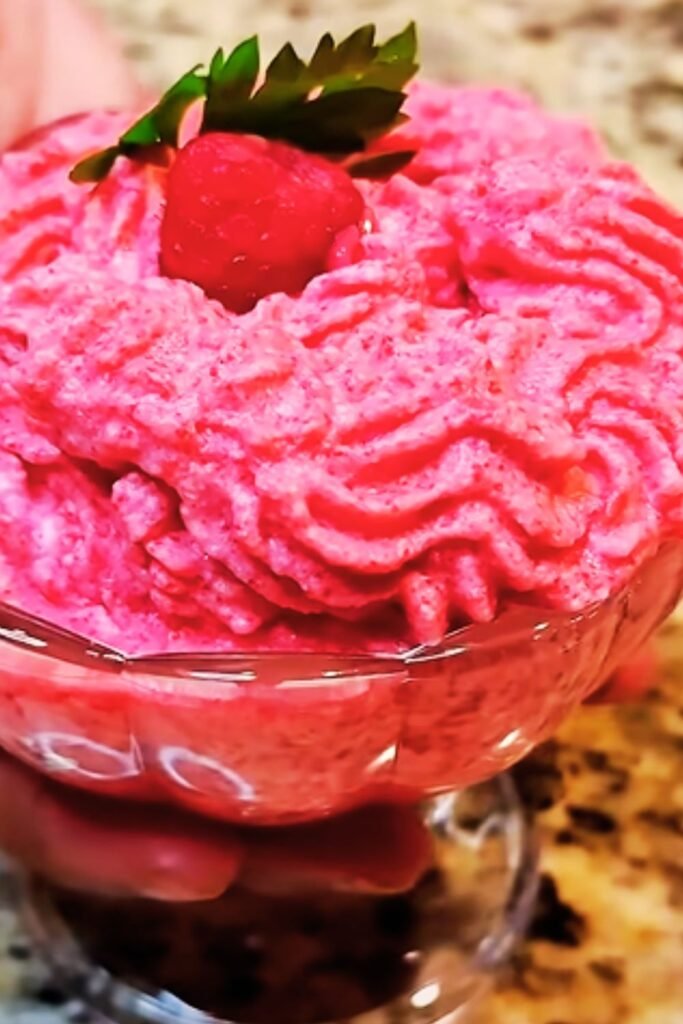
When I first discovered the magic of raspberry mousse, I knew I had stumbled upon something extraordinary. This ethereal dessert combines the tartness of fresh raspberries with the luxurious, cloud-like texture that makes every spoonful feel like a celebration. After years of perfecting my technique and experimenting with countless variations, I’m excited to share everything I’ve learned about creating this show-stopping dessert.
Raspberry mousse isn’t just another dessert – it’s a culinary masterpiece that transforms simple ingredients into something truly spectacular. The delicate balance between the fruit’s natural acidity and the mousse’s creamy richness creates a harmonious symphony of flavors that dance on your palate. Whether you’re planning an intimate dinner party or simply want to treat yourself to something special, mastering this recipe will elevate your dessert game to professional levels.
Understanding the Art of Mousse Making
Before diving into the specifics of raspberry mousse, I want to help you understand what makes this dessert so special. The word “mousse” comes from the French word meaning “foam” or “froth,” which perfectly describes the light, airy texture we’re aiming to achieve. This delicate structure is created through the careful incorporation of air, typically achieved by folding whipped cream or beaten egg whites into a flavored base.
Key Components of Perfect Mousse:
- Base: The flavored foundation (raspberry puree in our case)
- Stabilizer: Usually gelatin or agar-agar to maintain structure
- Aerator: Whipped cream or beaten egg whites for lightness
- Sweetener: Sugar or alternative sweeteners to balance acidity
- Fat: Cream or butter for richness and mouthfeel
The beauty of raspberry mousse lies in its versatility. I’ve served it as an elegant finale to formal dinners, incorporated it into layered parfaits for casual gatherings, and even used it as a filling for elaborate cakes. Each application showcases different aspects of this remarkable dessert.
Essential Ingredients and Their Roles
Creating exceptional raspberry mousse requires understanding not just what ingredients to use, but why each component matters. Through my years of experimentation, I’ve learned that the quality of your ingredients directly impacts the final result.
Raspberry Selection and Preparation
The foundation of any great raspberry mousse begins with selecting the right berries. I prefer using a combination of fresh and frozen raspberries, as frozen berries often break down more easily when creating the puree, while fresh berries provide textural contrast and visual appeal.
Raspberry Quality Indicators:
- Deep red color with slight gloss
- Firm but yielding texture
- Sweet, fragrant aroma
- No signs of mold or mushiness
- Intact structure without crushing
When preparing raspberries for mousse, I strain the puree to remove seeds, creating a silky smooth texture that won’t interfere with the mousse’s delicate structure. However, I sometimes reserve a few whole berries to fold in at the end for delightful textural surprises.
Gelatin: The Invisible Structure
Gelatin serves as the invisible architecture that holds our mousse together. I use unflavored gelatin powder, which needs to be properly bloomed before incorporation. This process involves sprinkling the gelatin over cold water and allowing it to absorb the liquid, creating a spongy mass that dissolves seamlessly when heated.
Gelatin Ratios and Temperatures:
- Standard ratio: 1 packet (2.25 tsp) per 2 cups of liquid
- Blooming temperature: Cold water (around 50°F)
- Dissolving temperature: 160-170°F (never boiling)
- Setting temperature: Below 65°F

The Complete Raspberry Mousse Recipe
After countless trials and refinements, I’ve developed what I consider the perfect raspberry mousse recipe. This version strikes the ideal balance between intensity of flavor and ethereal texture.
Ingredients
| Ingredient | Amount | Purpose | Quality Notes |
|---|---|---|---|
| Fresh raspberries | 2 cups | Primary flavor | Choose firm, bright red berries |
| Frozen raspberries | 1 cup | Puree base | Easier to break down when heated |
| Granulated sugar | 3/4 cup | Sweetener | Adjust based on berry tartness |
| Unflavored gelatin | 2 packets | Stabilizer | Ensure freshness for best results |
| Cold water | 1/4 cup | Gelatin blooming | Use filtered water |
| Heavy cream | 1 1/2 cups | Richness and volume | 35% fat content minimum |
| Vanilla extract | 1 tsp | Flavor enhancement | Pure vanilla preferred |
| Lemon juice | 2 tbsp | Acidity balance | Fresh squeezed recommended |
| Powdered sugar | 1/4 cup | Cream sweetening | Prevents grittiness |
Equipment Essentials
Having the right tools makes the difference between good and exceptional results. Here’s what I consider essential for mousse making:
Must-Have Equipment:
- Fine-mesh strainer for smooth puree
- Digital kitchen scale for precision
- Stand mixer or hand mixer
- Rubber spatula for gentle folding
- Small saucepan for heating
- Measuring cups and spoons
- Serving glasses or molds
Step-by-Step Instructions
Phase 1: Creating the Raspberry Base
I begin by combining the fresh and frozen raspberries in a medium saucepan with half the granulated sugar. The key here is gentle heat – I cook the mixture over medium-low heat, stirring occasionally, until the berries break down and release their juices. This process typically takes 8-10 minutes and fills my kitchen with the most incredible aroma.
Once the berries are completely broken down, I strain the mixture through a fine-mesh sieve, pressing the solids with the back of a spoon to extract every drop of flavorful liquid. The resulting puree should be smooth and vibrant, with no seeds or pulp remaining.
Phase 2: Gelatin Preparation
While the raspberry puree cools slightly, I prepare the gelatin. I sprinkle both packets over the cold water in a small bowl and let them bloom for 5 minutes. The mixture will become spongy and absorbed. Then I gently heat about 1/4 cup of the warm raspberry puree and whisk it into the bloomed gelatin until completely dissolved.
Phase 3: Combining the Base
I combine the dissolved gelatin mixture with the remaining raspberry puree, adding the lemon juice and vanilla extract. The lemon juice is crucial here – it brightens the raspberry flavor and prevents the mousse from tasting flat. I taste and adjust the sweetness at this point, adding more sugar if needed.
Phase 4: The Cream Component
In a separate bowl, I whip the heavy cream with the powdered sugar until soft peaks form. This is where patience pays off – overwhipped cream will create a grainy texture in the final mousse. I’m looking for cream that holds its shape but still has a smooth, flowing quality.
Phase 5: The Magic of Folding
The most critical step in mousse making is the folding technique. I add about one-third of the whipped cream to the raspberry mixture and fold it in completely. This initial addition lightens the base and makes it easier to incorporate the remaining cream without deflating it.
Then I add the lightened raspberry mixture to the remaining whipped cream, folding gently but thoroughly. I use a rubber spatula and employ a cutting and folding motion, turning the bowl as I work. The goal is to maintain as much air as possible while ensuring complete integration.

Texture and Consistency Mastery
Achieving the perfect mousse texture requires understanding the science behind the process. The ideal raspberry mousse should be light enough to melt on your tongue yet substantial enough to hold its shape when spooned or piped.
Troubleshooting Common Issues
Through my years of mousse making, I’ve encountered and solved numerous texture problems:
Grainy Texture Solutions:
- Ensure gelatin is completely dissolved before adding to base
- Strain raspberry puree thoroughly to remove all seeds
- Don’t overwhip the cream
- Fold ingredients at similar temperatures
Separation Problems:
- Check gelatin freshness and proper blooming
- Avoid extreme temperature differences between components
- Fold more gently to maintain emulsion
- Chill mixture if it’s too warm before folding
Density Issues:
- Don’t overmix once cream is added
- Ensure cream is whipped to proper consistency
- Check that raspberry base isn’t too hot when combining
Nutritional Information and Dietary Considerations
Understanding the nutritional profile of raspberry mousse helps me make informed decisions about portion sizes and dietary accommodations.
Nutritional Breakdown (Per Serving)
| Nutrient | Amount | % Daily Value | Health Benefits |
|---|---|---|---|
| Calories | 185 | 9% | Moderate energy content |
| Total Fat | 12g | 18% | Provides satiety |
| Saturated Fat | 7g | 35% | Monitor for heart health |
| Carbohydrates | 18g | 6% | Quick energy source |
| Fiber | 3g | 12% | Digestive health |
| Sugars | 15g | – | Natural fruit sugars |
| Protein | 3g | 6% | Muscle maintenance |
| Vitamin C | 25mg | 42% | Immune system support |
| Antioxidants | High | – | Cellular protection |
Dietary Modifications
I’ve successfully adapted this recipe for various dietary needs:
Sugar-Free Version:
- Replace granulated sugar with erythritol or stevia
- Reduce quantity by 25% as alternatives are sweeter
- Taste and adjust throughout the process
Dairy-Free Alternative:
- Substitute coconut cream for heavy cream
- Chill coconut milk overnight and use thick portion
- May require additional gelatin for structure
Vegan Adaptation:
- Replace gelatin with agar-agar powder
- Use aquafaba as whipping agent
- Increase setting time in refrigerator
Presentation and Serving Suggestions
The visual appeal of raspberry mousse is almost as important as its taste. I’ve developed several presentation techniques that never fail to impress guests.
Classic Presentation Methods
Individual Glasses: My preferred method involves spooning the mousse into clear glass cups or wine glasses. This allows the beautiful color to shine through while providing elegant portion control. I often garnish with fresh raspberries and a sprig of mint for a professional finish.
Layered Parfaits: For a more dramatic presentation, I create layers alternating raspberry mousse with complementary elements like vanilla mousse, crushed cookies, or fresh fruit. The key is ensuring each layer is properly set before adding the next.
Molded Presentations: Using silicone molds, I create individual shaped mousses that can be unmolded for stunning presentations. This technique works particularly well for special occasions and allows for creative garnishing.
Garnishing Techniques
Fresh Fruit Arrangements:
- Whole raspberries for color consistency
- Sliced strawberries for visual contrast
- Blackberries for textural variety
- Mint leaves for aromatic freshness
Textural Elements:
- Crumbled shortbread cookies
- Toasted nuts for crunch
- Chocolate shavings for elegance
- Candied lemon zest for brightness

Storage and Make-Ahead Tips
One of the greatest advantages of raspberry mousse is its make-ahead friendly nature. I often prepare it up to three days in advance, which actually improves the flavor as the ingredients have time to meld together.
Proper Storage Methods
Refrigerator Storage:
- Cover tightly with plastic wrap
- Store in refrigerator for up to 4 days
- Bring to room temperature 10 minutes before serving
- Avoid strong odors that might be absorbed
Freezer Storage:
- Wrap individual portions in plastic wrap
- Freeze for up to 2 months
- Thaw in refrigerator overnight
- Texture may be slightly different but still delicious
Transportation Tips
When transporting raspberry mousse to events, I use insulated carriers with ice packs to maintain temperature. Individual portions travel better than large bowls, and I always bring extra garnishes to refresh the presentation upon arrival.
Advanced Techniques and Variations
Once you’ve mastered the basic technique, there are numerous ways to elevate your raspberry mousse game.
Flavor Combinations
Mixed Berry Medley: I sometimes combine raspberries with blackberries and blueberries for a complex flavor profile. The key is maintaining the proper ratio of puree to gelatin regardless of the fruit combination.
Chocolate Raspberry: Adding melted dark chocolate to the raspberry base creates a sophisticated flavor combination. I fold in the chocolate when the raspberry mixture is still slightly warm to ensure smooth incorporation.
Lemon Raspberry: Incorporating fresh lemon zest and additional lemon juice creates a bright, citrusy version that’s perfect for spring and summer entertaining.
Texture Variations
Mousse Parfaits: Layering different textures within the mousse creates visual interest and varied eating experiences. I might include layers of crushed amaretti cookies or graham crackers for crunch.
Mousse Cakes: Using raspberry mousse as a filling for layer cakes requires adjusting the gelatin content slightly for better structure. The mousse should be firm enough to support cake layers but still maintain its characteristic lightness.
Seasonal Adaptations
Throughout the year, I adapt my raspberry mousse recipe to take advantage of seasonal ingredients and preferences.
Summer Variations
During peak raspberry season, I focus on showcasing the pure fruit flavor with minimal additions. Fresh berries are at their peak, and I often reduce the sugar content to let their natural sweetness shine through.
Winter Comfort
In colder months, I might add warming spices like cinnamon or cardamom to create a more comforting version. These spices complement the raspberry flavor without overwhelming it.
Holiday Presentations
For holidays, I create themed presentations using different garnishes and serving vessels. Christmas versions might include cranberries and rosemary, while Valentine’s Day presentations focus on romantic elements like heart-shaped garnishes.
Professional Tips from My Kitchen
After years of making raspberry mousse, I’ve developed several techniques that consistently produce professional-quality results.
Temperature Control
The temperature of your ingredients when combining them is crucial. I always ensure the raspberry base has cooled to room temperature before folding in the whipped cream. This prevents the cream from deflating and ensures smooth incorporation.
Timing Considerations
I’ve learned that mousse-making is all about timing. The gelatin needs to be at the perfect consistency – not too hot to melt the cream, but not so cool that it begins to set before folding. This sweet spot occurs when the mixture is just warm to the touch.
Quality Control
I always taste the mousse before the final setting. This is my last chance to adjust sweetness, acidity, or vanilla. Once the mousse sets, these flavors become locked in, so getting them right at this stage is essential.
Frequently Asked Questions
Q: Can I make raspberry mousse without gelatin? I’ve experimented with gelatin-free versions using agar-agar or even just relying on the fat content of heavy cream to provide structure. While possible, gelatin provides the best texture and stability. If you must avoid gelatin, agar-agar works well, though you’ll need to adjust the quantity and preparation method.
Q: How long does raspberry mousse need to set? In my experience, raspberry mousse needs at least 4 hours to set properly in the refrigerator. However, I prefer to let it set overnight for the best texture and flavor development. The mousse continues to improve for up to 24 hours after preparation.
Q: Can I use frozen raspberries exclusively? Absolutely! I often use frozen raspberries, especially when fresh ones are out of season or expensive. Frozen berries actually break down more easily when making the puree, which can result in a more intense flavor. Just ensure they’re completely thawed and drained before use.
Q: What’s the best way to remove seeds from raspberry puree? I use a fine-mesh strainer and press the cooked raspberries through with the back of a spoon. For an even smoother result, I sometimes pass the puree through the strainer twice. Some people prefer using a food mill, which also works well for this purpose.
Q: Why did my mousse turn out grainy? Graininess usually results from improperly dissolved gelatin or overwhipped cream. Make sure the gelatin is completely dissolved before adding it to the raspberry base, and whip the cream only to soft peaks. Also, ensure all ingredients are at similar temperatures when combining.
Q: Can I pipe raspberry mousse for decorative presentations? Yes, but the mousse needs to be the right consistency. If it’s too soft, refrigerate it for 30 minutes until it holds its shape better. I use a piping bag with a star tip for beautiful rosettes or a round tip for clean dollops.
Q: How do I prevent the mousse from separating? Separation usually occurs when ingredients are at vastly different temperatures or when the gelatin isn’t properly dissolved. Always ensure your raspberry base is at room temperature before folding in the cream, and never add hot gelatin mixture directly to cold cream.
Q: What’s the shelf life of raspberry mousse? When stored properly in the refrigerator, raspberry mousse stays fresh for 3-4 days. The texture is best within the first two days, though it remains safe to eat beyond that. I don’t recommend keeping it longer than 4 days as the texture begins to deteriorate.
Q: Can I make raspberry mousse ahead for a party? This is one of my favorite make-ahead desserts! I often prepare it 1-2 days in advance, which actually improves the flavor as the ingredients have time to meld. Just cover tightly with plastic wrap and refrigerate until ready to serve.
Q: What should I do if my mousse is too sweet or too tart? If the mousse is too sweet, add a bit more lemon juice to balance the flavors. If it’s too tart, you can fold in a small amount of powdered sugar dissolved in a tablespoon of warm water. Make these adjustments before the mousse fully sets.
Creating the perfect raspberry mousse is both an art and a science, requiring attention to detail and understanding of how ingredients interact. Through patience and practice, you’ll develop the intuition needed to create this spectacular dessert consistently. The joy of watching guests’ faces light up when they taste your homemade raspberry mousse makes every moment of preparation worthwhile.
Remember that cooking is a journey of discovery, and each batch of mousse teaches you something new. Don’t be discouraged by initial imperfections – even my early attempts weren’t perfect, but they were stepping stones to mastering this beautiful dessert. With these techniques and insights, you’re well-equipped to create raspberry mousse that rivals any professional pastry chef’s creation.