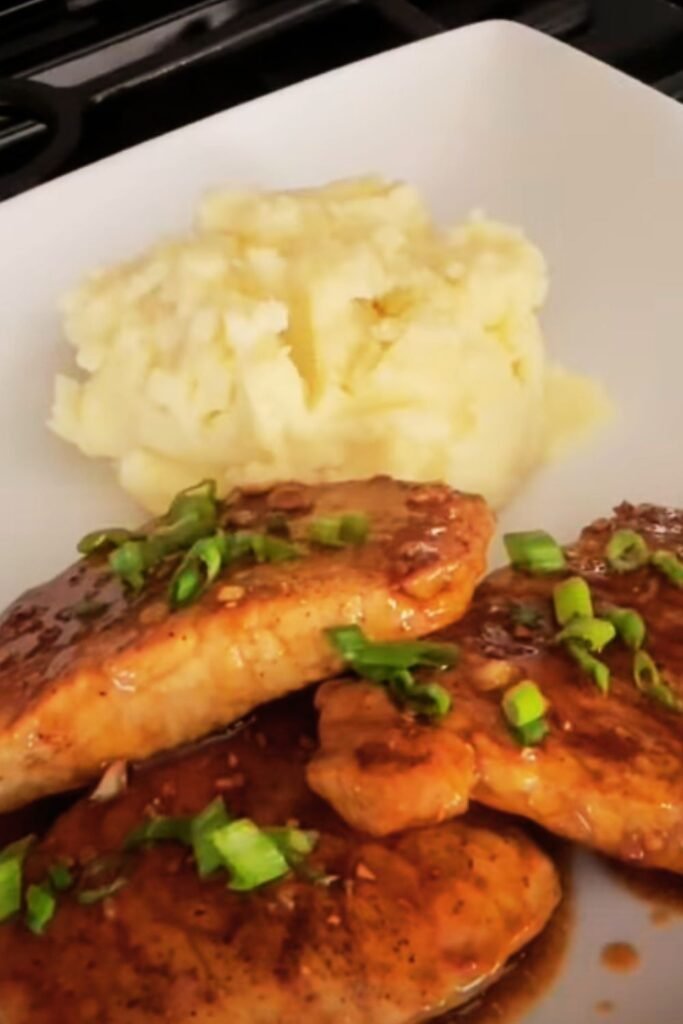
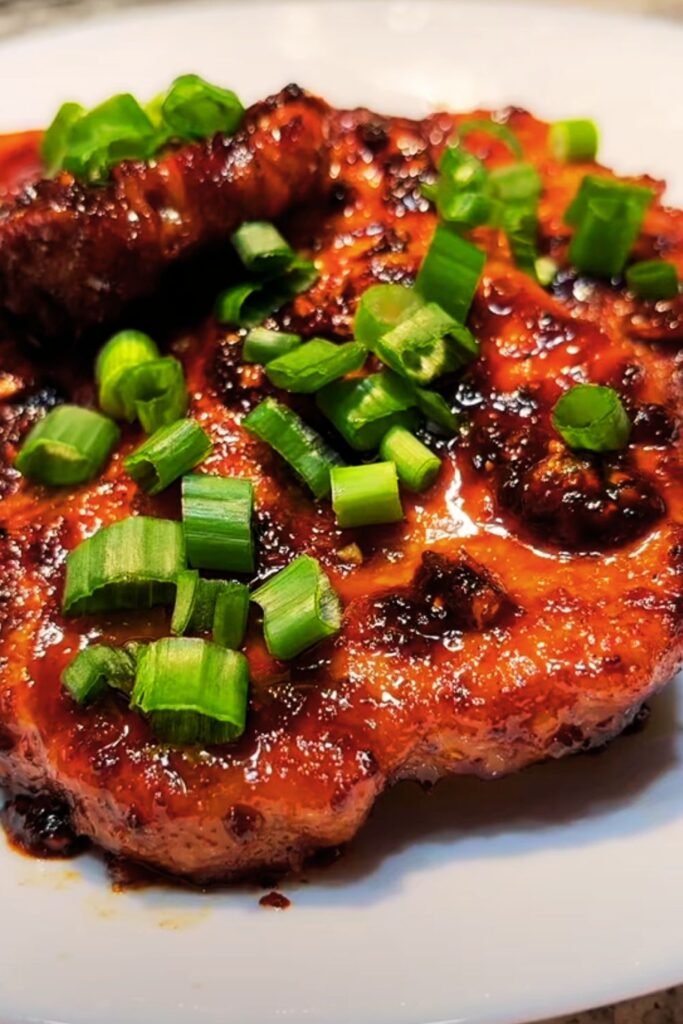
There’s something magical about the combination of tender pork and a glossy, sweet-savory honey garlic sauce that makes my mouth water every single time. I’ve been perfecting this boneless pork chops recipe for years, and I can confidently say it’s become one of my family’s most requested dinners. The way the honey caramelizes with the garlic, creating that beautiful golden glaze over perfectly cooked pork chops, is simply irresistible.
What makes this recipe truly special isn’t just the incredible flavor—it’s how achievable it is for home cooks of any skill level. I’ve taught this recipe to countless friends and family members, and they’re always amazed at how restaurant-quality results can come from such simple ingredients and techniques.
Why Boneless Pork Chops Are My Go-To Choice
I’ve cooked both bone-in and boneless pork chops extensively, and while bone-in chops have their place, boneless chops offer distinct advantages that make them my preferred choice for this recipe. They cook more evenly, are easier to portion control, and allow the honey garlic sauce to coat every surface beautifully.
Boneless vs. Bone-in Comparison:
| Aspect | Boneless Pork Chops | Bone-in Pork Chops |
|---|---|---|
| Cooking Time | 8-12 minutes total | 12-18 minutes total |
| Even Cooking | Excellent | Good |
| Sauce Coverage | Complete coverage | Limited by bone |
| Ease of Eating | Very easy | Requires cutting around bone |
| Cost per pound | Higher | Lower |
| Flavor | Relies on seasoning/sauce | Bone adds flavor |
| Presentation | Clean, uniform | Rustic, traditional |
Essential Ingredients for Perfect Honey Garlic Pork Chops
The beauty of this recipe lies in its simplicity. I use ingredients that are likely already in your pantry, but the quality of each component makes a significant difference in the final result.
For the Pork Chops:
- 4 boneless pork chops (6-8 oz each, about 1-inch thick)
- 2 tablespoons olive oil (for searing)
- 1 teaspoon salt (kosher salt preferred)
- 1/2 teaspoon black pepper (freshly ground)
- 1/2 teaspoon garlic powder
- 1/4 teaspoon paprika (adds color and mild flavor)
For the Honey Garlic Sauce:
- 1/3 cup honey (raw honey works best)
- 1/4 cup soy sauce (low-sodium preferred)
- 4 cloves garlic (minced fresh, not jarred)
- 2 tablespoons apple cider vinegar
- 1 tablespoon cornstarch
- 2 tablespoons water
- 1 tablespoon butter (for finishing)
- 1/4 teaspoon red pepper flakes (optional, for heat)
Choosing the Perfect Pork Chops
Not all pork chops are created equal, and I’ve learned this through years of trial and error. The cut you choose can make or break your dish.
Pork Chop Cut Guide:
| Cut Type | Thickness | Best For | Cooking Method |
|---|---|---|---|
| Center Cut | 1-1.5 inches | Pan-searing, grilling | High heat, quick cook |
| Rib Chop | 1-1.25 inches | Roasting, braising | Medium heat, longer cook |
| Sirloin Chop | 0.75-1 inch | Quick weeknight meals | High heat, fast sear |
| Loin Chop | 1-1.5 inches | Special occasions | Pan-sear then oven |
I always look for chops that are pale pink with fine marbling throughout. Avoid chops that look too dark or have excessive liquid in the package—these are signs of poor quality or improper storage.
Step-by-Step Cooking Instructions
Preparing the Pork Chops
I start by removing the pork chops from the refrigerator about 30 minutes before cooking. This allows them to come to room temperature, which ensures more even cooking. While they’re warming up, I pat them completely dry with paper towels—this step is crucial for achieving that beautiful golden sear.
Next, I season both sides generously with salt, pepper, garlic powder, and paprika. I like to press the seasonings into the meat gently with my fingers, creating an even coating that will form a flavorful crust.
Creating the Perfect Sear
Heat plays a crucial role in achieving restaurant-quality results. I preheat my cast-iron skillet or heavy-bottomed pan over medium-high heat for about 3-4 minutes. The pan should be hot enough that a drop of water sizzles and evaporates immediately.
I add the olive oil and swirl it around the pan. When the oil shimmers but doesn’t smoke, I carefully place the pork chops in the pan, making sure not to overcrowd them. The satisfying sizzle tells me the temperature is just right.
Searing Timeline:
- Minutes 0-4: First side searing, don’t move the chops
- Minute 4: Check for golden-brown crust, flip if ready
- Minutes 4-8: Second side searing
- Minute 8: Check internal temperature
Monitoring Internal Temperature
I cannot stress enough how important it is to use a meat thermometer. I’ve seen too many people either overcook their pork chops into leather or undercook them from fear. The USDA recommends cooking pork to an internal temperature of 145°F (63°C), followed by a three-minute rest period.
Temperature Guide:
| Doneness Level | Internal Temperature | Appearance | Texture |
|---|---|---|---|
| Medium-rare | 140°F (60°C) | Slightly pink center | Very juicy |
| Medium | 145°F (63°C) | Barely pink center | Juicy and tender |
| Medium-well | 150°F (66°C) | No pink | Firm but moist |
| Well-done | 160°F (71°C) | No pink | Firm and dry |
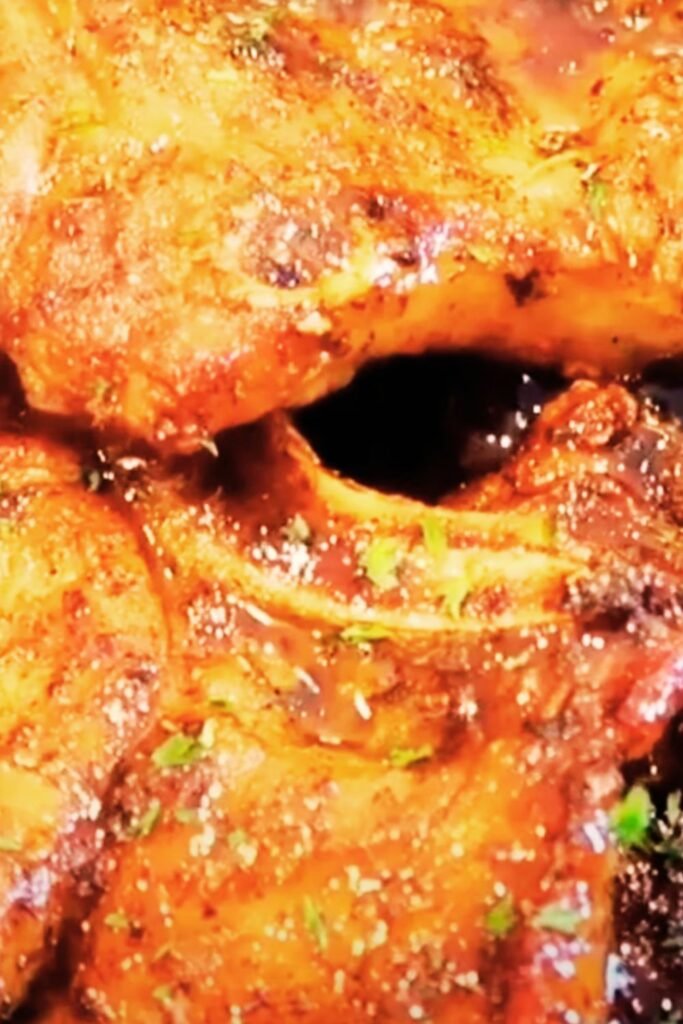
Preparing the Honey Garlic Sauce
While the pork chops are resting, I prepare the sauce in the same pan to capture all those delicious browned bits. I reduce the heat to medium-low and add the minced garlic, stirring constantly for about 30 seconds until fragrant but not browned.
I whisk together the cornstarch and water in a small bowl to create a slurry—this prevents lumps in the final sauce. Then I add the honey, soy sauce, and apple cider vinegar to the pan, followed by the cornstarch slurry.
The sauce will bubble and thicken within 2-3 minutes. I stir constantly to prevent sticking and watch for the consistency to coat the back of a spoon. Finally, I remove the pan from heat and whisk in the cold butter, which gives the sauce a beautiful glossy finish.
Pro Tips for Restaurant-Quality Results
After years of making this dish, I’ve discovered several techniques that elevate it from good to extraordinary:
Brining for Extra Juiciness
I sometimes brine thicker pork chops for 2-4 hours before cooking. My simple brine consists of:
- 4 cups water
- 1/4 cup kosher salt
- 2 tablespoons brown sugar
- 2 bay leaves
This optional step adds incredible moisture and flavor, especially for chops over 1.5 inches thick.
The Reverse Sear Method
For extra-thick chops (over 1.5 inches), I use the reverse sear method:
- Start in a 275°F oven until internal temperature reaches 130°F
- Finish with a high-heat sear in a cast-iron pan
- This ensures even cooking throughout
Sauce Variations I Love
- Asian-inspired: Add 1 teaspoon sesame oil and 1 tablespoon rice vinegar
- Spicy kick: Include 1 teaspoon sriracha or chili garlic sauce
- Herb-infused: Stir in fresh thyme or rosemary at the end
Nutritional Information and Health Benefits
Understanding the nutritional profile helps me appreciate this dish beyond its incredible taste.
Per Serving (1 pork chop with sauce):
| Nutrient | Amount | % Daily Value |
|---|---|---|
| Calories | 385 | 19% |
| Protein | 42g | 84% |
| Total Fat | 12g | 15% |
| Saturated Fat | 4g | 20% |
| Carbohydrates | 28g | 10% |
| Sugar | 26g | – |
| Sodium | 890mg | 39% |
| Iron | 2.1mg | 12% |
| Potassium | 654mg | 14% |
Pork is an excellent source of complete protein, containing all essential amino acids. It’s particularly rich in thiamine (vitamin B1), which supports proper nervous system function.
Perfect Side Dishes and Serving Suggestions
I’ve experimented with countless side dishes over the years, and certain combinations consistently shine:
Vegetable Sides That Complement
- Roasted Brussels sprouts with bacon bits
- Honey-glazed carrots that echo the sauce flavors
- Steamed broccoli with lemon butter
- Roasted asparagus with garlic and parmesan
Starch Accompaniments
- Garlic mashed potatoes (my personal favorite)
- Coconut rice for an Asian twist
- Roasted baby potatoes with herbs
- Wild rice pilaf with cranberries
Fresh Elements for Balance
- Simple green salad with vinaigrette
- Cucumber tomato salad with fresh herbs
- Coleslaw with apple cider vinegar dressing
Storage and Meal Prep Guidelines
This recipe works wonderfully for meal prep, and I often make extra for busy weeknights.
Storage Instructions:
| Storage Method | Duration | Quality |
|---|---|---|
| Refrigerator | 3-4 days | Excellent |
| Freezer | 2-3 months | Good |
| Room temperature | 2 hours maximum | Safe limit |
Reheating Tips
I reheat refrigerated pork chops in a 350°F oven for 8-10 minutes, covered with foil to prevent drying. For frozen chops, I thaw them overnight in the refrigerator before reheating.
The sauce can be stored separately and gently rewarmed on the stovetop with a splash of water if needed.
Troubleshooting Common Issues
Even experienced cooks encounter challenges. Here are solutions to the most common problems I’ve encountered:
Dry Pork Chops
Cause: Overcooking or starting with chops that are too thin Solution: Use a meat thermometer and choose chops at least 1-inch thick
Bland Flavor
Cause: Insufficient seasoning or poor-quality ingredients Solution: Season generously and use fresh garlic, not powder, in the sauce
Sauce Too Thick or Thin
Thick sauce: Add warm water, 1 tablespoon at a time Thin sauce: Mix additional cornstarch with cold water and stir in
Uneven Cooking
Cause: Chops of different thicknesses or cold pan Solution: Pound chops to even thickness and properly preheat pan
Questions and Answers
Q: Can I use bone-in pork chops instead of boneless? A: Absolutely! Bone-in chops will take about 3-5 minutes longer to cook. The bone actually adds flavor, but the cooking process requires more attention to ensure even heating around the bone area.
Q: What’s the best way to know when my pork chops are done? A: I always use a digital meat thermometer inserted into the thickest part of the chop. Look for 145°F (63°C) for perfectly cooked, slightly pink centers. The meat should feel firm but still have some give when pressed.
Q: Can I make the honey garlic sauce ahead of time? A: Yes! I often prepare the sauce up to 2 days in advance and store it in the refrigerator. Reheat gently on the stovetop, whisking in a little water if it’s too thick. The flavors actually improve with time.
Q: My sauce isn’t thickening properly. What went wrong? A: This usually happens when the cornstarch slurry wasn’t mixed thoroughly or the sauce wasn’t hot enough. Make a fresh slurry with equal parts cornstarch and cold water, then whisk it into the simmering sauce.
Q: Can I substitute the honey with another sweetener? A: Maple syrup works beautifully and adds a different flavor profile. Brown sugar mixed with a little water also works, though the consistency will be slightly different. I don’t recommend artificial sweeteners as they don’t caramelize properly.
Q: How do I prevent the garlic from burning in the sauce? A: Keep the heat at medium-low when adding garlic, and stir constantly. I add the liquid ingredients quickly after the garlic becomes fragrant (about 30 seconds) to prevent burning.
Q: Can I grill these pork chops instead of pan-searing? A: Definitely! Preheat your grill to medium-high heat and cook for 4-5 minutes per side. Brush with the honey garlic sauce during the last minute of cooking to prevent burning.
Q: What should I do if my pork chops are sticking to the pan? A: This usually means the pan wasn’t hot enough or you moved the chops too early. Make sure your pan is properly preheated and let the chops develop a crust (about 4 minutes) before attempting to flip them.
Q: Is it safe to eat pork that’s slightly pink? A: Yes! The USDA updated guidelines in 2011, stating that pork is safe to eat at 145°F with a three-minute rest period, even if there’s a hint of pink. This temperature ensures both safety and optimal juiciness.
Q: Can I use this sauce with other proteins? A: This honey garlic sauce is incredibly versatile! I’ve used it successfully with chicken thighs, salmon fillets, and even tofu. Adjust cooking times accordingly for different proteins.
This honey garlic pork chop recipe has become more than just a meal in my kitchen—it’s a reliable way to create something special from simple ingredients. The combination of properly seasoned, perfectly cooked pork with that glossy, flavorful sauce never fails to impress. Whether you’re cooking for family dinner or entertaining guests, this recipe delivers consistent, restaurant-quality results every single time.
The key lies in attention to detail: choosing quality ingredients, proper temperature control, and not rushing the process. Take your time with each step, and you’ll be rewarded with tender, juicy pork chops that are anything but ordinary. I hope this recipe becomes as beloved in your kitchen as it has in mine!