There’s something almost magical about chocolate desserts. The way they comfort us after a long day, bring smiles to dinner parties, and somehow make ordinary moments feel special. I’ve spent years perfecting the art of chocolate indulgence, and today I’m sharing my favorite foolproof recipes that deliver maximum chocolate satisfaction with minimum effort.
Whether you’re a kitchen novice or simply short on time, these desserts will have everyone believing you spent hours creating them. The truth can be our little secret!
The Science Behind Perfect Chocolate Desserts
Before diving into the recipes, let’s talk about what makes chocolate desserts work. Understanding a few basics will elevate your creations from good to unforgettable.
Chocolate contains cocoa butter that melts at body temperature—that’s why it literally melts in your mouth, creating that luxurious sensation we crave. The higher the cocoa percentage, the more intense the chocolate flavor, but also the trickier it can be to work with.
I’ve learned through countless (delicious) trials that chocolate desserts rely on three fundamental principles:
- Temperature matters: Chocolate is sensitive to heat. Melt it slowly and gently to avoid scorching.
- Quality ingredients make a difference: With simple recipes, each ingredient stands out. Use the best chocolate you can afford.
- Balance is key: The perfect chocolate dessert balances sweetness with depth. A pinch of salt often makes chocolate flavor pop.
Now, let’s get into these irresistible recipes that will satisfy your chocolate cravings without complicated techniques!
1. Five-Minute Molten Chocolate Mug Cake
When chocolate cravings strike, this individual cake delivers nearly instant gratification. The magic moment comes when you break through the tender cake exterior to discover the warm, flowing chocolate center.
Ingredients:
- 4 tablespoons all-purpose flour
- 2 tablespoons unsweetened cocoa powder
- ¼ teaspoon baking powder
- 3 tablespoons granulated sugar
- Pinch of salt
- 5 tablespoons milk
- 2 tablespoons vegetable oil
- ¼ teaspoon vanilla extract
- 1 small square dark chocolate (about ½ oz)
Instructions:
- In a microwave-safe mug, whisk together the flour, cocoa powder, baking powder, sugar, and salt until well combined.
- Add milk, oil, and vanilla extract. Stir until smooth with no lumps.
- Push the chocolate square into the center of the batter.
- Microwave on high for 60-90 seconds. The cake should look set but slightly moist on top.
- Let it rest for 2 minutes before eating (the hardest part, I know!).
I love topping mine with a small scoop of vanilla ice cream, which melts beautifully over the warm cake. For special occasions, a sprinkle of sea salt flakes or a few fresh raspberries adds wonderful contrast.
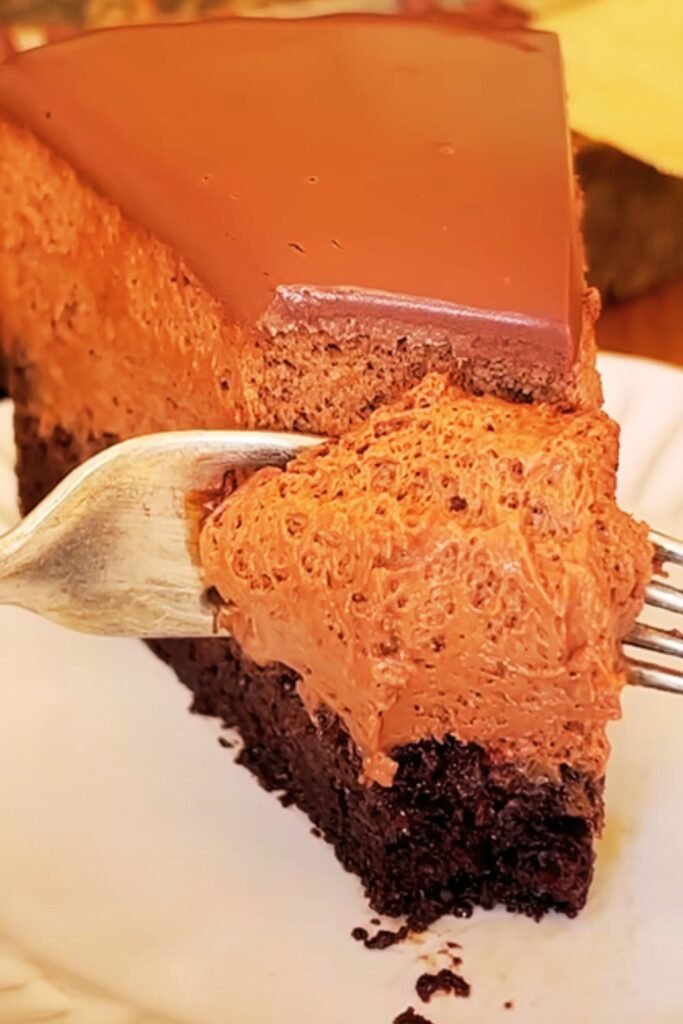
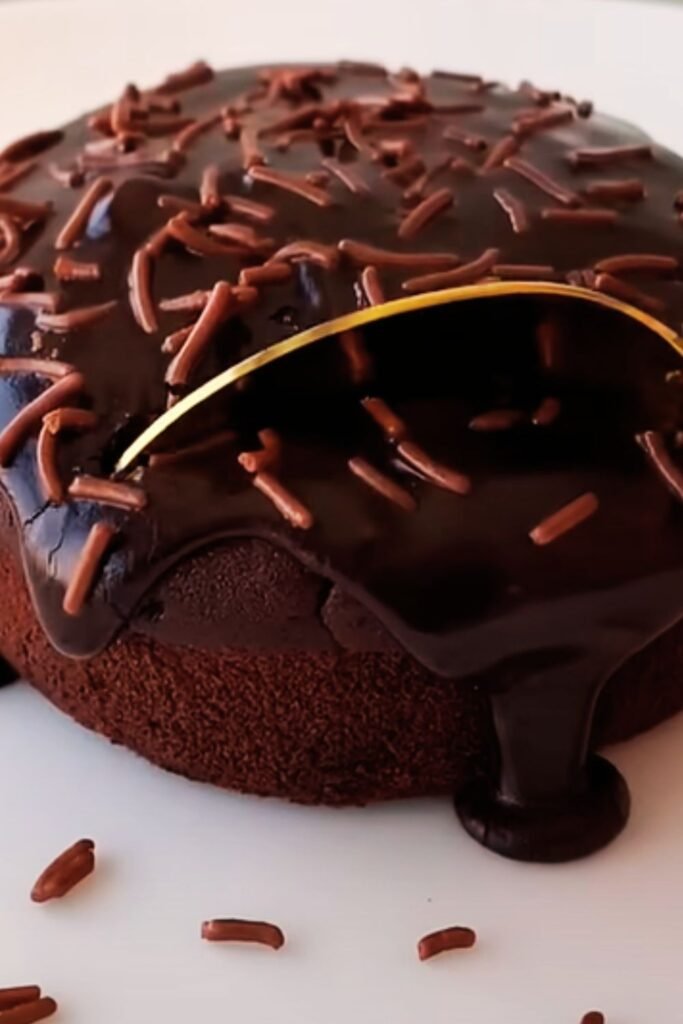
2. No-Bake Chocolate Truffle Tart
This impressive dessert requires zero oven time but delivers restaurant-worthy results. The crisp cookie crust contrasted with silky chocolate filling creates textural magic.
Ingredients:
For the crust:
- 2 cups chocolate cookie crumbs (about 24 sandwich cookies, fillings removed)
- 6 tablespoons unsalted butter, melted
For the filling:
- 2 cups heavy cream
- 12 oz high-quality dark chocolate (60-70% cocoa), finely chopped
- 2 tablespoons unsalted butter, room temperature
- 1 teaspoon vanilla extract
- Pinch of sea salt
Instructions:
- Combine cookie crumbs and melted butter in a bowl until the mixture resembles wet sand.
- Press firmly into a 9-inch tart pan with removable bottom, creating an even layer along the bottom and sides.
- Refrigerate the crust while preparing the filling.
- Heat cream in a saucepan until it just begins to simmer (don’t boil).
- Pour hot cream over chopped chocolate in a heat-proof bowl. Let sit for 3 minutes.
- Gently stir until chocolate melts completely and mixture is smooth.
- Add butter, vanilla, and salt. Stir until incorporated.
- Pour filling into chilled crust and refrigerate for at least 4 hours or overnight.
- Before serving, let tart sit at room temperature for 15-20 minutes for the perfect texture.
This tart keeps beautifully for up to three days in the refrigerator, making it perfect for prepare-ahead entertaining. I sometimes garnish with fresh berries, a light dusting of cocoa powder, or candied orange peel for color contrast.
3. Three-Ingredient Chocolate Mousse
This impossibly simple mousse has become my emergency dessert for unexpected guests. With just three ingredients, it creates a light yet intensely chocolatey experience that seems much more complex than it is.
Ingredients:
- 8 oz high-quality dark chocolate (60-70% cocoa), chopped
- 2 cups cold heavy cream, divided
- 2 tablespoons granulated sugar
Instructions:
- Place chocolate and ½ cup cream in a microwave-safe bowl.
- Microwave in 30-second intervals, stirring between each, until chocolate melts completely.
- Let mixture cool to room temperature (about 10-15 minutes).
- Meanwhile, whip remaining 1½ cups cream with sugar until soft peaks form.
- Fold one-third of the whipped cream into the chocolate mixture to lighten it.
- Gently fold in remaining whipped cream until no streaks remain.
- Spoon into serving glasses and refrigerate for at least 2 hours.
For an elegant presentation, I serve this in clear glasses with contrasting layers: mousse at the bottom, topped with fresh whipped cream, chocolate shavings, and perhaps a single perfect raspberry.
Quick tip: If the mousse seems too loose after folding, refrigerate the chocolate-cream mixture for 10 minutes before folding in the remaining whipped cream. This helps it set properly.
4. Fudgy One-Bowl Brownies
After testing countless brownie recipes, I’ve perfected this one-bowl wonder that creates the ideal balance of fudgy center and crackly top. The best part? Just one bowl to wash!
Ingredients:
- ½ cup unsalted butter
- 1 cup granulated sugar
- 2 large eggs, room temperature
- 1 teaspoon vanilla extract
- ½ cup all-purpose flour
- ½ cup unsweetened cocoa powder
- ¼ teaspoon salt
- ½ cup chocolate chips or chunks
Instructions:
- Preheat oven to 350°F (175°C). Line an 8×8 inch baking pan with parchment paper.
- Melt butter in a large microwave-safe bowl.
- Whisk in sugar until well combined.
- Add eggs one at a time, whisking well after each addition.
- Stir in vanilla extract.
- Sift cocoa powder, flour, and salt directly into the bowl.
- Fold dry ingredients into wet ingredients until just combined.
- Fold in chocolate chips.
- Transfer batter to prepared pan and spread evenly.
- Bake for 25-30 minutes. The center should be set but still slightly soft.
- Cool completely before cutting for clean edges.
The true secret to these brownies is not overbaking them. When in doubt, it’s better to pull them out a minute early than a minute late. They’ll continue to cook slightly as they cool.
5. Chocolate Pots de Crème
This silky French custard feels luxurious but requires just a few minutes of active preparation. The result is pure chocolate elegance.
Ingredients:
- 1½ cups heavy cream
- ½ cup whole milk
- 6 oz high-quality dark chocolate, finely chopped
- 4 large egg yolks
- ¼ cup granulated sugar
- ¼ teaspoon salt
- 1 teaspoon vanilla extract
Instructions:
- Preheat oven to 325°F (165°C).
- Heat cream and milk in a saucepan until it just begins to simmer.
- Place chocolate in a bowl and pour the hot cream mixture over it. Let stand for 3 minutes, then whisk until smooth.
- In a separate bowl, whisk egg yolks, sugar, and salt until pale yellow.
- Gradually whisk the chocolate mixture into the egg mixture.
- Stir in vanilla extract.
- Strain mixture through a fine-mesh sieve to remove any bits of cooked egg.
- Divide among 6 ramekins or small cups.
- Place ramekins in a large baking dish and fill with hot water until it reaches halfway up the sides of the ramekins.
- Bake for 25-30 minutes, until the edges are set but centers still jiggle slightly.
- Cool completely, then refrigerate for at least 4 hours or overnight.
I find these are best served with a small dollop of unsweetened whipped cream, which provides a beautiful contrast to the rich chocolate. A light dusting of cocoa powder or a few chocolate-covered espresso beans makes for an elegant garnish.
Comparative Analysis: Chocolate Types for Desserts
Different chocolate types yield different results in desserts. Here’s a breakdown to help you choose the right chocolate for your recipe:
| Chocolate Type | Cocoa % | Best Uses | Flavor Profile | Substitution Tips |
|---|---|---|---|---|
| Unsweetened | 100% | Baking, recipes with added sugar | Intense, bitter | Replace with 70% dark + reduce recipe sugar |
| Bittersweet | 70-85% | Ganache, mousse, sophisticated desserts | Deep, complex, slightly sweet | Can substitute semisweet + unsweetened |
| Semisweet | 55-65% | Versatile, cookies, brownies | Balanced sweetness | Good universal option |
| Milk Chocolate | 30-45% | Kid-friendly desserts, lighter flavors | Creamy, sweet | Add cocoa powder for more intensity |
| White Chocolate | 0% (cocoa butter only) | Contrast, creamy desserts | Sweet, vanilla, buttery | Not technically chocolate, cannot substitute for other types |
| Ruby Chocolate | N/A | Decorative, specialty desserts | Fruity, berry notes | New variety, use as specialty ingredient |
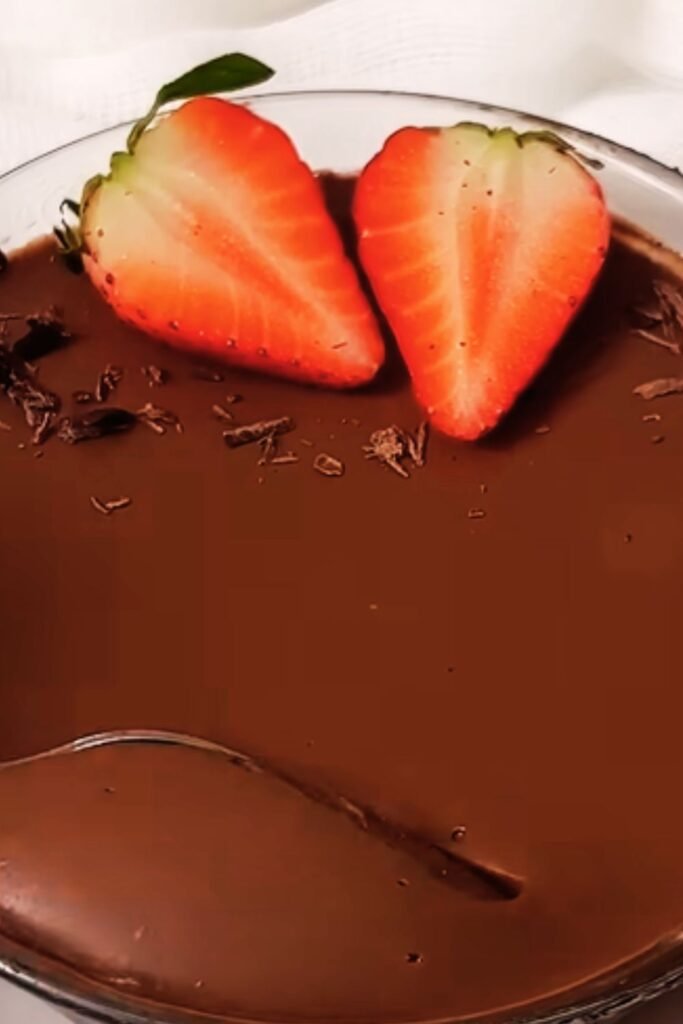
6. Ten-Minute Chocolate Pudding
Forget boxed pudding mix! This homemade version takes just slightly longer but delivers incomparably richer flavor and silkier texture. It’s become my go-to comfort dessert.
Ingredients:
- ½ cup granulated sugar
- 3 tablespoons cornstarch
- ¼ teaspoon salt
- 2½ cups whole milk
- 6 oz semisweet chocolate, chopped
- 1 teaspoon vanilla extract
- 1 tablespoon unsalted butter
Instructions:
- In a medium saucepan, whisk together sugar, cornstarch, and salt.
- Gradually whisk in milk until smooth.
- Cook over medium heat, whisking constantly, until mixture thickens and comes to a boil (about 5-7 minutes).
- Once mixture begins bubbling, cook for 1 more minute, still whisking.
- Remove from heat and add chocolate, vanilla, and butter.
- Whisk until chocolate and butter melt completely and mixture is smooth.
- Pour into serving dishes and press plastic wrap directly onto the surface (to prevent skin from forming).
- Refrigerate until chilled, about 2 hours.
I love serving this classic pudding in vintage glasses or small mason jars for charming presentation. For adults, a sprinkle of flaky sea salt on top creates a sophisticated flavor contrast.
7. Two-Ingredient Chocolate Soufflé
The word “soufflé” strikes fear in many home cooks, but this simplified version delivers impressive height and texture with just two ingredients. It’s my favorite way to impress dinner guests with minimal effort.
Ingredients:
- 4 oz high-quality dark chocolate
- 4 large eggs, separated
Instructions:
- Preheat oven to 375°F (190°C). Butter four 6-oz ramekins.
- Melt chocolate in the microwave in 30-second intervals, stirring between each, until smooth.
- Let chocolate cool slightly, then whisk in egg yolks one at a time.
- In a separate bowl, beat egg whites until stiff peaks form.
- Gently fold egg whites into chocolate mixture in three additions.
- Fill prepared ramekins about ¾ full.
- Bake for 12-14 minutes, until risen but centers still jiggle slightly.
- Serve immediately.
The key to soufflé success is proper folding technique: cut through the center of the mixture with a spatula, scrape along the bottom of the bowl, and fold the mixture over itself. Rotate the bowl slightly and repeat until just incorporated.
8. Easy Chocolate-Dipped Fruits
Sometimes the simplest desserts are the most satisfying. Chocolate-dipped fruits provide the perfect balance of indulgence and freshness.
Ingredients:
- 8 oz high-quality dark, milk, or white chocolate
- Assorted fruits: strawberries, banana slices, orange segments, etc.
- Optional toppings: chopped nuts, coconut flakes, sprinkles
Instructions:
- Line a baking sheet with parchment paper.
- Prepare fruits: wash and thoroughly dry (important for the chocolate to adhere).
- Melt chocolate in a microwave-safe bowl in 30-second intervals, stirring between each.
- Dip each piece of fruit halfway into the chocolate.
- Place on parchment paper.
- While chocolate is still wet, sprinkle with optional toppings if desired.
- Refrigerate for 15-20 minutes until chocolate sets.
I find this dessert works beautifully for entertaining because guests can customize their choices. For summer gatherings, frozen banana slices dipped in chocolate create a refreshing treat that feels like ice cream but is far simpler to prepare.
9. No-Churn Chocolate Ice Cream
Homemade ice cream without an ice cream maker? Absolutely possible, and deliciously creamy with this foolproof recipe that’s become my summer staple.
Ingredients:
- 2 cups heavy cream, cold
- 1 (14 oz) can sweetened condensed milk
- ½ cup unsweetened cocoa powder
- 1 teaspoon vanilla extract
- ¼ teaspoon salt
- 1 cup mix-ins (optional): chocolate chips, brownie bits, crushed cookies
Instructions:
- Whip heavy cream until stiff peaks form.
- In a separate bowl, whisk together condensed milk, cocoa powder, vanilla, and salt until smooth.
- Fold whipped cream into chocolate mixture in three additions until fully incorporated.
- Gently fold in any mix-ins if using.
- Transfer to a loaf pan or freezer-safe container.
- Cover with plastic wrap, pressing it directly onto the surface.
- Freeze for at least 6 hours or overnight.
The science behind this no-churn method is fascinating: the condensed milk provides enough sugar to prevent large ice crystals from forming, while the whipped cream incorporates air for a lighter texture. The result rivals premium store-bought options!
10. Five-Layer Chocolate Parfait
This showstopper looks complex but simply involves layering ready-made or easy homemade components. It’s my favorite dessert for dinner parties because most components can be prepared days ahead.
Ingredients:
- 1 cup chocolate cookie crumbs
- 2 tablespoons melted butter
- 2 cups chocolate pudding (homemade or store-bought)
- 1 cup whipped cream
- ½ cup chocolate sauce
- ¼ cup chocolate shavings
- Fresh berries (optional)
Instructions:
- Mix cookie crumbs with melted butter and divide among 6 serving glasses.
- Layer chocolate pudding over cookie base.
- Add a layer of whipped cream.
- Drizzle with chocolate sauce.
- Top with more whipped cream, chocolate shavings, and fresh berries if using.
- Refrigerate for at least 1 hour before serving.
For special occasions, I sometimes add a splash of coffee liqueur to the cookie crumb layer for adults, which adds wonderful depth to the flavor profile.
Serving Suggestions
The right presentation elevates a simple chocolate dessert to memorable status. Here are my favorite serving ideas:
- Temperature contrast: Serve warm chocolate desserts with cold cream or ice cream
- Textural elements: Add crunchy components like toasted nuts or cookie crumbles
- Color pops: Garnish with fresh mint, berries, or edible flowers
- Dusting effects: Use powdered sugar, cocoa powder, or cinnamon through a small sieve
- Sauce artistry: Drizzle plates with chocolate sauce using a squeeze bottle
- Drinking pairings: Serve with coffee, tea, or milk for kids
Troubleshooting Common Chocolate Dessert Problems
Even experienced bakers encounter issues with chocolate. Here’s how I solve the most common problems:
Problem: Seized chocolate (grainy texture when melting)
Solution: Add 1 tablespoon of vegetable oil or solid shortening per 6 ounces of chocolate and stir gently over very low heat.
Problem: Chocolate ganache separated or oily
Solution: Whisk in 1-2 tablespoons of warm cream or milk until it comes back together.
Problem: Chocolate won’t set properly
Solution: Place in refrigerator for 10-15 minutes, but not longer as it can develop condensation.
Problem: Chocolate coating too thick
Solution: Add a teaspoon of neutral oil (like vegetable or coconut) to thin it out.
Problem: Brownies too fudgy/undercooked
Solution: Return to oven for 3-5 minutes; if already cooled, cut into squares and bake individually for 1-2 minutes.
Q&A Section
Q: Which chocolate is best for melting and dipping? A: Chocolate with around 60% cocoa content typically melts most smoothly. For easiest melting without tempering, use high-quality chocolate chips or chocolate bars with cocoa butter (not palm oil). Chocolate specifically labeled “melting chocolate” or “coating chocolate” is formulated to melt and set without tempering.
Q: Can I make these desserts ahead of time? A: Most of these desserts can be made 1-2 days ahead. The no-bake tart, chocolate mousse, pots de crème, and pudding actually improve with a day of rest as flavors develop. The mug cake and soufflé should be made just before serving. Store-covered desserts in the refrigerator and bring them to room temperature 15-30 minutes before serving.
Q: How do I know when chocolate desserts are done baking? A: For brownies and cakes, look for set edges but a center that still has slight movement. A toothpick inserted should come out with a few moist crumbs (not wet batter). For custards like pots de crème, the edges should be set but the center should jiggle slightly when the ramekin is gently shaken.
Q: What’s the difference between Dutch-processed and natural cocoa powder? A: Dutch-processed cocoa powder has been treated with an alkalizing agent, making it darker, smoother, and less acidic than natural cocoa powder. For recipes with baking soda (which needs acid to activate), natural cocoa powder works best. For recipes without leavening agents or with baking powder, either type works well. When in doubt, use the type specified in your recipe.
Q: My chocolate seized when I was melting it. Can I save it? A: Yes! If your chocolate has seized (turned grainy or clumpy), you can often rescue it by immediately stirring in 1 tablespoon of vegetable oil or coconut oil per 6 ounces of chocolate. Stir continuously over very low heat until smooth again. Seized chocolate can still be used in baked goods like brownies or cake batters even if you can’t rescue the smooth texture.
Q: I don’t have heavy cream. What can I substitute? A: For most chocolate desserts, you can substitute full-fat coconut milk (the canned variety, not coconut beverage) for heavy cream with good results. For whipping, chill the coconut milk can overnight, open without shaking, and scoop out just the solid white cream that has risen to the top.
Final Thoughts
Chocolate desserts don’t need to be complicated to be spectacular. The recipes I’ve shared focus on maximizing chocolate flavor while minimizing unnecessary steps and ingredients. The beauty of these desserts lies in their simplicity—they allow the chocolate to shine.
I encourage you to experiment with different chocolate varieties in these recipes. Each type will bring its own character to the final dessert. Whether you prefer the intense depth of dark chocolate or the creamy sweetness of milk chocolate, these recipes provide the perfect canvas for your chocolate preferences.
Remember that chocolate desserts often taste even better the next day as flavors meld and develop. That makes many of these recipes perfect for prepare-ahead entertaining or weekend treats that keep giving.
The most important ingredient in any chocolate dessert isn’t listed in the recipe—it’s the joy that comes from creating something delicious and sharing it with others. Happy baking!