There’s something utterly magical about the combination of chocolate, cherries, and cream. As someone who’s spent countless hours perfecting roll cakes in my kitchen, I can confidently say that this Black Forest Roll Cake stands as one of the most impressive yet achievable showstoppers in my dessert repertoire.
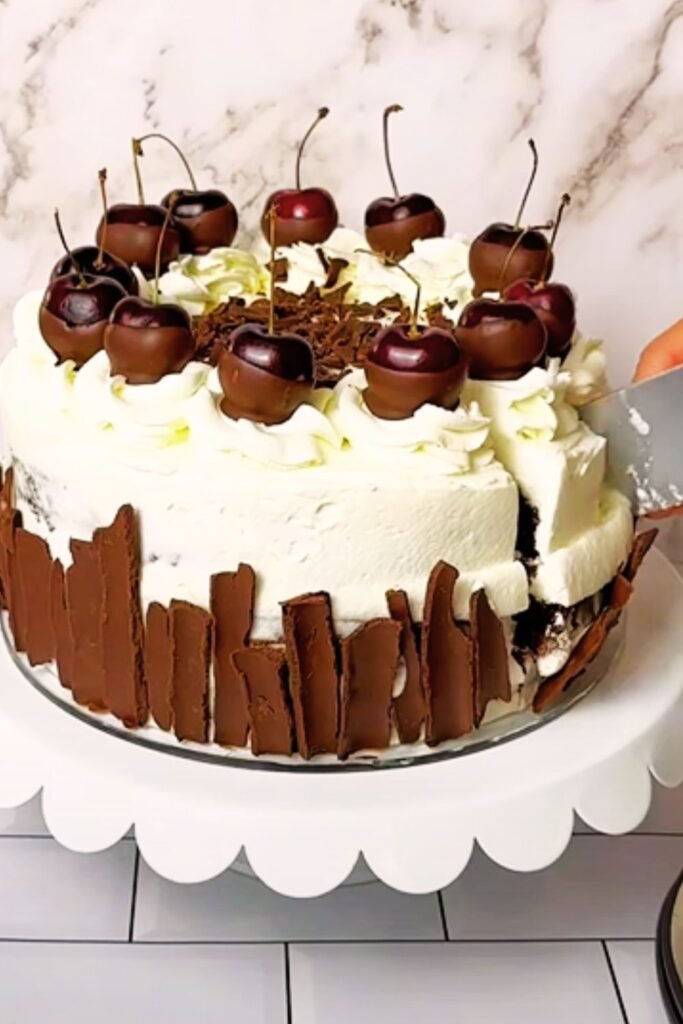
This elegant rolled version of the classic Black Forest Cake (Schwarzwälder Kirschtorte) brings all the beloved flavors of the traditional German dessert into a more approachable format. The spiral of rich chocolate sponge wrapped around billowy whipped cream and juicy cherries creates not just a feast for the palate, but a visual delight that never fails to elicit gasps of admiration from my guests.
What I love most about this particular recipe is how it balances sophistication with accessibility. While it looks like something from a high-end patisserie window, the techniques involved are manageable for home bakers willing to follow the process carefully. The result is a dessert that bridges the gap between everyday indulgence and special occasion centerpiece.
In this guide, I’ll walk you through each step of creating this luxurious treat, from achieving the perfect crack-free roll to arranging those final decorative touches that elevate this cake to true gourmet status.
Ingredients
For the Chocolate Sponge:
- 6 large eggs, separated
- 150g (¾ cup) granulated sugar
- 1 teaspoon vanilla extract
- 120g (1 cup) all-purpose flour
- 35g (⅓ cup) unsweetened cocoa powder
- ½ teaspoon baking powder
- ¼ teaspoon salt
- 2 tablespoons unsalted butter, melted and cooled
For the Cherry Filling:
- 500g (about 3 cups) fresh or frozen cherries, pitted
- 100g (½ cup) granulated sugar
- 2 tablespoons cornstarch
- 2 tablespoons water
- 2 tablespoons kirsch (cherry liqueur) or cherry juice for non-alcoholic version
- ½ teaspoon almond extract
For the Whipped Cream Filling & Frosting:
- 600ml (2½ cups) heavy whipping cream, very cold
- 60g (½ cup) confectioners’ sugar
- 2 teaspoons vanilla extract
- 2 teaspoons unflavored gelatin (optional, for stability)
- 2 tablespoons cold water (if using gelatin)
For Decoration:
- 100g (3½ oz) dark chocolate, for chocolate curls/shavings
- 12 fresh cherries with stems (if available)
- 2 tablespoons unsweetened cocoa powder, for dusting
Equipment Needed
Before diving into the preparation, make sure you have these essential tools:
- Swiss roll pan (approximately 38cm × 25cm or 15″ × 10″)
- Parchment paper
- Electric mixer (stand or hand)
- Rubber spatula
- Sieve/sifter for dry ingredients
- Clean kitchen towel
- Wire cooling rack
- Small saucepan
- Pastry brush
- Piping bag with star tip (optional for decoration)
Preparation Time
| Task | Time |
|---|---|
| Prep work | 30 minutes |
| Baking the sponge | 12-15 minutes |
| Cooling | 1-2 hours |
| Making the cherry filling | 20 minutes |
| Assembling and decorating | 45 minutes |
| Chilling before serving | Minimum 2 hours |
| Total Time | 4-5 hours (including chilling) |
Instructions
Step 1: Prepare the Cherry Filling
I always start with the cherry filling first as it needs time to cool completely before assembly:
- In a medium saucepan, combine the pitted cherries and sugar. Cook over medium heat until the cherries release their juices and begin to soften, about 5-7 minutes.
- In a small bowl, whisk together the cornstarch and water to make a slurry.
- Pour the slurry into the cherry mixture while stirring constantly.
- Continue cooking until the mixture thickens significantly, about 2-3 minutes.
- Remove from heat and stir in the kirsch (or cherry juice) and almond extract.
- Transfer to a bowl and let cool completely, then refrigerate until ready to use.
My Pro Tip: For deeper flavor, prepare the cherry filling a day ahead. The extra time allows the cherry flavor to intensify beautifully.
Step 2: Prepare the Chocolate Sponge
- Preheat your oven to 180°C (350°F). Line your Swiss roll pan with parchment paper, extending it slightly over the edges for easy removal. Lightly grease the parchment.
- Separate the egg whites and yolks into different bowls. Ensure both bowls are completely clean and free from any grease, especially the bowl for the whites.
- In a large bowl, beat the egg yolks and half the sugar (75g) until pale and thick – when you lift the beaters, the mixture should fall back in ribbons. This usually takes about 3-4 minutes. Beat in the vanilla extract.
- In a separate bowl, sift together the flour, cocoa powder, baking powder, and salt.
- Using clean beaters, whip the egg whites in a large bowl until soft peaks form. Gradually add the remaining sugar (75g) while continuing to beat until you achieve stiff, glossy peaks.
- Fold the dry ingredients into the egg yolk mixture using a rubber spatula, being careful not to overmix.
- Gradually fold in the whipped egg whites, one-third at a time, maintaining as much air as possible in the batter.
- Finally, fold in the melted butter very gently.
- Pour the batter into the prepared pan, smoothing it evenly to the edges with an offset spatula.
- Bake for 12-15 minutes, or until the cake springs back when touched lightly in the center. Be careful not to overbake, as a dry sponge will crack when rolling.
Step 3: Rolling the Warm Cake
This step is crucial for preventing cracks in your finished roll cake:
- While the cake is baking, lay a clean kitchen towel on your work surface and dust it generously with cocoa powder.
- As soon as the cake comes out of the oven, run a knife around the edges to loosen it from the pan.
- In one quick motion, invert the hot cake onto the prepared towel. Carefully peel off the parchment paper.
- Starting from the short end, gently roll the cake along with the towel. The towel will prevent the cake from sticking to itself.
- Place the rolled cake on a wire rack, seam side down, and let it cool completely (about 1-2 hours).
My Pro Tip: Never try to roll a warm sponge without the towel! The towel not only prevents sticking but also absorbs excess moisture as the cake cools, helping prevent sogginess.
Step 4: Prepare the Whipped Cream
If using gelatin for a more stable whipped cream (which I recommend, especially in warmer weather):
- In a small bowl, sprinkle the gelatin over the cold water and let stand for 5 minutes to bloom.
- Microwave the bloomed gelatin for 10 seconds or until just melted. Let it cool slightly but ensure it doesn’t set.
- In a large chilled bowl, beat the heavy cream until it begins to thicken.
- Gradually add the confectioners’ sugar and vanilla extract while continuing to beat.
- With the mixer running, slowly pour in the melted gelatin (if using).
- Continue beating until the cream holds firm peaks, being careful not to overbeat.
My Pro Tip: Chill your mixing bowl and beaters in the freezer for 15 minutes before whipping the cream. The colder everything is, the faster and more stable your whipped cream will be.
Step 5: Assemble the Roll Cake
- Once the rolled cake has cooled completely, gently unroll it. Don’t worry if it doesn’t lie completely flat – forcing it could cause breakage.
- Spread about two-thirds of the whipped cream evenly over the unrolled cake, leaving a 1cm (½ inch) border around the edges.
- Spoon the cooled cherry filling over the cream, distributing it evenly but keeping it away from the edges.
- Starting from the same short end as before, carefully re-roll the cake, using the towel to help guide the roll. Roll firmly but gently to avoid squeezing out the filling.
- Place the cake seam-side down on a serving platter or board.
- Use the remaining whipped cream to frost the outside of the roll, either completely or just on top as preferred.
Step 6: Decorate
- For chocolate curls: Use a vegetable peeler to shave along the edge of a room temperature chocolate bar. For larger curls, warm the chocolate slightly.
- Arrange the chocolate curls along the top and sides of the cake.
- Place the fresh cherries strategically along the top of the cake.
- Dust lightly with cocoa powder just before serving for a professional finish.
- Optional: If you reserved some whipped cream, pipe rosettes between the cherries for an extra flourish.
- Refrigerate for at least 2 hours before serving to allow the flavors to meld and the cake to set.
Storage and Make-Ahead Tips
This roll cake can be prepared in stages over a couple of days:
| Component | Storage Method | Maximum Storage Time |
|---|---|---|
| Cherry filling | Refrigerated in airtight container | Up to 3 days |
| Baked and rolled sponge (unfilled) | Wrapped in plastic at room temperature | 1 day |
| Completed cake | Refrigerated | 2-3 days |
The fully assembled cake is best enjoyed within 2 days, as the moisture from the filling will gradually soften the sponge. For the freshest presentation, I recommend assembling the cake on the same day you plan to serve it, but allowing at least 2 hours of chilling time before slicing.
Serving Suggestions
The Black Forest Roll Cake is a showstopper on its own, but here are some elegant serving ideas to elevate the experience:
- Accompany each slice with a small scoop of vanilla or cherry ice cream
- Serve alongside a shot of espresso for a sophisticated coffee pairing
- Add a drizzle of warm chocolate sauce at the table for dramatic effect
- Present with a small dish of extra cherries on the side
- For special occasions, dust each plate with cocoa powder using a stencil for an artistic touch
- Garnish plates with mint leaves for a pop of color
Troubleshooting Common Issues
| Problem | Possible Cause | Solution |
|---|---|---|
| Cake cracking when rolling | Overbaked sponge or rolled when too cool | Bake for less time or roll immediately while hot |
| Filling oozing out | Too much filling or not chilled enough | Use less filling or chill the assembled cake longer |
| Soggy cake | Cherry filling too wet | Drain extra juice from cherries or cook filling longer |
| Whipped cream deflating | Overbeaten cream or too warm | Use stabilized cream with gelatin and keep everything cold |
| Uneven thickness when sliced | Rolling too loosely | Maintain tension while rolling without squeezing |
Special Dietary Adaptations
This luxurious dessert can be modified to accommodate various dietary needs:
Gluten-Free Version:
- Replace all-purpose flour with a gluten-free flour blend (look for one with xanthan gum included)
- Add ¼ teaspoon of xanthan gum if your blend doesn’t include it
- Gluten-free cakes can be more fragile, so handle with extra care when rolling
Dairy-Free Option:
- Substitute the butter with dairy-free margarine or coconut oil
- Replace heavy cream with full-fat coconut cream (refrigerated overnight and liquid drained)
- Use dairy-free dark chocolate for decorations
Reduced Sugar Variation:
- Cut sugar in the sponge and filling by up to one-third
- Use a sugar alternative like erythritol or monk fruit in the whipped cream
- Select dark chocolate with at least 70% cocoa solids for decorations
Q&A Section
Q: Why did my cake crack when I tried to roll it? A: The most common reason for cracking is that the sponge was either overbaked (making it too dry) or it cooled too much before rolling. Always roll the cake while it’s still hot from the oven, and make sure to use the towel method described in the recipe. Also, be gentle but confident when rolling – hesitation can lead to uneven pressure and cracks.
Q: Can I make this cake without alcohol? A: Absolutely! Simply substitute the kirsch with cherry juice, cherry syrup, or even a tablespoon of lemon juice mixed with a drop of almond extract. The flavor profile will be slightly different but equally delicious.
Q: My whipped cream became runny during assembly. What went wrong? A: Whipped cream can deflate if it gets too warm or if it was overbeaten. For stability, I highly recommend using the gelatin option mentioned in the recipe. Also, make sure all your tools are very cold before whipping. If you live in a particularly warm climate, you might want to assemble the cake in stages, returning components to the refrigerator as needed.
Q: How do I prevent the filling from making my cake soggy? A: Make sure your cherry filling has cooled completely and has thickened properly. If it seems too wet, strain off some of the excess liquid before assembling. Additionally, creating a layer of whipped cream before adding the cherry filling creates a barrier that helps protect the sponge.
Q: Can I freeze this roll cake? A: Yes, but with some caveats. Freeze the assembled but undecorated cake wrapped tightly in plastic wrap, then in aluminum foil. Thaw overnight in the refrigerator and add fresh decorations before serving. Note that the texture of the cherries may change slightly after freezing and thawing, but the flavor will still be delicious.
Q: What can I use if I don’t have a proper Swiss roll pan? A: A regular rimmed baking sheet can work as long as you create a barrier for the batter. Use folded aluminum foil to create “walls” inside your baking sheet to the dimensions needed (typically 38cm × 25cm or 15″ × 10″). Line with parchment paper as usual.
Q: My chocolate curls aren’t forming properly. Any tips? A: The temperature of the chocolate is key. If it’s too cold, you’ll get crumbles rather than curls. Try warming the chocolate bar slightly by holding it in your hands for a minute. Alternatively, place it in a warm (not hot) area for a few minutes. The chocolate should yield slightly when pressed but not melt on contact.
Q: Can I use canned cherry pie filling instead of making my own? A: While you can use canned filling in a pinch, I strongly recommend making your own. Commercial fillings are often overly sweet and contain thickeners and artificial flavors that can overpower the delicate balance of the cake. If you must use canned, look for a premium brand with whole cherries and drain off excess syrup.
Final Thoughts
Creating this Luxurious Black Forest Roll Cake is truly a labor of love, but the results are well worth the effort. The combination of light chocolate sponge, bright cherry filling, and cloud-like whipped cream creates a dessert that’s sophisticated yet comforting.
What I find most rewarding about this recipe is how it takes the beloved flavors of a traditional Black Forest Cake and reimagines them in an elegant rolled format. The spiral pattern revealed when sliced never fails to impress guests, yet the familiar flavor combination provides a nostalgic comfort.
Remember that perfection comes with practice. If your first attempt isn’t picture-perfect, don’t be discouraged! Each time you make this recipe, you’ll gain confidence with the rolling technique and develop your own personal touches.
Whether for holidays, birthdays, or simply to elevate an ordinary day to something special, this Black Forest Roll Cake brings a touch of European café elegance to your table. Enjoy the process as much as the delicious result!