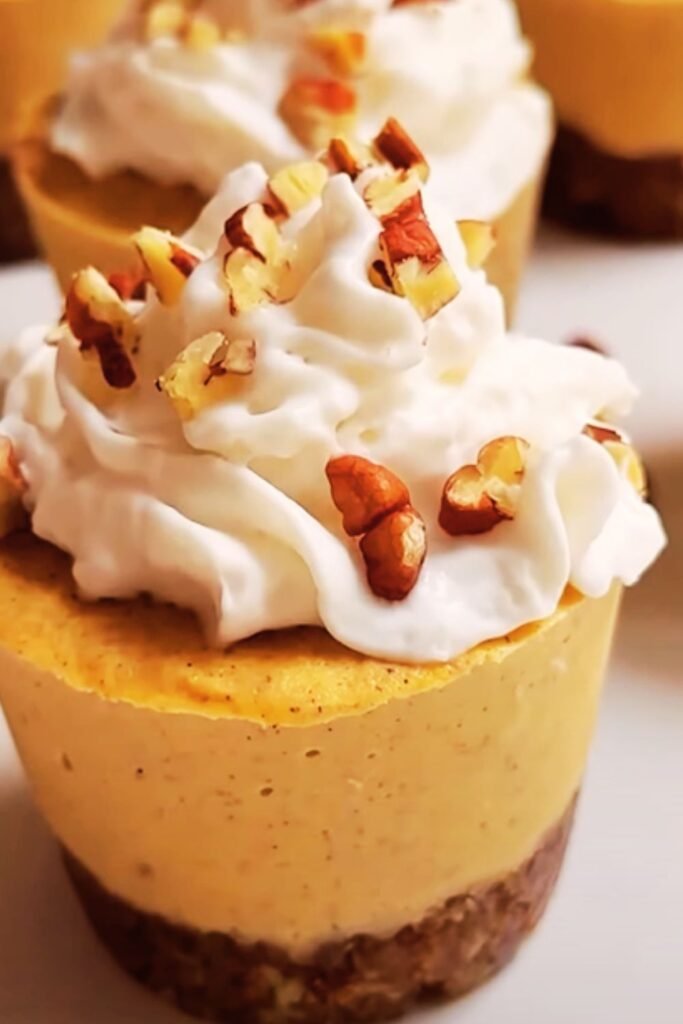
There’s something magical about the combination of creamy cheesecake and warm pumpkin spices that just screams “autumn.” I’ve been perfecting these mini pumpkin cheesecakes for years, and they’ve become my signature dessert for fall gatherings. Unlike traditional cheesecakes that can be intimidating to make, these adorable single-serving treats are surprisingly simple and absolutely foolproof.
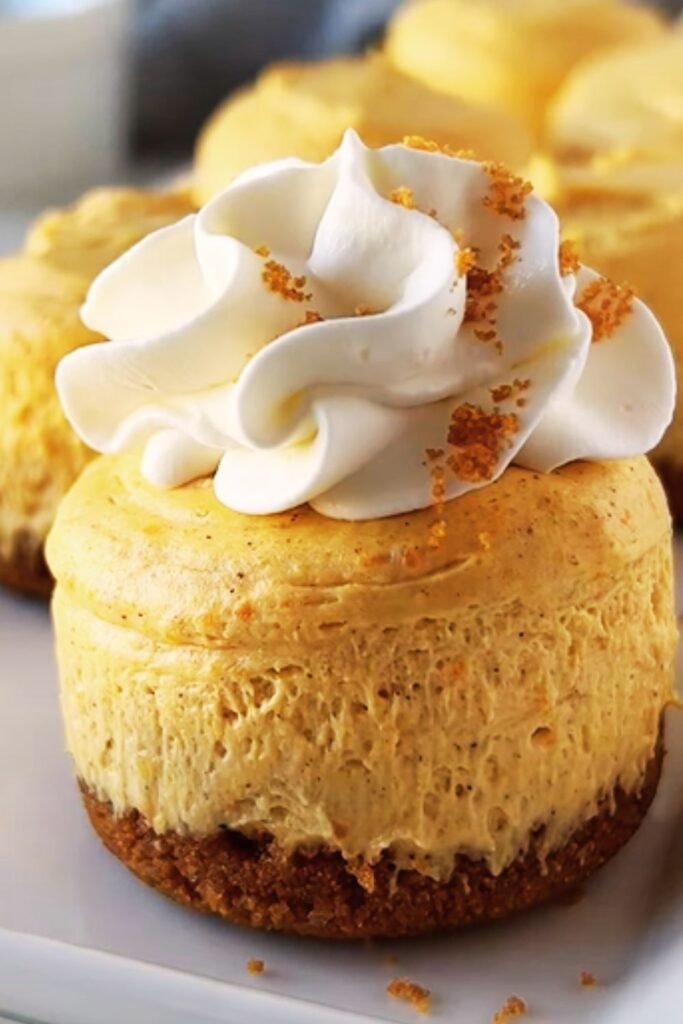
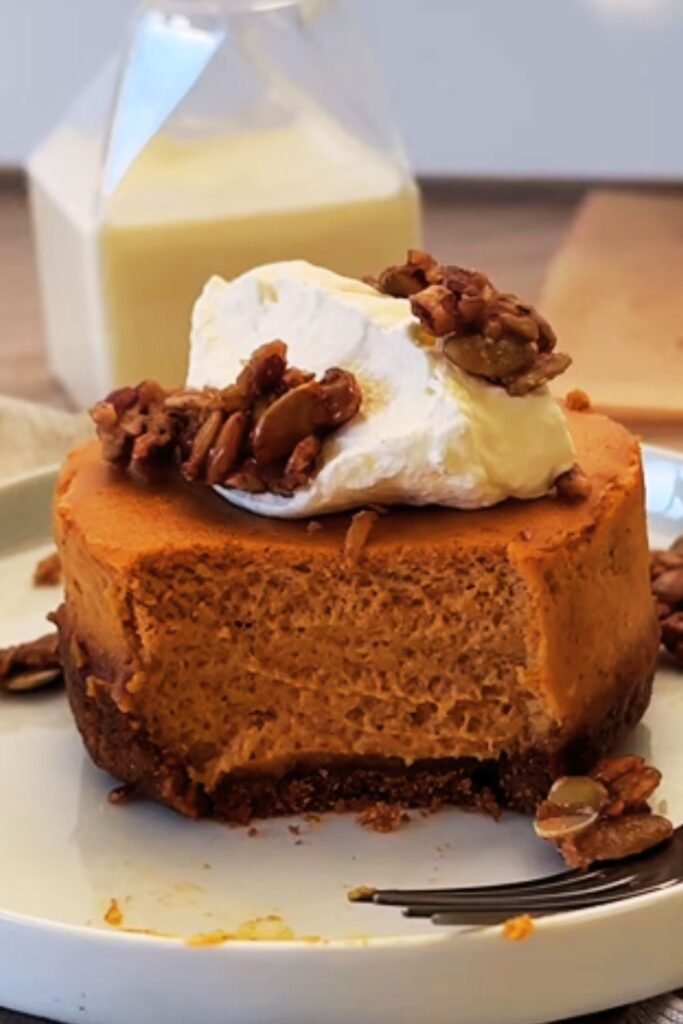
What I love most about these mini pumpkin cheesecakes is how they deliver all the flavor and decadence of a full-sized cheesecake in just a few delightful bites. The gingersnap crust provides the perfect spicy foundation for the silky-smooth pumpkin filling. And the best part? You can easily make them ahead of time, which makes them perfect for holiday entertaining or potlucks.
Whether you’re an experienced baker or just starting out, this recipe will guide you through creating these impressive desserts that will have everyone asking for the recipe. So let’s get started on creating these little treasures that capture the essence of fall in every bite!
Why You’ll Love This Recipe
I’ve shared these mini pumpkin cheesecakes at countless gatherings, and they’re always met with rave reviews. Here’s why they’ve become my go-to fall dessert:
- Individual servings: No more messy slicing! Each guest gets their own perfect portion.
- Make-ahead friendly: These can be prepared up to 3 days in advance, making party prep a breeze.
- Beginner-friendly: Much less finicky than traditional cheesecakes with no water bath required.
- Customizable toppings: Create a topping bar and let guests garnish their own.
- Perfectly portioned: Just enough to satisfy your sweet tooth without going overboard.
- Transport easily: Much simpler to transport than a full cheesecake.
- Impressive presentation: They look like they came from a fancy bakery!
Essential Ingredients
For the Gingersnap Crust
- 1½ cups gingersnap cookie crumbs (about 25-30 cookies)
- 3 tablespoons unsalted butter, melted
- 1 tablespoon brown sugar
- ¼ teaspoon salt
For the Pumpkin Cheesecake Filling
- 16 ounces (2 blocks) cream cheese, softened to room temperature
- ¾ cup granulated sugar
- 1 cup pure pumpkin puree (not pumpkin pie filling)
- 3 large eggs, at room temperature
- 1 teaspoon vanilla extract
- 1½ teaspoons pumpkin pie spice
- ½ teaspoon ground cinnamon
- ¼ teaspoon ground nutmeg
- ¼ teaspoon salt
- 2 tablespoons all-purpose flour
For the Whipped Cream Topping
- 1 cup heavy whipping cream, chilled
- 3 tablespoons powdered sugar
- ½ teaspoon vanilla extract
- ¼ teaspoon cinnamon (optional)
Optional Garnishes
- Cinnamon sticks
- Caramel sauce
- Chopped pecans or walnuts
- Pumpkin pie spice for dusting
- Candied ginger pieces
Special Equipment Needed
- Standard 12-cup muffin tin
- Paper or foil cupcake liners
- Electric mixer (stand or hand mixer)
- Small food processor (for crushing cookies, but you can also use a ziplock bag and rolling pin)
- Piping bag with star tip (optional, for decorative whipped cream)
Step-by-Step Instructions
Preparing the Crust
- Preheat your oven to 350°F (175°C) and line a standard 12-cup muffin tin with cupcake liners.
- In a food processor, pulse the gingersnap cookies until they form fine crumbs. Alternatively, place them in a sealed ziplock bag and crush with a rolling pin.
- In a medium bowl, combine the gingersnap crumbs, melted butter, brown sugar, and salt. Mix until the mixture resembles wet sand.
- Divide the crust mixture evenly among the prepared muffin cups (about 1 tablespoon per cup). Use the bottom of a small glass or measuring cup to press down firmly, creating a compact base.
- Bake the crusts for 5 minutes, then remove from the oven and allow to cool while preparing the filling. Keep the oven on.
Pro Tip: For a more intense flavor, toast the gingersnap crumbs on a baking sheet for 5 minutes before mixing with the butter.
Making the Cheesecake Filling
- In a large bowl, beat the softened cream cheese with an electric mixer until completely smooth and fluffy, about 2 minutes. Scrape down the sides of the bowl as needed.
- Add the granulated sugar and beat for another 1-2 minutes until well combined and smooth.
- Add the pumpkin puree and mix until fully incorporated.
- Beat in the eggs, one at a time, mixing well after each addition but being careful not to overmix. Excessive mixing can introduce too much air into the batter, which may cause cracks.
- Add the vanilla extract, pumpkin pie spice, cinnamon, nutmeg, and salt. Mix until just combined.
- Sprinkle the flour over the mixture and gently fold it in with a rubber spatula until no streaks remain.
Pro Tip: Make sure all your dairy ingredients are at room temperature for the smoothest cheesecake texture. I usually take them out about 1-2 hours before starting.
Baking and Cooling
- Fill each muffin cup with the cheesecake batter, leaving about ¼ inch from the top. The cheesecakes will rise slightly while baking but will settle as they cool.
- Bake in the preheated oven for 20-22 minutes, or until the centers of the cheesecakes are just slightly jiggly (they’ll firm up as they cool).
- Turn off the oven, crack the door open, and let the cheesecakes cool in the oven for 10 minutes. This gentle cooling helps prevent cracking.
- Remove from the oven and let cool completely at room temperature, about 30 minutes.
- Once cooled, refrigerate the mini cheesecakes for at least 3 hours or overnight until thoroughly chilled and set.
Pro Tip: Avoid opening the oven door during baking, as sudden temperature changes can cause the cheesecakes to crack or sink in the middle.
Preparing the Whipped Cream Topping
- In a chilled mixing bowl, combine the heavy cream, powdered sugar, vanilla extract, and cinnamon (if using).
- Beat with an electric mixer starting on low speed and gradually increasing to high until stiff peaks form, about 2-3 minutes.
- Spoon or pipe the whipped cream onto the chilled mini cheesecakes just before serving, or place in a piping bag and allow guests to top their own cheesecakes.
Serving and Garnishing
Gently remove the paper liners if desired (they’ll come off more easily when the cheesecakes are fully chilled). Place on a serving platter and top with your choice of:
- A dusting of pumpkin pie spice or cinnamon
- A drizzle of caramel sauce
- Chopped toasted pecans or walnuts
- A small piece of candied ginger
- A tiny cinnamon stick as a decorative element
Make-Ahead and Storage Tips
One of the reasons I love these mini pumpkin cheesecakes so much is how convenient they are for entertaining. Here’s how to make them work for your schedule:
Make-Ahead Options:
- 1-3 days ahead: Prepare the cheesecakes completely (without the whipped cream topping) and store covered in the refrigerator. Add the whipped cream and garnishes just before serving.
- 2-3 weeks ahead: Baked and cooled cheesecakes can be frozen without the topping. Place them in an airtight container with parchment paper between layers. Thaw overnight in the refrigerator before serving.
- Morning of serving: Make the whipped cream and store it in a covered container in the refrigerator. It will stay fresh for about 12 hours.
Storage Tips:
- Store leftover mini cheesecakes in an airtight container in the refrigerator for up to 5 days.
- For the best flavor and texture, bring the cheesecakes to room temperature for about 15 minutes before serving.
- If you’ve added whipped cream, be aware that it will begin to soften and lose its shape after about 24 hours, though the flavor will still be delicious.
Troubleshooting Common Issues
Even experienced bakers occasionally run into challenges. Here are solutions to common mini cheesecake problems:
| Problem | Possible Cause | Solution |
|---|---|---|
| Cracked tops | Overmixing the batter or sudden temperature changes | Beat ingredients just until combined; allow cheesecakes to cool gradually in the oven with door cracked |
| Sunken centers | Opening the oven door during baking or underbaking | Avoid opening the oven door; bake until centers are just slightly jiggly |
| Soggy crust | Not pre-baking the crust or using too much butter | Always pre-bake the crust for 5 minutes; measure butter carefully |
| Lumpy filling | Cream cheese too cold or not beating thoroughly | Ensure cream cheese is completely softened; beat until absolutely smooth before adding other ingredients |
| Sticking to liners | Removing liners while cheesecakes are still warm | Chill completely in the refrigerator before attempting to remove liners |
| Whipped cream deflating | Not chilled properly or overbeaten | Use cold equipment; add stabilizer like cornstarch (½ tsp) to the cream; don’t overbeat |
Recipe Variations to Try
The beauty of this recipe is its versatility. Here are some of my favorite ways to customize these mini pumpkin cheesecakes:
Crust Variations
- Graham cracker crumbs instead of gingersnaps
- Chocolate cookie crumbs for a chocolate-pumpkin combination
- Pecan or walnut cookie crumbs for a nutty base
- Biscoff cookie crumbs for a caramelized spice flavor
Filling Variations
- Add 2 tablespoons of bourbon or maple syrup for depth of flavor
- Swirl in 2 tablespoons of caramel sauce before baking
- Mix in ⅓ cup of white chocolate chips for pumpkin white chocolate cheesecakes
- Add ¼ cup of toasted, finely chopped nuts to the batter
Topping Variations
- Maple whipped cream (substitute maple syrup for the powdered sugar)
- Cream cheese frosting for a more decadent treat
- Chocolate ganache (pour 4 oz of hot cream over 4 oz of chocolate chips, stir until smooth)
- Marshmallow fluff lightly toasted with a kitchen torch
Dietary Adaptations
These mini pumpkin cheesecakes can be adapted for various dietary needs:
Gluten-Free Version
- Use gluten-free gingersnaps or graham crackers for the crust
- Verify your spices are gluten-free (most are, but some may contain anti-caking agents)
- Substitute the all-purpose flour with cornstarch or a gluten-free flour blend
Lower-Sugar Option
- Reduce granulated sugar to ½ cup
- Use a sugar substitute that’s designed for baking (follow equivalent measurements)
- Choose unsweetened whipped cream with just a touch of vanilla
Dairy-Free Alternative
- Use dairy-free cream cheese (many coconut or almond-based options work well)
- Substitute coconut oil for butter in the crust
- Use coconut cream instead of heavy cream for the topping
Serving Suggestions
These mini pumpkin cheesecakes are delightful on their own, but they can also be part of a larger dessert experience:
- Create a fall dessert table with these cheesecakes as the centerpiece
- Serve alongside hot apple cider or a spiced chai tea
- Pair with a coffee bar for an elegant after-dinner experience
- Create a topping station so guests can customize their own cheesecakes
- Serve with fresh apple slices for a refreshing contrast to the rich cheesecake
Nutritional Information
For those keeping track of their nutritional intake, here’s an approximate breakdown per mini cheesecake (without optional toppings):
| Nutrient | Amount per Serving |
|---|---|
| Calories | 285 |
| Total Fat | 19g |
| Saturated Fat | 11g |
| Cholesterol | 95mg |
| Sodium | 230mg |
| Total Carbohydrates | 24g |
| Dietary Fiber | 1g |
| Sugars | 18g |
| Protein | 5g |
| Calcium | 8% DV |
| Iron | 6% DV |
| Vitamin A | 70% DV |
Note: Values are approximate and may vary based on specific ingredients used.
Why This Recipe Works
As someone who has made countless variations of cheesecake over the years, I’ve discovered a few key principles that make this recipe particularly successful:
- The pre-baked crust: This brief stint in the oven before adding the filling ensures the crust stays crisp rather than becoming soggy.
- Room temperature ingredients: Using room temperature cream cheese and eggs creates a silky-smooth filling without lumps.
- The flour addition: Just 2 tablespoons of flour helps stabilize the filling, preventing cracks and giving the cheesecakes the perfect texture.
- Gentle cooling: Allowing the cheesecakes to cool gradually in the turned-off oven prevents the dramatic temperature change that often causes cracks.
- The muffin tin method: Individual cheesecakes bake more evenly and quickly than a large cheesecake, making this recipe much more foolproof.
Frequently Asked Questions
Q: Can I use canned pumpkin pie filling instead of pure pumpkin puree?
No, I don’t recommend this substitution. Pumpkin pie filling already contains sugar and spices in unknown quantities, which would make the recipe unpredictable. Stick with pure pumpkin puree for the best results.
Q: My cheesecakes cracked on top. What did I do wrong?
Cracking usually happens due to sudden temperature changes or overmixing. Next time, try mixing just until ingredients are combined, and allow the cheesecakes to cool gradually in the oven with the door cracked before removing them.
Q: Can I make these in a mini cheesecake pan with removable bottoms?
Absolutely! If you have a specialized mini cheesecake pan, it works perfectly for this recipe. Reduce the baking time by about 2 minutes since they tend to be slightly smaller than muffin cups.
Q: How far in advance can I make these?
You can make these up to 3 days ahead and store them in the refrigerator, or freeze them for up to 3 weeks. Just add the whipped cream and garnishes shortly before serving.
Q: The centers of my cheesecakes sank after cooling. How can I prevent this?
A slight sink in the center is normal and creates the perfect little well for toppings! But if they’re sinking too much, try baking for 1-2 minutes longer next time. Also, avoid opening the oven door during baking.
Q: Can I use homemade pumpkin puree?
Yes! Homemade pumpkin puree works wonderfully, but be sure to drain it well in a fine-mesh sieve or cheesecloth to remove excess moisture. This prevents your filling from being too loose.
Q: I don’t have pumpkin pie spice. What can I use instead?
You can make your own pumpkin pie spice by mixing: 1 teaspoon cinnamon, ¼ teaspoon nutmeg, ¼ teaspoon ginger, and ⅛ teaspoon each of cloves and allspice.
Q: How do I know when the cheesecakes are done baking?
The centers should be slightly jiggly when you gently shake the pan, but the edges should be set. They’ll continue to firm up as they cool, so it’s better to slightly underbake than overbake.
Final Tips for Success
After making these countless times for friends and family, I’ve collected a few extra tips that really make a difference:
- For the smoothest filling, beat the cream cheese alone first until absolutely no lumps remain before adding any other ingredients.
- Be patient with the chilling time. At least 3 hours in the refrigerator allows the flavors to meld and the texture to set perfectly.
- If you’re having trouble removing the paper liners, dip a knife in hot water, wipe it dry, and then gently slide it between the liner and the cheesecake.
- For a picture-perfect presentation, use a piping bag fitted with a large star tip to create beautiful swirls of whipped cream.
- The flavor actually improves after a day in the refrigerator, making this the perfect make-ahead dessert.
These mini pumpkin cheesecakes have become my signature fall dessert for good reason. They’re impressive enough for special occasions but simple enough to make any time the craving strikes. The combination of spiced pumpkin filling, crisp gingersnap crust, and fluffy whipped cream creates a perfectly balanced bite that truly captures the essence of autumn.
Whether you’re hosting a holiday gathering, bringing a dessert to a potluck, or simply treating yourself to something special, these mini pumpkin cheesecakes are sure to become a favorite in your recipe collection too. Happy baking!