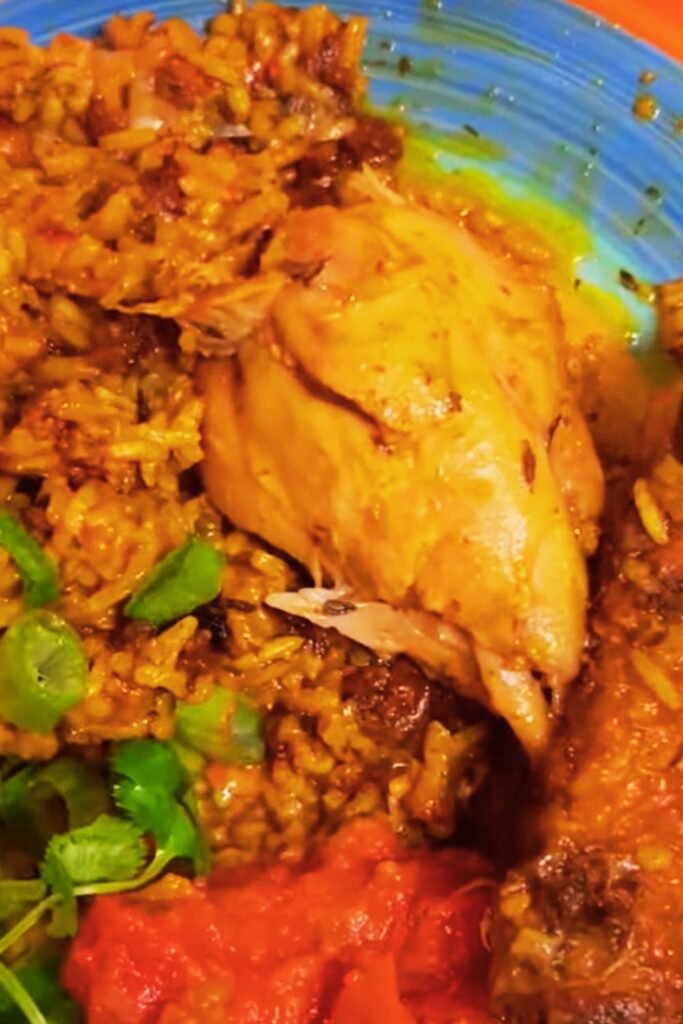
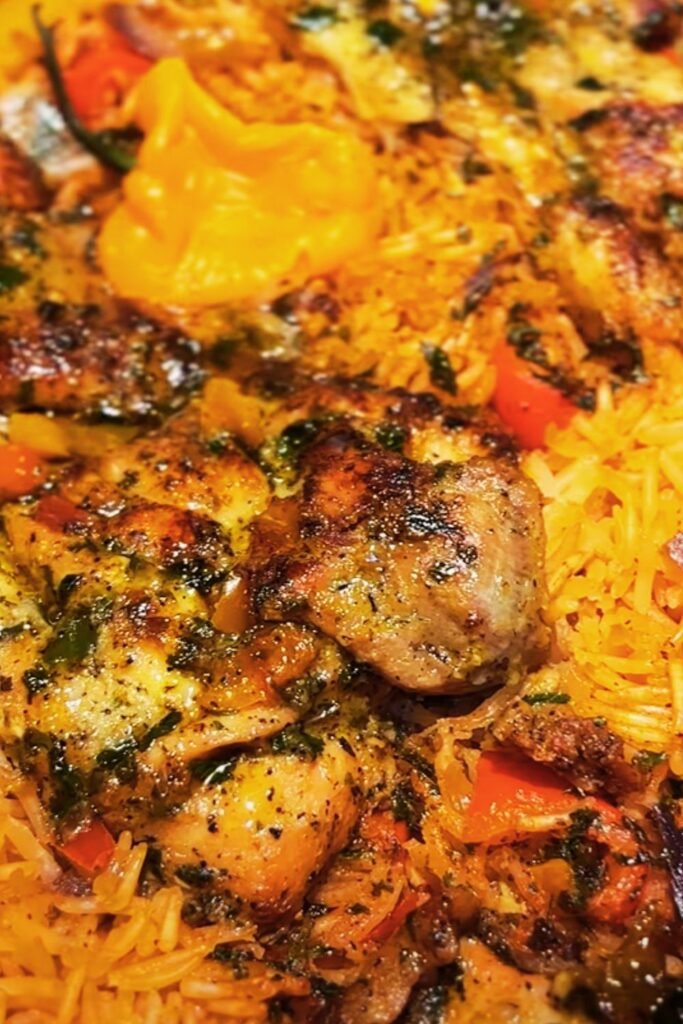
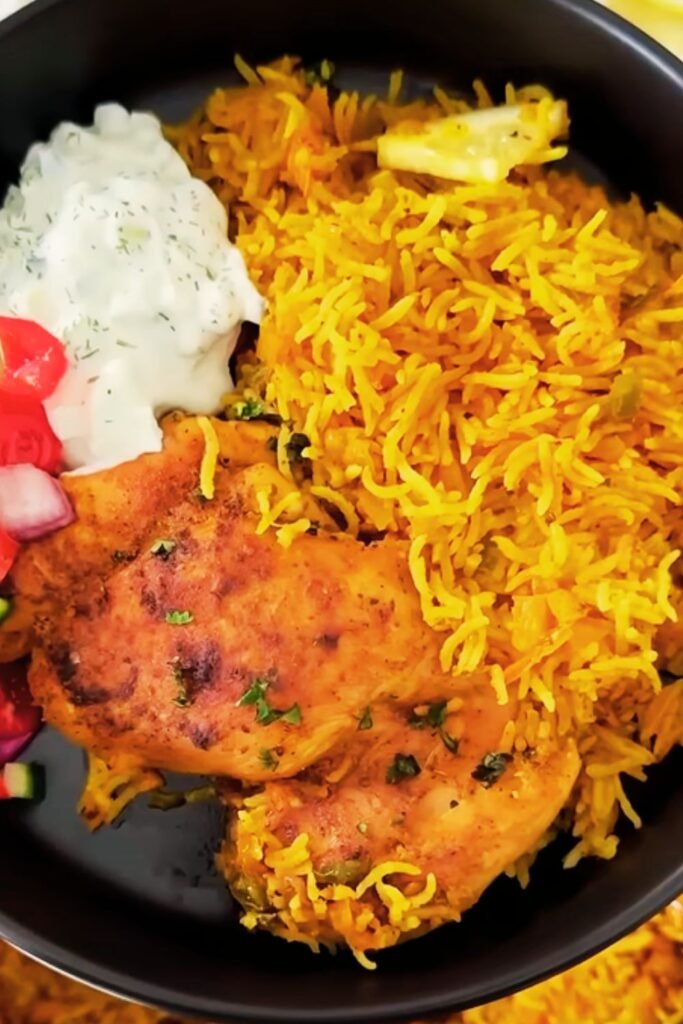
I’ve been making one-pan meals for years, and this garlic parmesan chicken and rice has become my absolute go-to when I want something delicious, comforting, and incredibly easy to clean up. There’s something magical about the way the chicken juices mingle with the rice, creating a creamy, flavorful base that absorbs all those gorgeous garlic and parmesan notes.
The beauty of this dish lies not just in its simplicity, but in how it transforms basic ingredients into something that tastes like you’ve been cooking all day. I remember the first time I made this for my family – the aroma that filled my kitchen was so intoxicating that my neighbors actually knocked on my door to ask what I was cooking!
Why I Love This One-Pan Wonder
One-pan meals have revolutionized my weeknight cooking routine. After spending countless evenings juggling multiple pots and pans, I discovered that some of the most satisfying meals come from the simplest cooking methods. This particular recipe checks every box I look for in a weeknight dinner: minimal cleanup, maximum flavor, and ingredients I typically have on hand.
The technique behind this dish is what I call “layered cooking” – each ingredient builds upon the last, creating complex flavors without complex techniques. The chicken renders its juices, which then flavor the rice, while the garlic infuses everything with its aromatic essence.
Key Benefits of One-Pan Cooking
Time Efficiency : Reduces active cooking time by allowing ingredients to cook simultaneously
Enhanced Flavors : Ingredients share and absorb each other’s flavors throughout the cooking process
Minimal Cleanup : Single pan means less dishes to wash after dinner
Energy Conservation : Uses only one burner or oven space, making it perfect for small kitchens
Foolproof Results : Less chance for overcooking individual components when everything cooks together
Essential Ingredients Breakdown
I’ve refined this recipe over dozens of attempts, and each ingredient serves a specific purpose in creating the perfect balance of flavors and textures.

Main Components
| Ingredient | Quantity | Purpose | Substitution Options |
|---|---|---|---|
| Chicken Thighs | 6 pieces (bone-in, skin-on) | Primary protein, provides flavor base | Chicken breasts (adjust cooking time) |
| Long-grain White Rice | 1½ cups | Starch base, absorbs flavors | Jasmine rice, Basmati rice |
| Chicken Broth | 2½ cups | Cooking liquid, adds depth | Vegetable broth, water with bouillon |
| Fresh Garlic | 6 cloves | Primary flavoring agent | Garlic powder (1 tsp = 1 clove) |
| Parmesan Cheese | 1 cup (grated) | Creamy richness, umami | Pecorino Romano, aged Asiago |
| Heavy Cream | ½ cup | Creaminess, binds flavors | Half-and-half, whole milk |
Supporting Cast
| Ingredient | Quantity | Role | Notes |
|---|---|---|---|
| Yellow Onion | 1 medium (diced) | Aromatic base | Sweet onion works too |
| Olive Oil | 3 tablespoons | Cooking fat | Avocado oil alternative |
| Italian Seasoning | 2 teaspoons | Herb complexity | Oregano + basil mix |
| Paprika | 1 teaspoon | Color and mild heat | Smoked paprika for depth |
| Salt | To taste | Flavor enhancement | Sea salt preferred |
| Black Pepper | ½ teaspoon | Heat and complexity | Freshly cracked best |
| Fresh Parsley | ¼ cup (chopped) | Fresh finish, color | Chives or green onions |
My Step-by-Step Cooking Method
Over the years, I’ve discovered that the order of operations makes all the difference in achieving restaurant-quality results at home. Here’s my foolproof approach:
Phase 1: Preparing the Foundation
I start by seasoning my chicken thighs generously with salt, pepper, paprika, and half of the Italian seasoning. This isn’t just about flavor – the salt helps create that beautiful golden-brown crust we’re after. I let them sit at room temperature for about 15 minutes while I prep the other ingredients.
Essential Preparation Steps:
- Pat chicken completely dry with paper towels
- Season all surfaces evenly
- Allow seasoning to penetrate at room temperature
- Dice onion uniformly for even cooking
- Mince garlic finely to distribute flavor evenly
Phase 2: Building the Flavor Base
I heat my largest oven-safe skillet or Dutch oven over medium-high heat and add the olive oil. Once it shimmers, I carefully place the chicken thighs skin-side down. The sizzling sound tells me everything’s going right – I’m looking for that gorgeous golden-brown color that takes about 5-6 minutes per side.
The key here is patience. I resist the urge to move the chicken around. That beautiful crust forms when the protein has uninterrupted contact with the hot pan surface.
Phase 3: The Aromatic Symphony
After removing the perfectly browned chicken, I’m left with those precious browned bits and rendered fat – liquid gold for flavor building. I add the diced onion to this same pan, letting it soften and caramelize slightly, about 3-4 minutes.
Then comes my favorite moment – adding the minced garlic. The aroma that fills my kitchen is absolutely intoxicating. I cook it for just 30 seconds, being careful not to burn it.
Phase 4: Rice Integration Magic
This is where the magic happens. I add the rice to the pan, stirring it around to coat each grain with the flavorful fat. This step, called “toasting,” gives the rice a nutty depth that elevates the entire dish. I cook it for about 2 minutes until some grains start to look slightly translucent.
Critical Rice Preparation Techniques:
- Toast rice until edges become translucent
- Stir constantly to prevent sticking
- Listen for subtle crackling sounds
- Ensure even coating with pan drippings
- Maintain medium heat to avoid burning

Phase 5: The Creamy Transformation
I slowly pour in the chicken broth while scraping up any browned bits from the bottom of the pan. These bits are pure flavor concentrated into caramelized goodness. Next, I stir in the heavy cream and remaining Italian seasoning.
The liquid should just barely cover the rice – if it seems too dry, I add a bit more broth. If it’s too wet, I let it simmer uncovered for a minute or two.
Phase 6: The Grand Assembly
I nestle the browned chicken thighs back into the pan, skin-side up, making sure they’re sitting on top of the rice mixture, not buried in it. This positioning ensures the skin stays crispy while the meat stays moist.
Into the oven it goes at 375°F for about 25-30 minutes, until the rice is tender and the chicken reaches an internal temperature of 165°F.
Advanced Techniques for Perfect Results
Through years of making this dish, I’ve learned several tricks that separate good results from exceptional ones.
Temperature Control Mastery
Initial Searing Temperature : Medium-high heat (around 375°F pan temperature) for optimal browning
Oven Finishing Temperature : 375°F provides gentle, even cooking without drying out the chicken
Resting Temperature : Allow dish to rest 5 minutes before serving for optimal texture
Timing Optimization Chart
| Phase | Duration | Visual Cues | Temperature Check |
|---|---|---|---|
| Chicken Searing | 5-6 min/side | Golden brown crust | Pan sizzling actively |
| Onion Softening | 3-4 minutes | Translucent edges | Medium heat maintained |
| Garlic Cooking | 30 seconds | Fragrant, no browning | Quick stir constantly |
| Rice Toasting | 2 minutes | Some translucent grains | Gentle crackling sounds |
| Oven Finishing | 25-30 minutes | Rice tender, chicken 165°F | Use meat thermometer |
Texture Perfection Secrets
The difference between good and extraordinary lies in these details:
Rice Texture Optimization:
- Use long-grain rice for separate, fluffy grains
- Maintain 2:1 liquid to rice ratio
- Don’t over-stir once in oven
- Let rest covered after cooking
Chicken Perfection:
- Start with room temperature chicken
- Don’t overcrowd the pan
- Keep skin side up during oven finishing
- Rest before serving to redistribute juices
Nutritional Profile and Health Benefits
Understanding the nutritional aspects of this dish helps me feel good about serving it to my family regularly.
Detailed Nutritional Breakdown (Per Serving)
| Nutrient | Amount | % Daily Value | Health Benefit |
|---|---|---|---|
| Calories | 485 | 24% | Balanced energy source |
| Protein | 32g | 64% | Muscle maintenance and repair |
| Carbohydrates | 42g | 14% | Energy and brain function |
| Fat | 22g | 34% | Essential fatty acids |
| Fiber | 1.2g | 5% | Digestive health |
| Sodium | 680mg | 30% | Electrolyte balance |
| Calcium | 285mg | 28% | Bone health |
| Iron | 2.1mg | 12% | Oxygen transport |
Health-Conscious Modifications
Lower Sodium Version:
- Use low-sodium chicken broth
- Reduce added salt by half
- Increase herbs and spices for flavor
Lighter Option:
- Substitute half-and-half for heavy cream
- Remove chicken skin before cooking
- Add extra vegetables like bell peppers
Higher Fiber Alternative:
- Use brown rice (increase liquid and cooking time)
- Add diced carrots and celery
- Include frozen peas in final 5 minutes
Flavor Variations I Love
After making this dish countless times, I’ve developed several variations that keep it interesting:
Mediterranean Twist
I replace Italian seasoning with oregano and add sun-dried tomatoes, kalamata olives, and crumbled feta cheese in the final minutes.
Mexican-Inspired Version
I use cumin, chili powder, and paprika for seasoning, add diced jalapeños with the onion, and finish with fresh cilantro and a squeeze of lime.
Asian Fusion Approach
Soy sauce replaces some of the salt, I add ginger with the garlic, and finish with sesame oil and green onions.

Troubleshooting Common Issues
Even experienced cooks encounter challenges. Here are solutions to the most common problems I’ve encountered:
Rice Problems and Solutions
Issue: Rice too dry/hard
- Cause: Insufficient liquid or too high heat
- Prevention: Measure liquid carefully, maintain proper oven temperature
- Fix: Add warm broth gradually, cover and cook longer
Issue: Rice too mushy
- Cause: Too much liquid or overcooking
- Prevention: Use correct rice-to-liquid ratio
- Fix: Let rest uncovered to allow excess moisture to evaporate
Issue: Rice unevenly cooked
- Cause: Poor liquid distribution or hot spots
- Prevention: Level rice before adding chicken back
- Fix: Gently stir and redistribute during cooking
Chicken Concerns
| Problem | Likely Cause | Prevention Strategy | Quick Fix |
|---|---|---|---|
| Dry chicken | Overcooking or insufficient fat | Use meat thermometer, don’t exceed 165°F | Add more cream or broth |
| Soggy skin | Chicken buried in liquid | Keep skin above rice level | Broil briefly at end |
| Uneven browning | Overcrowded pan or low heat | Use larger pan, higher initial heat | Sear in batches if needed |
| Bland flavor | Under-seasoning or no resting time | Season generously, allow time to penetrate | Add finishing salt and herbs |
Serving Suggestions and Pairings
This dish is incredibly versatile and pairs beautifully with various sides and accompaniments.
Perfect Side Dishes
Light and Fresh Options:
- Simple mixed green salad with lemon vinaigrette
- Roasted asparagus with garlic
- Steamed broccoli with a squeeze of lemon
- Fresh cucumber and tomato salad
Heartier Accompaniments:
- Garlic bread or crusty artisan rolls
- Roasted root vegetables
- Sautéed green beans with almonds
- Honey-glazed carrots
Beverage Pairings
Non-Alcoholic Options:
- Sparkling water with lemon
- Iced tea with fresh mint
- Fresh lemonade
- Sparkling apple cider
Family-Friendly Drinks:
- Flavored sparkling water
- Fresh fruit smoothies
- Herbal teas
- Natural fruit juices
Storage and Meal Prep Tips
This dish is fantastic for meal prep and stores beautifully, making it perfect for busy weeknight planning.
Proper Storage Methods
Refrigerator Storage:
- Cool completely before refrigerating
- Store in airtight containers for up to 4 days
- Separate chicken from rice if storing longer
- Keep sauce separate to prevent sogginess
Freezer Storage:
- Freeze for up to 3 months in freezer-safe containers
- Portion into individual servings for convenience
- Label with date and reheating instructions
- Thaw overnight in refrigerator before reheating
Reheating Techniques
Oven Method (Best Results):
- Preheat oven to 350°F
- Add splash of broth if rice looks dry
- Cover with foil and heat 15-20 minutes
- Check internal temperature reaches 165°F
Stovetop Method:
- Use medium-low heat in covered pan
- Add liquid gradually to prevent sticking
- Stir gently and heat thoroughly
- Monitor closely to prevent burning
Microwave Method (Quick Option):
- Use microwave-safe dish with vented cover
- Add small amount of broth or water
- Heat in 30-second intervals, stirring between
- Let rest 1 minute before serving
Questions and Answers
Q. Can I use boneless chicken thighs instead of bone-in? Yes, absolutely! Boneless thighs work wonderfully and actually cook a bit faster. I reduce the oven time to about 20-25 minutes and check for doneness at the 20-minute mark. The bone-in thighs do provide more flavor, but boneless are more convenient and still delicious.
Q. What type of rice works best for this recipe? I’ve tested this with many rice varieties, and long-grain white rice gives the best texture. Jasmine and Basmati rice also work beautifully. I avoid short-grain rice as it tends to become too sticky, and brown rice requires significantly longer cooking time and more liquid.
Q. Can I make this dish ahead of time? Definitely! I often prep this in the morning and refrigerate it. When ready to cook, I let it come to room temperature for about 15 minutes, then proceed with the oven step. You can also fully cook it ahead and reheat using my methods above.
Q. My rice turned out mushy – what went wrong? This usually happens when there’s too much liquid or the rice was overcooked. Make sure you’re measuring the broth accurately, and remember that different rice brands can absorb liquid differently. If your rice tends to cook quickly, start checking at the 20-minute mark.
Q. Can I substitute the heavy cream with something lighter? Yes! Half-and-half works well, though the result will be slightly less rich. Whole milk can work in a pinch, but I recommend adding a tablespoon of flour whisked in to prevent curdling. Greek yogurt stirred in at the very end also creates a tangy, creamy finish.
Q. The chicken skin isn’t crispy – how can I fix this? Crispy skin requires the chicken to be positioned on top of the rice, not nestled into it. Also, make sure your initial searing creates a good crust. If needed, I sometimes finish the dish under the broiler for 2-3 minutes to crisp up the skin.
Q. Can I add vegetables to this dish? Absolutely! I love adding vegetables that have similar cooking times. Diced bell peppers go in with the onions, while frozen peas or corn can be stirred in during the last 5 minutes of cooking. Root vegetables like carrots need to be diced small and added earlier in the process.
Q. What should I do if the dish looks too dry before it finishes cooking? If the rice looks dry during cooking, add warm chicken broth, about ¼ cup at a time, around the edges of the pan. Cover tightly with foil and continue cooking. The key is to add liquid gradually rather than all at once.
Q. Can I use chicken breasts instead of thighs? While chicken breasts can work, they require more careful attention to prevent overcooking. I recommend pounding them to even thickness and reducing the oven time to 18-22 minutes. Thighs are more forgiving and flavorful, but breasts will work if that’s your preference.
Q. How do I know when the rice is perfectly cooked? The rice is done when it’s tender but still has a slight bite, and most of the liquid has been absorbed. There might be a small amount of creamy liquid remaining, which is perfect – it continues to absorb as the dish rests.
This one-pan garlic parmesan chicken and rice has become more than just a recipe in my kitchen – it’s a reliable friend that never lets me down. Whether I’m cooking for my family on a busy Tuesday or entertaining friends on the weekend, it delivers consistent, delicious results that make everyone feel cared for and satisfied.
The beauty of this dish lies not just in its incredible flavors, but in its adaptability. I encourage you to make it your own, adjusting the seasonings to your family’s preferences and adding vegetables that you love. That’s how the best family recipes are born – through love, experimentation, and the joy of sharing good food with the people we care about most.