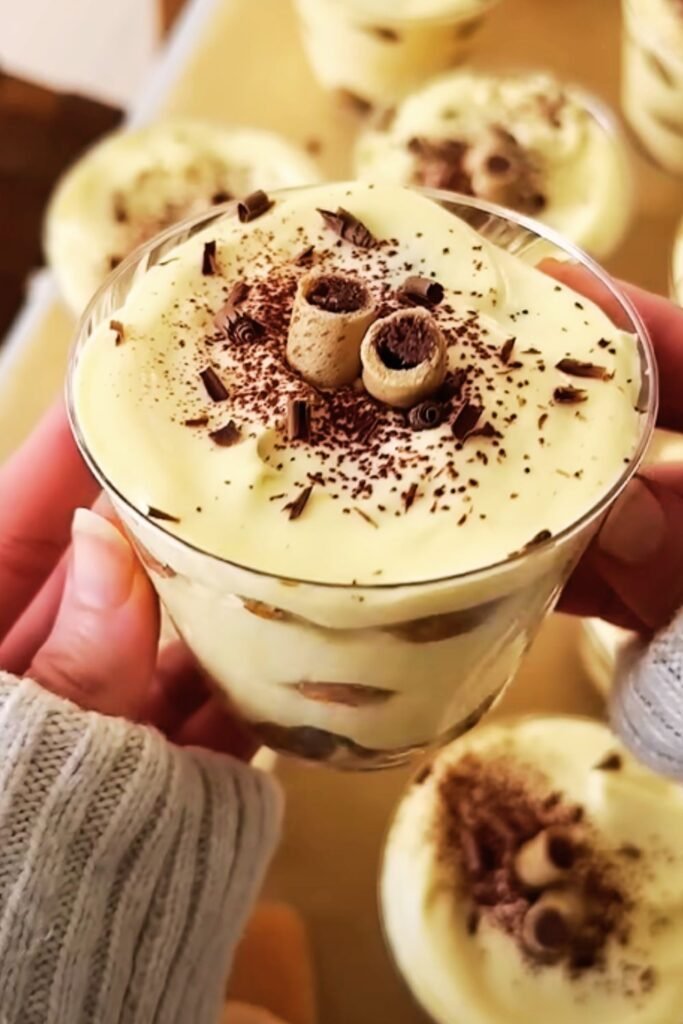
There’s something undeniably magical about a perfectly executed tiramisu. The delicate balance of coffee-soaked ladyfingers, creamy mascarpone filling, and that light dusting of cocoa powder creates a dessert experience that’s truly unforgettable. While traditional tiramisu is made in large dishes for sharing, I’ve found that individual portions not only look more elegant but also solve the age-old problem of messy serving. Today, I’m thrilled to share my perfected recipe for individual tiramisu cups that will impress your guests while being surprisingly simple to prepare.
The Charm of Individual Servings
Before diving into the recipe, let me share why I’m such an advocate for individual tiramisu portions. When I first started making tiramisu years ago, I always encountered the same issue: the first serving from a large dish would inevitably fall apart, looking nothing like those perfect slices you see in cookbooks. By creating individual portions, each guest receives a pristine, picture-perfect dessert with all layers beautifully intact.
Individual servings also offer practical benefits. They can be prepared well in advance, require no last-minute cutting or serving stress, and allow for easier portion control. Plus, there’s something undeniably charming about presenting a personal dessert to each of your guests—it instantly elevates any dinner party from casual to sophisticated.
The History Behind the Heavenly Layers
Tiramisu, which translates to “pick me up” or “lift me up” in Italian, has a relatively recent history compared to many traditional Italian desserts. While there are various claims about its exact origin, most food historians agree it emerged in the Veneto region of Italy (specifically Treviso) in the 1960s or 1970s.
The dessert’s name refers to the energizing effects of its ingredients: coffee, sugar, and (traditionally) a touch of liqueur. What began as a local specialty quickly gained international recognition for its perfect balance of flavors and textures. The combination of coffee-soaked ladyfingers, rich mascarpone cream, and cocoa creates a multi-sensory experience that has made tiramisu one of the most beloved Italian desserts worldwide.
Essential Ingredients for Authentic Flavor
The beauty of tiramisu lies in its simplicity, but that also means each ingredient must be of excellent quality. Here’s what you’ll need to create truly outstanding individual tiramisu:
- Mascarpone cheese: The foundation of the cream layer, mascarpone provides that luxurious, velvety texture that’s essential to authentic tiramisu. Always use fresh, high-quality mascarpone for the best flavor and texture.
- Eggs: The traditional tiramisu uses raw egg yolks, which contribute to the rich, silky texture of the cream. I’ll share options for both traditional preparation and a cooked alternative for those concerned about raw eggs.
- Ladyfingers (Savoiardi): These light, dry sponge biscuits are specifically designed to absorb moisture without falling apart completely. Italian Savoiardi are ideal, but any good quality ladyfingers will work.
- Espresso: Freshly brewed, strong espresso provides the distinctive coffee flavor that defines tiramisu. While instant espresso can work in a pinch, freshly brewed will elevate your dessert significantly.
- Sugar: Just enough to sweeten the mascarpone mixture without overwhelming the coffee notes.
- Cocoa powder: Unsweetened cocoa powder provides both visual contrast and a subtle bitter note that balances the sweet cream perfectly.
- Optional additions: Traditional tiramisu often includes a splash of liqueur, typically Marsala wine, dark rum, or coffee liqueur.
Individual Tiramisu Recipe
Ingredients
For the coffee soak:
- 1 cup (240ml) freshly brewed espresso
- 2 tablespoons granulated sugar
- 2 tablespoons coffee liqueur or dark rum (optional)
For the mascarpone cream:
- 4 large egg yolks (at room temperature)
- ½ cup (100g) granulated sugar
- 2 cups (450g) mascarpone cheese (at room temperature)
- ½ teaspoon vanilla extract
- 1 cup (240ml) heavy whipping cream
For assembly:
- 24-30 ladyfingers (Savoiardi)
- 2 tablespoons unsweetened cocoa powder
- Dark chocolate shavings (optional)
- Fresh berries for garnish (optional)
Special equipment:
- 6 individual glass serving dishes (8oz/240ml capacity work well)
- Electric mixer (stand or handheld)
- Fine mesh sieve (for dusting cocoa powder)
Instructions
Step 1: Prepare the Coffee Mixture
- Brew the espresso and pour it into a shallow dish that’s wide enough to dip the ladyfingers.
- While the coffee is still hot, stir in 2 tablespoons of sugar until completely dissolved.
- Allow the coffee mixture to cool to room temperature before adding the liqueur (if using).
- Once cooled, the mixture is ready for dipping the ladyfingers.
Step 2: Prepare the Mascarpone Cream
Traditional Method (with raw eggs):
- In a large bowl, beat the egg yolks and sugar with an electric mixer until pale and thick (about 3-4 minutes). The mixture should form ribbons when the beater is lifted.
- Add the mascarpone cheese and vanilla extract, beating on low speed until just combined. Be careful not to overmix, as mascarpone can separate if beaten too vigorously.
- In a separate bowl, whip the heavy cream until firm peaks form.
- Gently fold the whipped cream into the mascarpone mixture using a rubber spatula, maintaining as much air as possible for a light, fluffy texture.
Cooked Egg Alternative:
If you prefer not to use raw eggs, follow this safer alternative:
- Create a double boiler by placing a heatproof bowl over a pot of simmering water (ensure the bowl doesn’t touch the water).
- Whisk the egg yolks and sugar in the bowl continuously until the mixture reaches 160°F (71°C) on an instant-read thermometer.
- Remove from heat and continue beating until the mixture cools and becomes pale and thick.
- Then proceed with steps 2-4 from the traditional method.
Step 3: Assemble the Individual Tiramisu
- Working quickly, dip each ladyfinger into the coffee mixture for about 1 second per side. A brief dip is crucial—too long and they’ll become soggy, too short and they’ll remain dry in the center.
- Arrange a layer of soaked ladyfingers at the bottom of each serving glass, breaking them as needed to fit.
- Spread approximately 2-3 tablespoons of the mascarpone cream over the ladyfingers in each glass.
- Add another layer of coffee-dipped ladyfingers.
- Top with another layer of mascarpone cream, using a spatula or piping bag to create a smooth, attractive finish.
Step 4: Chill and Serve
- Cover each glass with plastic wrap and refrigerate for at least 4 hours, preferably overnight. This resting time allows the flavors to meld and the textures to develop fully.
- Just before serving, dust the top of each tiramisu generously with cocoa powder using a fine mesh sieve.
- If desired, garnish with chocolate shavings and/or fresh berries for a pop of color and flavor contrast.
Tips for Tiramisu Perfection
After years of making tiramisu for friends and family, I’ve collected several tips that make the difference between a good tiramisu and an exceptional one:
- Temperature matters: Ensure all refrigerated ingredients (especially the mascarpone) are at room temperature before beginning. Cold mascarpone tends to form lumps when mixed.
- The perfect dip: When soaking the ladyfingers, aim for just 1 second per side. They should absorb some coffee but still maintain their structure. Remember: they’ll continue softening as the tiramisu rests.
- Gentle folding: When incorporating the whipped cream into the mascarpone mixture, use a light hand and a rubber spatula, folding from the bottom up to preserve the air bubbles that create that signature light texture.
- Resting time is non-negotiable: While it’s tempting to dive in right away, tiramisu truly needs at least 4 hours (preferably overnight) in the refrigerator to develop its full flavor and perfect texture.
- Dust cocoa at the last minute: Apply the cocoa powder just before serving to ensure it remains dry and provides that beautiful visual and textural contrast.
Creative Variations to Try
While I’m a purist at heart when it comes to classic tiramisu, there are several delicious variations that maintain the spirit of the dessert while introducing new flavors:
Seasonal Fruit Tiramisu
Incorporate seasonal berries or stone fruits between the layers:
- Summer: Layer in fresh strawberries, raspberries, or peaches
- Fall: Add thinly sliced poached pears
- Winter: Consider using orange segments or pomegranate arils
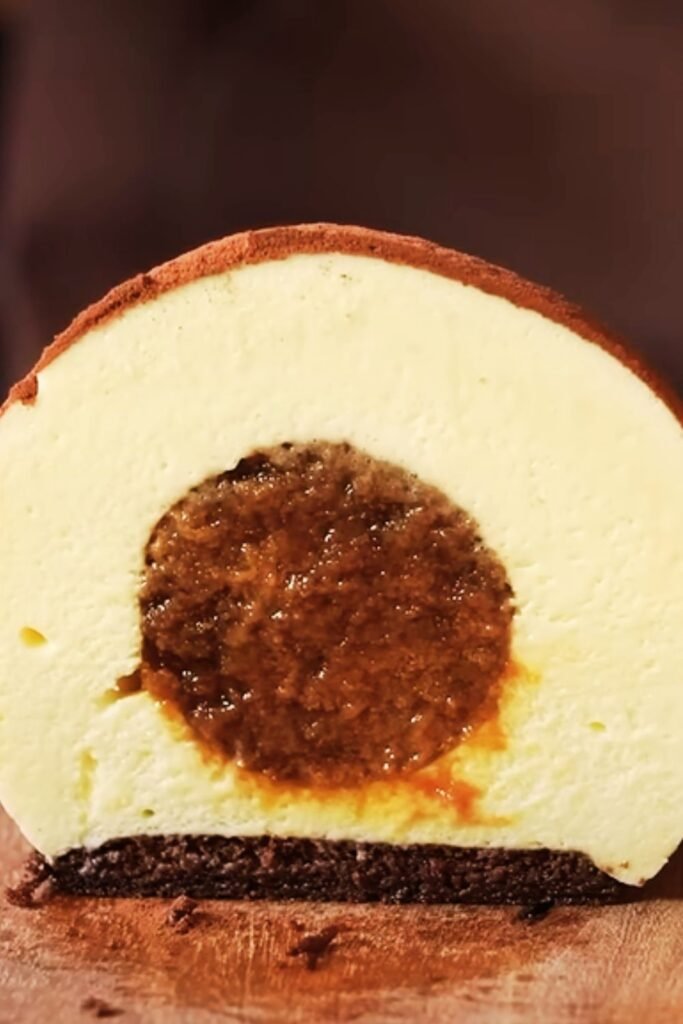
Chocolate Lover’s Tiramisu
For an extra decadent version:
- Add 2 tablespoons of cocoa powder to the mascarpone mixture
- Use chocolate-flavored ladyfingers if available
- Add a layer of chocolate ganache between the cream layers
- Garnish with chocolate curls alongside the cocoa powder dusting
Citrus Tiramisu
For a bright, refreshing twist:
- Add the zest of one lemon or orange to the mascarpone mixture
- Replace half the coffee mixture with fresh orange juice
- Garnish with candied citrus peel
Perfect Pairings and Serving Suggestions
Individual tiramisu is a stunning dessert on its own, but you can elevate the experience further with thoughtful pairings:
Beverages:
- Coffee: A small espresso served alongside provides a wonderful flavor echo
- Dessert Tea: A vanilla or chai tea offers complementary warm notes
- Non-alcoholic options: Sparkling water with a twist of lemon helps cleanse the palate between bites
Accompaniments:
- Fresh berries served on the side
- Amaretti cookies for textural contrast
- A small scoop of vanilla bean gelato for an extra-indulgent option
Make-Ahead and Storage Tips
One of the greatest advantages of individual tiramisu is its make-ahead convenience:
- Make-ahead timeline: Prepare up to 2 days in advance, keeping covered in the refrigerator
- Freezing option: Individual tiramisu freeze beautifully for up to 1 month. Thaw overnight in the refrigerator before dusting with fresh cocoa powder.
- Storage: Keep refrigerated and consume within 3 days for optimal flavor and food safety
Nutritional Information
For those watching their intake, here’s an approximate nutritional breakdown per individual serving (based on 6 servings):
| Nutrient | Amount per Serving |
|---|---|
| Calories | 420 |
| Protein | 7g |
| Carbohydrates | 32g |
| Fat | 30g |
| Saturated Fat | 17g |
| Cholesterol | 215mg |
| Sodium | 65mg |
| Fiber | 1g |
| Sugar | 20g |
Common Questions and Troubleshooting
Q: Why did my mascarpone mixture curdle?
The most common reason for curdling is temperature shock or overmixing. Ensure your mascarpone is at room temperature before mixing, and beat it gently just until incorporated. Vigorous beating can cause the fat to separate.
Q: My ladyfingers became too soggy. What went wrong?
This typically happens when the ladyfingers are soaked for too long. Remember, just a quick 1-second dip per side is all you need. The cookies should absorb some liquid but still maintain their structure.
Q: Can I make this without alcohol?
Absolutely! The liqueur is completely optional. You can simply omit it or replace it with 1-2 teaspoons of vanilla extract added to the coffee mixture for additional flavor depth.
Q: How can I tell if my tiramisu is ready to serve?
Perfect tiramisu should be set but still creamy when you insert a spoon. The ladyfingers should be soft throughout but not disintegrated. Visually, the layers should be distinct, and the top should be firm enough to hold the cocoa powder dusting.
Q: Is it safe to use raw eggs in tiramisu?
Traditional tiramisu does use raw eggs, which poses a very small risk of foodborne illness. If you’re serving to pregnant women, elderly, young children, or those with compromised immune systems, I recommend using the cooked egg method described in the recipe. You can also use pasteurized eggs as a safer alternative.
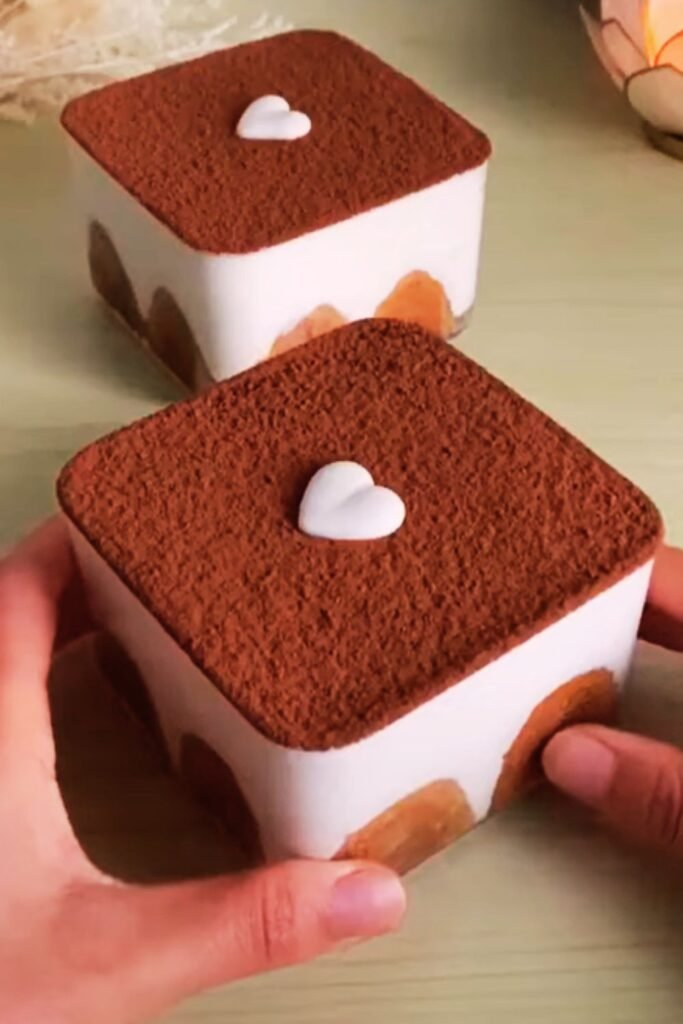
The Secret to Restaurant-Quality Presentation
Creating stunning individual tiramisu isn’t just about taste—presentation plays a huge role in the overall experience. Here are my favorite tips for achieving that professional, restaurant-quality look:
- Choose the right glassware: Clear vessels like martini glasses, small trifle dishes, or straight-sided rocks glasses showcase the beautiful layers.
- Piping perfection: Use a piping bag fitted with a large round or star tip for the final layer of mascarpone cream to create a more finished appearance.
- Create height: Build your layers slightly higher in the center for a more dramatic presentation.
- Strategic garnishing: Place garnishes thoughtfully rather than randomly—perhaps a single perfect raspberry centered on top, or three precisely placed chocolate shavings.
- Clean edges: Before serving, wipe any smudges from the rim and sides of your serving glasses with a clean, damp cloth.
Why Individual Tiramisu Will Become Your Signature Dessert
After years of dessert-making, I’ve found few recipes that consistently impress guests like these individual tiramisu cups. There’s something truly special about presenting each person with their own perfect portion of this classic Italian dessert.
The combination of convenience, impressive presentation, and incredible flavor makes this recipe one you’ll return to time and again. Whether for an intimate dinner party, a family celebration, or a romantic dinner for two, these individual tiramisu portions strike the perfect balance between elegant sophistication and comforting indulgence.
What I love most about this recipe is how it transforms a traditional favorite into something that feels both classic and contemporary. By mastering this single recipe, you’ll have a go-to dessert that’s suitable for virtually any occasion—from casual gatherings to your most formal entertaining.
I hope you enjoy creating and serving these individual tiramisu cups as much as I do. There’s nothing quite like watching someone take their first bite and witnessing that moment of pure dessert bliss. Buon appetito!
Q&A Section
Q: Can I prepare individual tiramisu in advance for a party?
Absolutely! Individual tiramisu actually benefits from being made ahead of time. I recommend preparing them 12-24 hours before serving for optimal flavor development. Just wait to dust with cocoa powder until right before serving for the best presentation.
Q: What can I substitute for mascarpone cheese if I can’t find it?
While authentic tiramisu requires mascarpone, in a pinch you can create a substitute by blending 8 ounces of cream cheese with 1/4 cup of heavy cream and 2 tablespoons of sour cream until smooth. The flavor won’t be identical, but it will still be delicious.
Q: Are there any non-coffee alternatives for those who don’t like coffee?
Yes! For a coffee-free version, you can soak the ladyfingers in strong chai tea sweetened with a bit of honey. Another delicious alternative is using hot chocolate (cooled to room temperature). Both options maintain the moisture and flavor-infusion concept while skipping the coffee.
Q: How can I make a lighter version of tiramisu with fewer calories?
For a lighter version, you can substitute part of the mascarpone with Greek yogurt (about 1/3 of the total amount), use light cream instead of heavy whipping cream, and reduce the sugar by 25%. While not traditional, it still creates a delicious dessert with significantly fewer calories.
Q: Why is my tiramisu watery at the bottom?
A watery bottom layer typically occurs when the ladyfingers have been soaked too long or when the mascarpone mixture is too loose. Ensure you’re dipping the ladyfingers very briefly (just 1 second per side) and that your mascarpone cream is properly whipped to firm peaks before assembly.
Q: Can these individual tiramisus be frozen?
Yes! Individual tiramisu freezes surprisingly well. Prepare them completely (except for the cocoa powder dusting), cover tightly with plastic wrap and then aluminum foil, and freeze for up to 3 months. Thaw overnight in the refrigerator and dust with fresh cocoa powder before serving.
Q: What’s the best cocoa powder to use for the topping?
For authentic tiramisu, use a high-quality unsweetened Dutch-processed cocoa powder. It provides the perfect bitter contrast to the sweet cream and gives that beautiful dark color that makes tiramisu visually distinctive.
Q: How do I prevent my ladyfingers from becoming too soggy?
The key is a very quick dip—literally one second per side. Another pro tip: place the soaked ladyfingers with the sugar-crusted side facing outward (if your ladyfingers have a distinctive sugar-coated side). This helps maintain some structural integrity while still allowing proper absorption.