There’s something absolutely magical about the sizzling sound of chicken hitting a hot grill. I’ve been perfecting my grilled chicken skewer technique for years, and I can confidently say that these quick grilled chicken skewers have become my go-to recipe whenever I need something delicious, fast, and guaranteed to impress.
Whether you’re hosting a backyard barbecue, preparing a weeknight dinner, or looking for a protein-packed meal that doesn’t require hours in the kitchen, these chicken skewers deliver every single time. I’ve served them to picky eaters, grill masters, and everyone in between – they never disappoint.
The beauty of chicken skewers lies in their versatility and speed. You can have them ready from start to finish in under 30 minutes, which makes them perfect for those busy evenings when you want something homemade but don’t have all day to cook. Plus, the combination of tender, juicy chicken with whatever vegetables and seasonings you choose creates endless possibilities for customization.
Why I Love This Grilled Chicken Skewer Method
After trying countless variations and techniques, I’ve discovered that the secret to perfect chicken skewers isn’t just about the marinade or the grilling technique – it’s about understanding the entire process from preparation to presentation. My method focuses on three key elements: proper preparation, smart seasoning, and precise cooking techniques.
Quick Preparation: The marinating process I use takes just 15-20 minutes, which means you don’t need to plan hours ahead.
Foolproof Cooking: My temperature and timing guidelines ensure perfectly cooked chicken every time, without the guesswork.
Maximum Flavor: The seasoning combination I’ve developed creates layers of flavor that complement rather than overpower the natural taste of the chicken.
Minimal Cleanup: Using the right tools and techniques means less mess and more time enjoying your meal.
Essential Ingredients for Perfect Chicken Skewers
Let me break down exactly what you’ll need to create these incredible skewers. I’ve tested various cuts of chicken, and I always recommend using boneless, skinless chicken thighs for the best results, though chicken breast works beautifully too.
Main Ingredients
| Ingredient | Quantity | Purpose | Substitution Options |
|---|---|---|---|
| Chicken thighs (boneless, skinless) | 2 lbs | Main protein | Chicken breast, cut into 1.5-inch pieces |
| Olive oil | 3 tablespoons | Marinade base, prevents sticking | Avocado oil, vegetable oil |
| Lemon juice | 2 tablespoons | Tenderizer, flavor | Lime juice, white wine vinegar |
| Garlic | 4 cloves, minced | Aromatic base | Garlic powder (1 tsp) |
| Salt | 1 teaspoon | Seasoning | Sea salt, kosher salt |
| Black pepper | 1/2 teaspoon | Seasoning | White pepper |
Flavor Enhancers
| Spice/Herb | Quantity | Flavor Profile | Alternative Options |
|---|---|---|---|
| Paprika | 1 tablespoon | Smoky, mild heat | Smoked paprika, sweet paprika |
| Oregano | 1 teaspoon | Mediterranean herb | Italian seasoning, thyme |
| Cumin | 1/2 teaspoon | Earthy warmth | Coriander, curry powder |
| Onion powder | 1/2 teaspoon | Savory depth | Fresh onion, minced |
| Red pepper flakes | 1/4 teaspoon | Heat (optional) | Cayenne pepper, chili powder |
Vegetable Add-ins
I always include vegetables on my skewers because they add color, nutrition, and complementary flavors. Here are my favorite combinations:
Classic Mediterranean: Bell peppers (red, yellow, green), red onion, cherry tomatoes, zucchini
Tropical Twist: Pineapple chunks, bell peppers, red onion
Garden Fresh: Cherry tomatoes, mushrooms, zucchini, red onion
Colorful Crunch: Bell peppers, red onion, yellow squash, cherry tomatoes
My Step-by-Step Preparation Method
Step 1: Preparing the Chicken
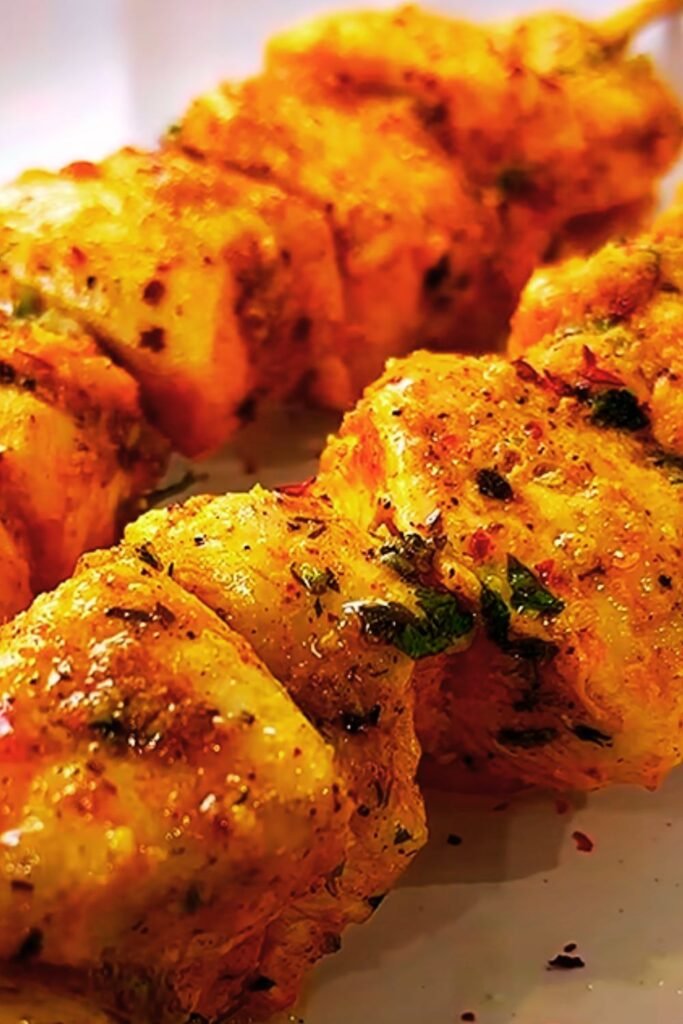
I start by cutting my chicken into uniform pieces, roughly 1.5 inches in size. This ensures even cooking, which is crucial for food safety and optimal texture. If I’m using chicken thighs, I remove any excess fat, though I leave some for flavor and moisture.
The key here is consistency – every piece should be roughly the same size so they cook at the same rate. I’ve learned this the hard way after serving skewers with some pieces overcooked and others still pink in the center.
Step 2: Creating the Perfect Marinade
In a large bowl, I whisk together the olive oil, lemon juice, minced garlic, and all the dry seasonings. The olive oil helps the seasonings adhere to the chicken while creating a barrier that prevents the meat from drying out on the grill.
I add the chicken pieces to this marinade and use my hands to ensure every piece is thoroughly coated. This hands-on approach might seem messy, but it’s the most effective way to ensure even coverage.
Step 3: Marinating for Maximum Flavor
While many recipes call for overnight marinating, I’ve found that 15-20 minutes is actually sufficient for chicken pieces this size. The acid in the lemon juice begins breaking down the proteins immediately, and longer marinating can actually make the chicken mushy.
During this time, I prepare my vegetables and soak my wooden skewers in water to prevent burning.
Step 4: Assembling the Skewers
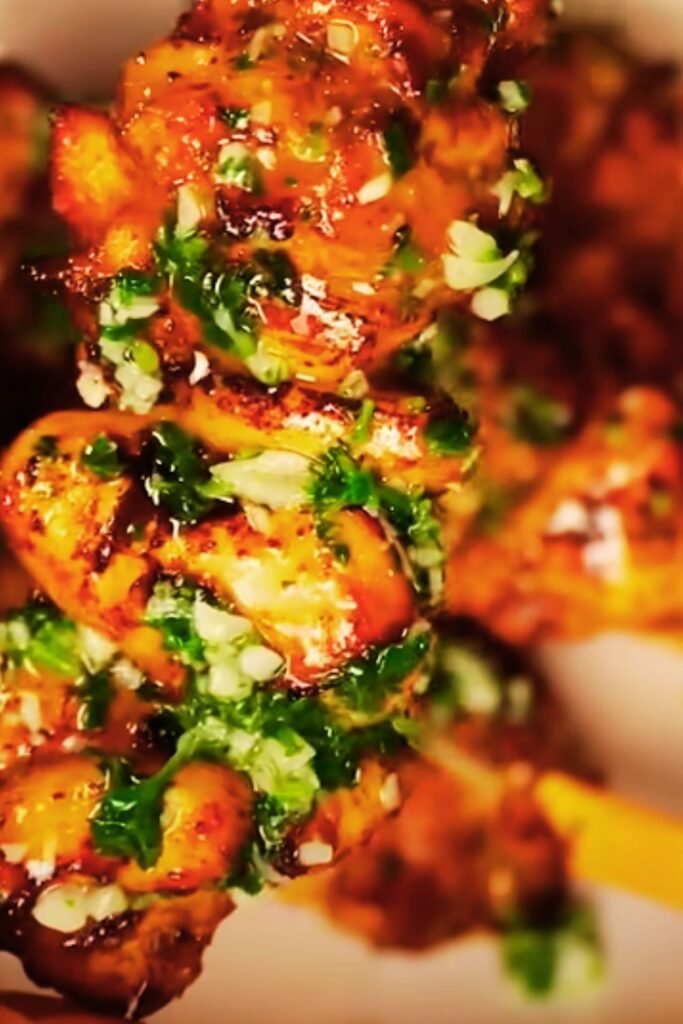
This is where creativity meets technique. I thread the chicken and vegetables onto the skewers, alternating colors and textures for visual appeal. My typical pattern is: chicken, bell pepper, onion, chicken, tomato, chicken, pepper, and so on.
Threading Tips I’ve Learned:
- Don’t pack the pieces too tightly – they need space for even cooking
- Pierce vegetables through their sturdiest parts to prevent them from spinning
- Leave small gaps between pieces for air circulation
- Keep similar-sized pieces together for even cooking
Grilling Techniques That Actually Work
Temperature Control
I preheat my grill to medium-high heat, which translates to about 375-400°F. This temperature is hot enough to create those beautiful grill marks and seal in juices, but not so hot that the outside burns before the inside cooks through.
Cooking Process
| Step | Time | Temperature | Action Required |
|---|---|---|---|
| Initial searing | 2-3 minutes | Medium-high | Don’t move skewers |
| First turn | 2-3 minutes | Medium-high | Quarter turn for grill marks |
| Second turn | 2-3 minutes | Medium-high | Quarter turn again |
| Final turn | 2-3 minutes | Medium-high | Complete rotation |
| Rest period | 3-5 minutes | Off heat | Let juices redistribute |
The total cooking time should be 10-12 minutes, depending on the size of your chicken pieces. I always use an instant-read thermometer to check that the internal temperature reaches 165°F.
Visual and Touch Cues
Beyond temperature, I look for these signs that my skewers are perfectly cooked:
Color: The chicken should be golden brown with nice grill marks, not black or charred
Texture: When gently pressed, the chicken should feel firm but not hard
Juices: Clear juices should run when the chicken is pierced, not pink or bloody
Movement: The chicken should feel secure on the skewer, not sliding around
Flavor Variations I Love to Experiment With
Mediterranean Magic
For this variation, I add fresh herbs like rosemary and thyme to my marinade, along with a splash of balsamic vinegar. I thread the skewers with cherry tomatoes, kalamata olives, and chunks of zucchini. The result is a flavor profile that transports you straight to the Greek islands.
Asian-Inspired Fusion
I replace the lemon juice with rice vinegar and add soy sauce, fresh ginger, and a touch of sesame oil to the marinade. Threading with bell peppers, pineapple chunks, and snap peas creates a sweet and savory combination that’s absolutely addictive.
Smoky Southwest
This version includes chili powder, smoked paprika, and a pinch of chipotle powder in the marinade. I thread with corn kernels, bell peppers, and red onion, then finish with a squeeze of lime and fresh cilantro.
Herbs de Provence Elegance
Using the classic French herb blend with a splash of white wine vinegar creates a sophisticated flavor profile. I pair this with baby potatoes, cherry tomatoes, and fresh thyme sprigs for an elegant presentation.

Serving Suggestions and Pairings
These chicken skewers are incredibly versatile when it comes to serving options. I’ve served them as the main course, as part of a larger barbecue spread, and even as appetizers at parties.
Main Course Presentations
Over Rice: I serve the skewers over fluffy basmati rice with a side of cucumber yogurt sauce
With Flatbread: Warm pita or naan bread makes an excellent accompaniment, along with hummus and tabbouleh
Salad Style: I remove the chicken and vegetables from the skewers and serve them over mixed greens with a lemon vinaigrette
Grain Bowl: Quinoa, farro, or bulgur wheat makes an excellent base, topped with the grilled chicken and vegetables
Side Dish Combinations
| Side Dish | Preparation Time | Flavor Complement |
|---|---|---|
| Greek salad | 10 minutes | Fresh, tangy contrast |
| Roasted vegetables | 25 minutes | Smoky, caramelized flavors |
| Garlic bread | 15 minutes | Rich, comforting addition |
| Couscous | 15 minutes | Light, fluffy texture |
| Grilled corn | 10 minutes | Sweet, smoky pairing |
Sauce and Condiment Options
I always prepare at least two different sauces when serving these skewers. Here are my go-to options:
Tzatziki: Greek yogurt, cucumber, garlic, dill, and lemon juice
Chimichurri: Fresh parsley, cilantro, garlic, olive oil, and red wine vinegar
Lemon Herb Butter: Softened butter mixed with fresh herbs and lemon zest
Spicy Mayo: Mayonnaise with sriracha and lime juice
Balsamic Glaze: Reduced balsamic vinegar with a touch of honey
Troubleshooting Common Issues
Dry Chicken
If your chicken turns out dry, the most likely culprits are overcooking or using chicken breast without enough fat. I recommend using a meat thermometer and removing the skewers as soon as they reach 165°F internal temperature. Also, don’t skip the marinating step – even 15 minutes makes a significant difference.
Uneven Cooking
This usually happens when the chicken pieces are different sizes or the skewers are packed too tightly. Take extra time during preparation to cut uniform pieces and leave space between items on the skewer.
Vegetables Burning
Some vegetables cook faster than others. I’ve learned to cut harder vegetables like onions and peppers slightly larger, and to place more delicate items like cherry tomatoes in the center of the skewer where they’re somewhat protected.
Sticking to the Grill
Make sure your grill grates are clean and well-oiled before cooking. I also brush the skewers lightly with oil just before grilling. Don’t try to move the skewers too soon – let them develop a good sear first.
Make-Ahead and Storage Tips
Preparation in Advance
I often prepare these skewers several hours ahead of time, especially when entertaining. The assembled skewers can be stored in the refrigerator for up to 4 hours before grilling. Just cover them with plastic wrap to prevent drying out.
For meal prep, I marinate the chicken and cut the vegetables up to 24 hours in advance, storing them separately. Then I assemble the skewers just before cooking.
Storage and Reheating
Refrigerator Storage: Cooked skewers will keep for 3-4 days in the refrigerator when stored in an airtight container
Freezer Storage: You can freeze cooked chicken skewers for up to 3 months, though the vegetables may lose some texture
Reheating Options:
- Oven: 350°F for 10-12 minutes
- Microwave: 1-2 minutes on medium power
- Grill: Quick reheat over medium heat for 2-3 minutes per side
Batch Cooking
When I’m meal prepping, I often double or triple this recipe. The marinated chicken freezes beautifully, and having these ready to grill makes weeknight dinners incredibly easy. I portion the marinated chicken into freezer bags, and they thaw quickly for last-minute grilling sessions.
Nutritional Benefits and Health Considerations
These chicken skewers aren’t just delicious – they’re also incredibly nutritious. Chicken is an excellent source of lean protein, containing all essential amino acids your body needs. The vegetables add fiber, vitamins, and minerals while keeping the calorie count reasonable.
Nutritional Breakdown (Per Serving)
| Nutrient | Amount | % Daily Value |
|---|---|---|
| Calories | 285 | 14% |
| Protein | 32g | 64% |
| Carbohydrates | 8g | 3% |
| Fat | 14g | 18% |
| Fiber | 2g | 7% |
| Sodium | 380mg | 17% |
Health Benefits
High Protein Content: Supports muscle building and maintenance, especially important for active individuals
Low Carbohydrate: Makes these skewers suitable for various dietary approaches, including keto and low-carb lifestyles
Rich in Vitamins: The vegetables provide vitamin C, vitamin A, and various B vitamins
Antioxidant Properties: The herbs and spices used contain compounds that may help reduce inflammation
Dietary Modifications
Keto-Friendly: These skewers are naturally low in carbohydrates and can easily fit into a ketogenic diet
Paleo Compatible: Using compliant seasonings and oils makes these suitable for paleo dieters
Gluten-Free: Naturally gluten-free when served without bread-based sides
Dairy-Free: The basic recipe contains no dairy, making it suitable for those with lactose intolerance
Equipment and Tools That Make a Difference
Essential Grilling Equipment
Grill: While I prefer gas grills for their convenience and temperature control, charcoal grills work perfectly and add a lovely smoky flavor
Skewers: I use both metal and wooden skewers, depending on the occasion. Metal skewers conduct heat and cook the chicken from the inside, while wooden skewers are disposable and great for parties
Instant-Read Thermometer: This is non-negotiable for food safety and perfect results
Grill Brush: Clean grates are essential for preventing sticking and ensuring even cooking
Helpful Accessories
Grill Basket: For smaller vegetables that might fall through the grates
Basting Brush: For applying oil or sauce during cooking
Long-Handled Tongs: For safely turning skewers without burning your hands
Timer: Consistent timing is crucial for perfect results
Frequently Asked Questions
Q: Can I use frozen chicken for this recipe? I don’t recommend using frozen chicken directly. Always thaw chicken completely before marinating and grilling. Frozen chicken won’t absorb the marinade properly and may cook unevenly. Plan ahead and thaw your chicken in the refrigerator overnight for best results.
Q: How long should I soak wooden skewers? I soak wooden skewers for at least 30 minutes before using them. This prevents them from burning on the grill. If you forget to soak them, you can do a quick 10-minute soak in hot water, though 30 minutes is ideal.
Q: Can I make these skewers in the oven? Absolutely! Preheat your oven to 425°F and place the skewers on a parchment-lined baking sheet. Cook for 15-18 minutes, turning once halfway through. You won’t get the same char and smoky flavor as grilling, but they’ll still be delicious.
Q: What’s the best way to tell when the chicken is done? The most reliable method is using an instant-read thermometer. The internal temperature should reach 165°F. Visually, the chicken should be golden brown with clear juices running when pierced. The meat should feel firm but not hard when pressed gently.
Q: Can I prepare these skewers ahead of time? Yes! You can assemble the skewers up to 4 hours before grilling and store them covered in the refrigerator. For longer storage, I recommend marinating the chicken and cutting the vegetables separately, then assembling just before cooking.
Q: Why do my vegetables cook faster than my chicken? This usually happens when the vegetable pieces are cut too small or when they’re placed on the outside edges of the skewer where they get the most direct heat. Try cutting vegetables slightly larger and positioning them between chicken pieces for more even cooking.
Q: Can I use different cuts of chicken? Chicken thighs are my preference because they stay moist and flavorful, but chicken breast works well too. Just be extra careful not to overcook breast meat as it can dry out quickly. Avoid using chicken with bones, as it won’t cook evenly on skewers.
Q: How do I prevent the chicken from sticking to the grill? Make sure your grill grates are clean and well-oiled before cooking. I also brush the skewers lightly with oil just before grilling. Don’t try to move the skewers too soon – let them develop a good sear first, and they’ll release naturally.
Q: What should I do if my grill is too hot? If your grill is running too hot, move the skewers to a cooler part of the grill or reduce the heat. You can also create temperature zones by having one side of your grill on high heat and the other on medium or low heat.
Q: Can I use this marinade for other proteins? This marinade works wonderfully with other proteins! I’ve used it successfully with pork tenderloin, shrimp, and even firm fish like salmon. Adjust the cooking times accordingly, as different proteins have different cooking requirements.
These quick grilled chicken skewers have become one of my most requested recipes, and I hope they become a favorite in your kitchen too. The combination of simplicity, flavor, and versatility makes them perfect for everything from casual weeknight dinners to impressive dinner parties. Remember, the key to success lies in proper preparation, consistent technique, and not being afraid to experiment with different flavor combinations. Happy grilling!