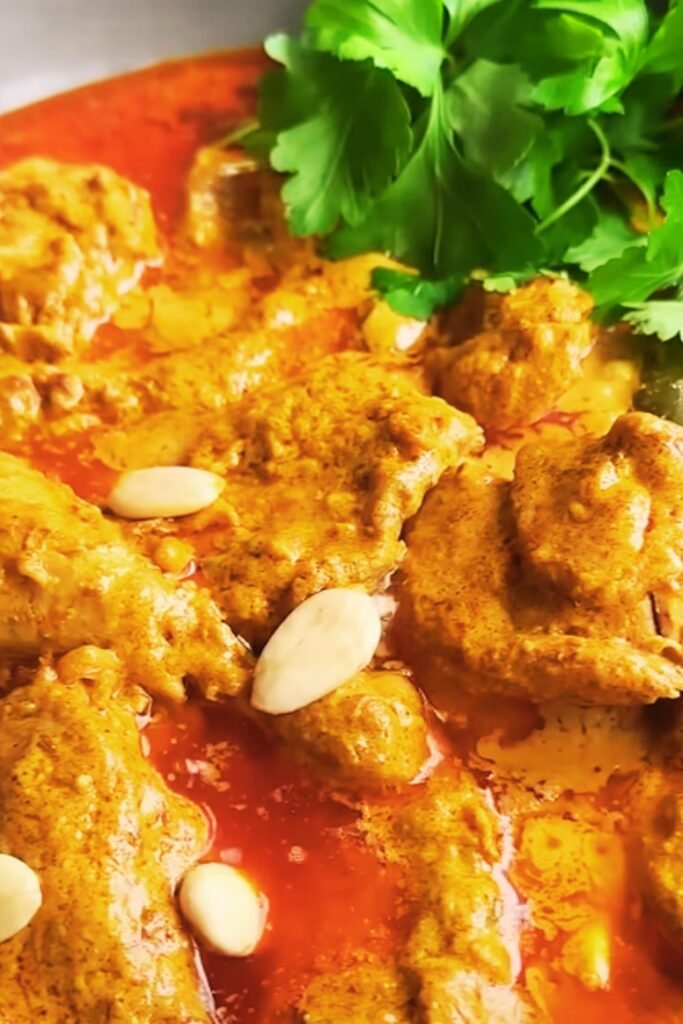
There’s something truly magical about the aroma of curry spices wafting through my kitchen on a busy weeknight. When I first discovered this quick mild chicken curry recipe, it completely transformed my approach to weeknight dinners. I was initially skeptical – could something so quick really deliver the rich, complex flavors I craved? After making it dozens of times and tweaking it to perfection, I can confidently say this has become my go-to comfort meal that never fails to satisfy.
This isn’t your typical hours-long curry that requires endless prep and complicated techniques. Instead, it’s a beautifully balanced, mild curry that comes together in just 30 minutes, making it perfect for those nights when you want something comforting but don’t have the luxury of time. The beauty lies in its simplicity – using readily available ingredients to create something that tastes like it’s been simmering all day.
Why I Love This Quick Mild Chicken Curry
After years of experimenting with various curry recipes, I’ve learned that the best dishes often come from understanding a few key principles rather than following overly complicated methods. This mild chicken curry embodies that philosophy perfectly. It delivers incredible flavor without overwhelming heat, making it suitable for the whole family, including those who are sensitive to spice.
What sets this recipe apart is its versatility. I’ve served it to guests who expected a heavy, rich curry and watched their surprise when they realized how light yet satisfying it was. The creamy coconut base provides richness without the heaviness of traditional cream-based curries, while the carefully balanced spice blend creates depth without aggression.
Key Benefits of This Recipe
Time Efficiency: Ready in 30 minutes from start to finish Family-Friendly: Mild heat level suitable for all ages
Nutritious: Packed with lean protein and vegetables Customizable: Easy to adjust spice levels and add vegetables Budget-Friendly: Uses affordable, accessible ingredients Meal Prep Friendly: Tastes even better the next day
Essential Ingredients and Their Roles
Understanding why each ingredient matters has helped me perfect this recipe over time. Let me share my insights about the key components:
Protein Foundation
Chicken Thighs vs. Breasts: I strongly recommend using boneless, skinless chicken thighs for this curry. While chicken breasts work, thighs remain more tender and flavorful during the cooking process. They also handle the simmering better without becoming dry.
Spice Blend Components
The magic happens in the spice combination. I’ve found that using whole spices when possible and grinding them fresh makes a noticeable difference, but pre-ground spices work perfectly well for busy weeknights.
Cumin Seeds: Provide earthiness and depth Coriander Seeds: Add citrusy, slightly sweet notes
Turmeric Powder: Contributes color and subtle bitterness Garam Masala: Brings warmth and complexity Paprika: Adds color and mild sweetness
Aromatics Base
Onions: I prefer yellow onions for their balanced sweetness Garlic: Fresh garlic is non-negotiable – it provides pungency and depth Ginger: Fresh ginger root adds brightness and heat Tomatoes: Either fresh or canned work well, providing acidity and body
Liquid Components
Coconut Milk: Use full-fat for richness, light for a leaner version Chicken Stock: Adds depth and prevents the curry from being too rich Tomato Paste: Concentrates flavor and adds body to the sauce
Detailed Cooking Method
My approach to this curry focuses on building layers of flavor efficiently. Each step serves a purpose in developing the final taste profile.
Step 1: Preparation Phase (5 minutes)
Start by cutting your chicken into uniform bite-sized pieces – roughly 1.5-inch chunks work best. This ensures even cooking and makes the curry easier to eat. Pat the chicken dry with paper towels and season generously with salt and pepper.
Dice your onion finely – about ¼-inch pieces. Mince the garlic and ginger together; I often use a microplane grater for the ginger as it distributes more evenly throughout the curry.
Step 2: Building the Flavor Base (8 minutes)
Heat oil in a large, heavy-bottomed pan or Dutch oven over medium-high heat. I prefer using a neutral oil like vegetable or canola, as olive oil can sometimes compete with the delicate spice flavors.
Add the chicken pieces in a single layer, avoiding overcrowding. Let them brown for 3-4 minutes before stirring. This initial browning creates fond on the bottom of the pan, which will add incredible depth to your final sauce.
Remove the chicken and set aside. In the same pan, reduce heat to medium and add the diced onions. Cook until translucent and slightly golden, about 4-5 minutes. The key here is patience – properly cooked onions form the backbone of a great curry.
Step 3: Spice Integration (3 minutes)
Add the minced garlic and ginger to the onions, cooking for about 30 seconds until fragrant. Be careful not to burn the garlic, as it will create bitterness.
Add all your ground spices – cumin, coriander, turmeric, garam masala, and paprika. Stir constantly for 30-60 seconds until the spices become very fragrant. This step, called blooming, releases the essential oils in the spices and prevents them from tasting raw in the finished dish.
Step 4: Creating the Sauce (10 minutes)
Add the tomato paste and stir for another 30 seconds. Then add your diced tomatoes (or canned tomatoes, crushing them with your hands as you add them). Let this mixture cook for 3-4 minutes, allowing the tomatoes to break down and meld with the spices.
Pour in the coconut milk and chicken stock, stirring to combine everything smoothly. Bring the mixture to a gentle simmer, then return the chicken to the pan along with any accumulated juices.
Step 5: Final Cooking and Seasoning (8 minutes)
Reduce heat to maintain a gentle simmer. Cover partially and cook for 6-8 minutes, until the chicken is cooked through and the sauce has thickened slightly. Taste and adjust seasoning with salt, pepper, and additional spices if needed.
In the final minute, stir in fresh cilantro if using, and a squeeze of lime juice to brighten the flavors.
Nutritional Profile and Health Benefits
One of the reasons this curry has become such a staple in my kitchen is its impressive nutritional profile. Unlike many curry recipes that rely heavily on cream or excessive oil, this version provides substantial nutrition without compromising on taste.
| Nutrient | Per Serving | % Daily Value |
|---|---|---|
| Calories | 285 | 14% |
| Protein | 32g | 64% |
| Total Fat | 12g | 15% |
| Saturated Fat | 8g | 40% |
| Carbohydrates | 8g | 3% |
| Fiber | 2g | 8% |
| Sugar | 5g | – |
| Sodium | 420mg | 18% |
| Potassium | 685mg | 15% |
| Vitamin C | 15mg | 17% |
| Iron | 2.1mg | 12% |
Health Benefits Breakdown
High-Quality Protein: Each serving provides over 30 grams of complete protein, supporting muscle maintenance and satiety.
Beneficial Fats: The coconut milk provides medium-chain triglycerides (MCTs), which are easily metabolized by the body.
Anti-Inflammatory Compounds: Turmeric contains curcumin, ginger provides gingerol, and garlic offers allicin – all potent anti-inflammatory compounds.
Antioxidant Rich: The combination of spices and tomatoes provides a substantial antioxidant boost.
Low Carbohydrate: At only 8 grams of carbs per serving, this curry fits well into low-carb eating patterns.
Customization and Variations
The beauty of this recipe lies in its adaptability. Over the months I’ve been making this curry, I’ve discovered countless ways to modify it based on what’s available in my pantry or the preferences of my family.
Spice Level Adjustments
For Milder Taste:
- Reduce garam masala by half
- Omit black pepper entirely
- Add a tablespoon of honey or maple syrup
- Increase coconut milk ratio
For More Heat:
- Add ½ teaspoon cayenne pepper
- Include 1-2 finely minced jalapeños with the onions
- Use hot paprika instead of sweet
- Finish with a dash of hot sauce
Vegetable Additions
I love incorporating vegetables both for nutrition and to make the curry more substantial:
Quick-Cooking Vegetables (add in final 5 minutes):
- Bell peppers
- Zucchini
- Spinach
- Peas
Longer-Cooking Vegetables (add with chicken):
- Cauliflower florets
- Diced potatoes
- Carrots
- Sweet potatoes
Protein Alternatives
While chicken thighs are my preferred choice, this curry works beautifully with other proteins:
Other Meats:
- Lamb shoulder (increase cooking time by 10 minutes)
- Beef chuck (cut small, increase time by 15 minutes)
- Pork shoulder (similar timing to chicken)
Seafood Options:
- Shrimp (add in final 3 minutes only)
- Firm fish like cod (add in final 5 minutes)
- Scallops (add in final 2 minutes)
Vegetarian Versions:
- Extra-firm tofu (press and cube)
- Chickpeas (add canned, drained chickpeas with sauce)
- Mixed vegetables only
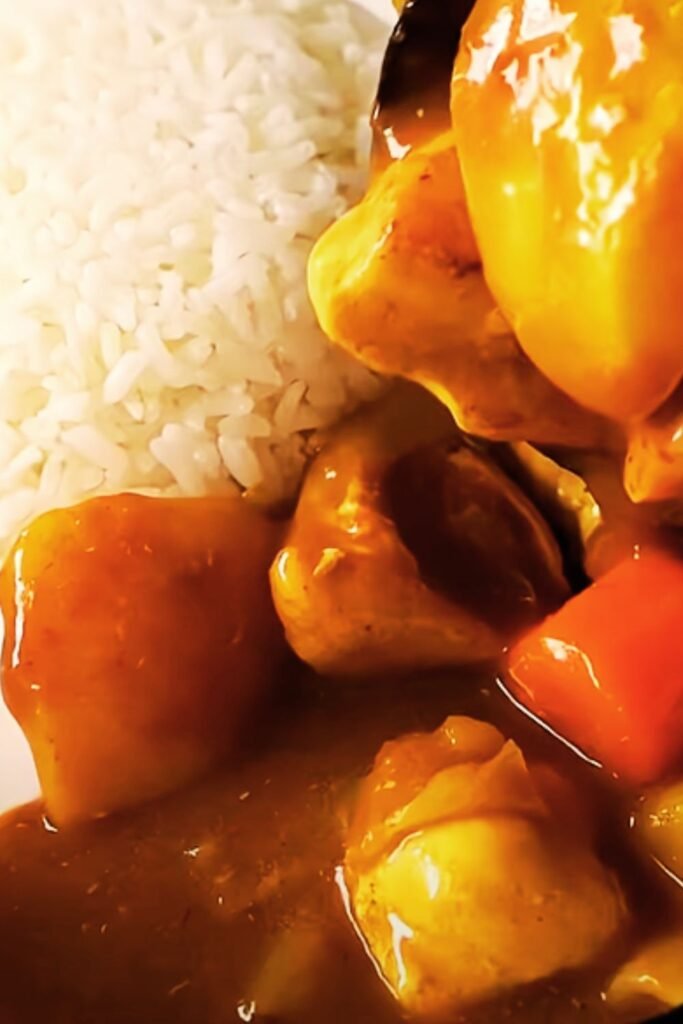
Serving Suggestions and Pairings
After making this curry countless times, I’ve discovered which accompaniments truly complement its flavors and which ones compete unnecessarily.
Traditional Pairings
Rice Options:
- Basmati rice (my personal favorite)
- Jasmine rice for subtle fragrance
- Brown rice for added fiber
- Cauliflower rice for low-carb option
Bread Accompaniments:
- Naan bread (store-bought or homemade)
- Whole wheat chapati
- Rice crackers for gluten-free option
- Papadum for crunch
Fresh Accompaniments
I always serve this curry with fresh elements to balance the richness:
Cooling Elements:
- Plain Greek yogurt mixed with mint
- Cucumber raita
- Sliced fresh cucumber
- Fresh cilantro sprigs
Acidic Components:
- Lime wedges (essential in my opinion)
- Quick pickled onions
- Mango chutney
- Fresh tomato salsa
Storage and Meal Prep Tips
This curry is absolutely perfect for meal preparation, and honestly, I think it tastes even better the next day after the flavors have had time to meld together.
Storage Guidelines
| Storage Method | Duration | Best Practices |
|---|---|---|
| Refrigerator | 3-4 days | Store in airtight containers |
| Freezer | 2-3 months | Freeze in portion-sized containers |
| Room Temperature | 2 hours max | Cool completely before storing |
Meal Prep Strategy
I often make a double batch on Sunday and portion it into individual containers with rice. This gives me quick, healthy lunches throughout the week that just need a quick microwave reheat.
Freezing Tips:
- Cool completely before freezing
- Leave space in containers for expansion
- Label with date and contents
- Freeze sauce and rice separately for best texture
Reheating Instructions:
- From refrigerator: Microwave 2-3 minutes, stirring halfway
- From frozen: Thaw overnight, then reheat as above
- Stovetop: Reheat gently over medium-low heat, adding splash of water if needed
Make-Ahead Components
To make weeknight cooking even faster, I sometimes prep components ahead:
Sunday Prep:
- Dice onions and store in refrigerator
- Mix spice blend and store in small jar
- Cut chicken and marinate with salt and pepper
Morning Prep (for evening cooking):
- Complete steps 1-3 in the morning
- Refrigerate the spice-onion mixture
- Cut chicken and refrigerate separately
Troubleshooting Common Issues
Even with a relatively simple recipe like this, I’ve encountered (and helped others solve) various challenges over time. Here are the most common issues and my tried-and-tested solutions:
Sauce Consistency Problems
Too Thin:
- Simmer uncovered for additional 5-10 minutes
- Mix 1 tablespoon cornstarch with 2 tablespoons cold water, stir into curry
- Add 1-2 tablespoons tomato paste
Too Thick:
- Add chicken stock or water, ¼ cup at a time
- Reduce heat and stir gently to prevent sticking
- Add extra coconut milk for richness
Flavor Imbalances
Too Bland:
- Increase salt gradually – this is often the culprit
- Add more garam masala or individual spices
- Squeeze fresh lime juice just before serving
- Check if spices are fresh (replace if over a year old)
Too Spicy (even for mild curry):
- Add more coconut milk
- Stir in a tablespoon of honey or sugar
- Add diced tomatoes to dilute heat
- Serve with cooling yogurt
Bitter Taste:
- Usually from burnt garlic or spices – start over if severe
- Add a teaspoon of sugar to balance
- Increase coconut milk to mask bitterness
Texture Issues
Tough Chicken:
- Reduce heat and simmer longer
- Next time, don’t skip the browning step
- Use thighs instead of breasts
- Cut into smaller pieces for faster cooking
Grainy Sauce:
- Strain the sauce if coconut milk has separated
- Use full-fat coconut milk for smoother texture
- Don’t let the sauce boil vigorously
Q&A Section
Q: Can I make this curry in a slow cooker?
Yes! Brown the chicken and sauté the aromatics first, then transfer everything to your slow cooker. Cook on low for 4-6 hours or high for 2-3 hours. Add the coconut milk in the final 30 minutes to prevent curdling.
Q: What’s the best way to make this curry spicier without changing the overall flavor profile?
I recommend adding cayenne pepper gradually – start with ¼ teaspoon and taste. You can also include fresh jalapeños with the onions, or finish with your favorite hot sauce. Avoid adding too much chili powder as it can make the curry bitter.
Q: Why does my coconut milk sometimes curdle in the curry?
Coconut milk can separate when exposed to high heat or acid. To prevent this, use full-fat coconut milk, add it gradually while stirring, and keep the heat at a gentle simmer rather than a rolling boil. If it does separate, whisking vigorously often brings it back together.
Q: Can I substitute the coconut milk with dairy products?
Absolutely! Heavy cream works well, though it will change the flavor profile slightly. Greek yogurt mixed with a little milk is another option, but add it off the heat to prevent curdling. For a lighter version, use half-and-half or whole milk, though the curry won’t be as rich.
Q: How do I prevent the chicken from becoming tough?
The key is not overcooking. Chicken thighs are more forgiving than breasts, but regardless of the cut, once the internal temperature reaches 165°F (74°C), remove from heat. Also, cutting the chicken into smaller, uniform pieces ensures even cooking.
Q: What vegetables work best in this curry, and when should I add them?
Hard vegetables like potatoes, carrots, and cauliflower should be added with the chicken so they have time to cook through. Softer vegetables like bell peppers, zucchini, and peas should be added in the final 5 minutes. Leafy greens like spinach go in just before serving.
Q: Is there a way to make this curry without tomatoes?
Yes! You can omit the tomatoes and tomato paste entirely. The curry will be lighter in color and slightly less acidic. You might want to add a splash of lemon juice at the end to maintain some brightness, and perhaps an extra ¼ cup of coconut milk for body.
Q: How can I tell when the curry is properly done?
The chicken should be cooked through (165°F internal temperature), the sauce should coat the back of a spoon without being too thick, and all the flavors should be well-integrated. Taste for seasoning – you should be able to detect all the spices without any one overpowering the others.
Q: What’s the best rice to serve with this curry?
I prefer basmati rice for its fragrant, nutty flavor and fluffy texture. Jasmine rice is my second choice. The key is to rinse the rice until the water runs clear before cooking, and to use the absorption method rather than boiling in lots of water.
Q: Can I double this recipe, and will the cooking time change?
You can definitely double the recipe! Use a larger pan to ensure even cooking. The cooking time shouldn’t change significantly, but you may need an extra 2-3 minutes for the larger volume of liquid to reduce properly. Just keep an eye on the consistency and adjust as needed.
This quick mild chicken curry has truly become one of my most treasured recipes. It represents everything I love about home cooking – simple ingredients transformed into something comforting and delicious through technique and care. Whether you’re cooking for picky eaters, trying to eat healthier, or simply need a reliable weeknight meal, this curry delivers on all fronts. The mild spice level makes it accessible to everyone, while the complex flavor development ensures it never feels boring or one-dimensional.
I encourage you to make this recipe your own. Start with my base version, then experiment with the variations and modifications I’ve suggested. Some of my favorite cooking memories have come from playing with this recipe – discovering that sweet potatoes work beautifully, learning that a squeeze of lime at the end makes everything brighter, realizing that day-old curry makes an incredible breakfast when served over scrambled eggs.
The beauty of curry lies not just in its flavors, but in its ability to bring people together around the table. There’s something universally comforting about a bowl of aromatic, warming curry that transcends cultural boundaries. I hope this recipe brings as much joy to your kitchen as it has to mine, and that it becomes a reliable friend for those nights when you need something delicious, nourishing, and satisfying without the fuss.
Remember, the best recipes are living documents – they evolve with your tastes, your available ingredients, and your growing confidence in the kitchen. Don’t be afraid to make adjustments, and trust your palate. After all, the most important ingredient in any curry is the love and attention you put into making it.