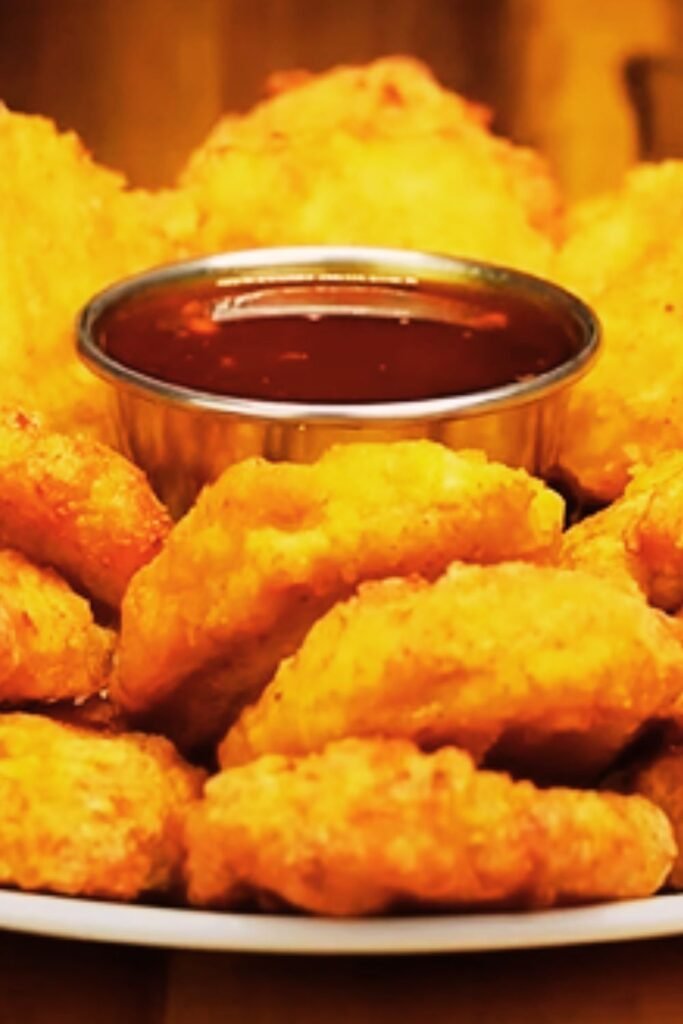
Let me share with you the most incredible chicken nugget recipe that has completely transformed how I think about comfort food. These aren’t just any chicken nuggets – they’re crispy, golden perfection that rivals your favorite restaurant while being infinitely healthier. I’ve spent years perfecting this technique, and I’m excited to share every secret with you.
The Game-Changing Discovery
My journey with these nuggets began during one of those chaotic weeknight dinner moments. I was craving something crispy and satisfying but wanted to avoid the guilt that comes with deep-fried options. After countless experiments and kitchen disasters, I discovered the three crucial elements that make these nuggets absolutely extraordinary: pre-toasting the breadcrumbs, using a wire rack, and proper seasoning timing.
What sets these apart isn’t just the cooking method – it’s the attention to detail in every step. The result? Chicken nuggets so crispy and flavorful that even the most discerning fast-food lovers can’t tell the difference.
Why This Recipe Works So Well
The Science Behind Perfect Crispiness
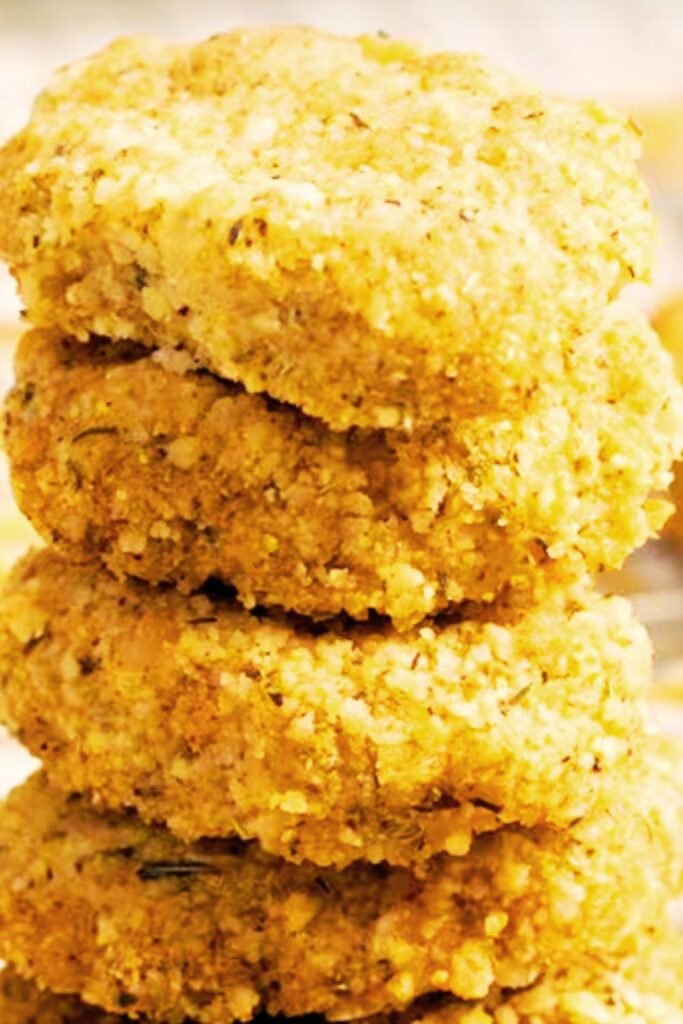
Pre-toasted Breadcrumbs: This is my secret weapon. By toasting panko breadcrumbs before coating the chicken, we create an already-developed crust that becomes impossibly crispy in the oven. This step eliminates the soggy coating problem that plagues most baked chicken recipes.
Wire Rack Elevation: Elevating the nuggets on a wire rack allows hot air to circulate completely around each piece, ensuring even browning and preventing the dreaded soggy bottom.
Strategic Oil Application: Using cooking spray at two different stages – on the breadcrumbs during toasting and on the assembled nuggets before baking – creates multiple layers of browning opportunity.
Nutritional Advantages
These baked beauties contain approximately 75% less fat than their deep-fried counterparts while maintaining superior texture and flavor. By using lean chicken breast and controlling our cooking oil, we’re creating a protein-rich meal that supports healthy eating goals without sacrificing satisfaction.
Complete Ingredient Breakdown
For the Seasoned Breadcrumb Coating
- 1½ cups panko breadcrumbs – Japanese-style breadcrumbs create superior texture
- 1½ teaspoons kosher salt – Enhances all flavors
- 1 teaspoon black pepper, freshly ground – Adds essential warmth
- 1 teaspoon onion powder – Provides savory depth
- 1 teaspoon sweet paprika – Contributes color and mild sweetness
- ½ teaspoon garlic powder – Essential aromatic component
- ¼ teaspoon cayenne pepper – Optional heat element
For the Chicken and Binding
- 1½ pounds boneless, skinless chicken breast – Cut into 1-inch uniform cubes
- 2 large eggs – Room temperature works best
- 2 tablespoons almond milk – Any milk variety works
- Olive oil cooking spray – For optimal browning
Essential Equipment
- Wire cooling rack – Oven-safe variety
- Large rimmed baking sheet – 18×13 inch preferred
- Two medium mixing bowls – For wet and dry mixtures
- Kitchen tongs – For safe handling
- Instant-read thermometer – For food safety
Step-by-Step Master Method
Phase 1: Preparing the Foundation
Step 1: Breadcrumb Preparation Preheat your oven to 400°F. Spread panko breadcrumbs evenly across your baking sheet. Spray lightly with cooking spray – you want coverage without oversaturation. Bake for 2 minutes, then shake the pan gently. Continue baking for 2-4 more minutes until the breadcrumbs achieve a beautiful golden color. Watch carefully during the final minutes to prevent burning.
Step 2: Seasoning Integration
Transfer the warm, toasted breadcrumbs to a medium bowl. While they’re still warm, whisk in all your spices. The residual heat helps the seasonings distribute evenly and become more aromatic.
Step 3: Creating the Binding Mixture In your second bowl, whisk together eggs and milk until completely smooth. This mixture should be thin enough to coat easily but thick enough to help breadcrumbs adhere.
Phase 2: Assembly Process
Step 4: Rack Preparation Place your wire rack over the same baking sheet (now cleaned). Spray the rack generously with cooking spray – this prevents sticking and aids in browning.
Step 5: The Coating Dance Working with one piece at a time, dip each chicken cube into the egg mixture, allowing excess to drip off. Then roll it in the seasoned breadcrumbs, pressing gently to ensure complete coverage. Transfer immediately to your prepared rack, spacing pieces about 1 inch apart for optimal air circulation.
Step 6: Final Preparation Once all nuggets are coated and arranged, spray their tops generously with cooking spray. This final spray is crucial for achieving restaurant-quality browning.
Phase 3: The Baking Process
Step 7: Precision Baking Bake for 15-20 minutes, checking internal temperature with your thermometer. Nuggets are perfectly done when they reach 165°F internally and display a gorgeous golden-brown exterior.

Advanced Tips for Perfection
Chicken Preparation Secrets
Size Consistency: Cut your chicken into uniformly sized pieces. Inconsistent sizing leads to uneven cooking – some pieces overcooked while others remain undercooked.
Temperature Timing: Remove chicken from refrigerator 15 minutes before cooking. This slight temperature increase ensures more even cooking throughout.
Moisture Management: Pat chicken completely dry with paper towels before beginning the coating process. Excess moisture prevents proper breadcrumb adhesion.
Troubleshooting Common Issues
Problem: Coating falls off during baking Solution: Ensure chicken is completely dry and egg mixture isn’t too thin
Problem: Nuggets aren’t crispy enough
Solution: Increase oven temperature to 425°F and ensure proper spray application
Problem: Uneven browning Solution: Rotate baking sheet halfway through cooking time
Nutritional Information Table
| Nutrient | Per Serving (4 servings) | % Daily Value* |
|---|---|---|
| Calories | 285 | 14% |
| Protein | 36g | 72% |
| Total Fat | 8g | 10% |
| Saturated Fat | 2g | 10% |
| Cholesterol | 125mg | 42% |
| Sodium | 580mg | 25% |
| Carbohydrates | 12g | 4% |
| Fiber | 1g | 4% |
| Sugars | 1g | – |
| Iron | 2mg | 11% |
| Calcium | 45mg | 3% |
*Based on 2,000 calorie diet
Flavor Variations and Adaptations
International Spice Blends
Italian-Inspired: Replace standard spices with 1 teaspoon each of dried oregano, basil, and parmesan cheese powder
Mexican-Style: Substitute with 1 teaspoon cumin, ½ teaspoon chili powder, and ¼ teaspoon smoked paprika
Asian-Fusion: Add 1 teaspoon ginger powder, ½ teaspoon Chinese five-spice, and 1 tablespoon sesame seeds to breadcrumbs
Dietary Modifications
Gluten-Free Version: Substitute with certified gluten-free panko breadcrumbs – texture remains excellent
Dairy-Free Option: Use any plant-based milk in place of regular milk
Lower-Sodium Alternative: Reduce salt to ¾ teaspoon and increase other spices to compensate
Perfect Serving Suggestions
Classic Dipping Sauces
Homemade Honey Mustard
- 3 tablespoons Dijon mustard
- 2 tablespoons honey
- 1 tablespoon mayonnaise
- 1 teaspoon apple cider vinegar
Elevated BBQ Sauce
- ½ cup ketchup
- 2 tablespoons brown sugar
- 1 tablespoon apple cider vinegar
- 1 teaspoon smoked paprika
- ½ teaspoon garlic powder
Creamy Ranch
- ½ cup Greek yogurt
- 2 tablespoons mayonnaise
- 1 packet ranch dressing mix
- 1-2 tablespoons milk for consistency
Complementary Side Dishes
Roasted Vegetables: Broccoli, carrots, or Brussels sprouts roasted with olive oil and herbs
Healthy Potato Options: Sweet potato fries, roasted fingerlings, or crispy smashed potatoes
Fresh Salads: Mixed greens with cucumber, cherry tomatoes, and light vinaigrette
Comfort Sides: Homemade mac and cheese, coleslaw, or corn on the cob
Storage and Meal Prep Strategies
Refrigeration Guidelines
Store leftover nuggets in an airtight container for up to 5 days in the refrigerator. For best results when reheating, use your oven’s broil setting for 2-3 minutes to restore crispiness.
Freezing Protocol
Preparation: Allow nuggets to cool completely before freezing Initial Freeze: Arrange on a baking sheet and freeze for 2 hours
Long-term Storage: Transfer to freezer bags or containers for up to 3 months Reheating: Bake directly from frozen at 375°F for 12-15 minutes
Make-Ahead Options
You can prepare the seasoned breadcrumb mixture up to 3 days in advance. Store in an airtight container at room temperature. The egg mixture can be prepared the morning of cooking.
Kid-Friendly Modifications
Reducing Spice Level
For younger palates, eliminate the cayenne pepper and reduce black pepper to ½ teaspoon. Consider adding a touch of garlic powder for flavor without heat.
Fun Shape Variations
Cut chicken into fun shapes using cookie cutters before coating. Stars, hearts, and dinosaurs are particularly popular with children.
Interactive Cooking
Let kids help with the coating process – it’s messy fun that gets them excited about eating the final product.
Advanced Cooking Techniques
Air Fryer Adaptation
Cook at 375°F for 12-15 minutes, shaking the basket halfway through. No need to change any other aspects of the recipe.
Convection Oven Adjustments
Reduce temperature to 375°F and decrease cooking time by 2-3 minutes. The increased air circulation in convection ovens accelerates browning.
Double-Batch Strategy
When making large quantities, use two baking sheets and rotate their positions halfway through cooking for even results.
Nutritional Comparison Table
| Preparation Method | Calories | Fat (g) | Protein (g) | Sodium (mg) |
|---|---|---|---|---|
| Our Baked Recipe | 285 | 8 | 36 | 580 |
| Fast Food Nuggets | 470 | 28 | 22 | 890 |
| Deep Fried Homemade | 380 | 22 | 28 | 650 |
| Store-Bought Frozen | 320 | 18 | 24 | 720 |
Frequently Asked Questions
Q: Can I use chicken thighs instead of breasts?
A: Absolutely! Thighs will be slightly more flavorful and juicy. Increase cooking time by 2-3 minutes and ensure internal temperature reaches 165°F.
Q: What if I don’t have a wire rack?
A: You can bake directly on the sheet, but flip nuggets halfway through cooking. Results won’t be quite as crispy but still delicious.
Q: How do I know when they’re perfectly done?
A: The exterior should be deep golden brown, and internal temperature should reach 165°F. They should feel firm to the touch, not squishy.
Q: Can I make these without eggs?
A: Yes! Try using buttermilk, beaten flax eggs, or even thin mayonnaise as binding agents. Results may vary slightly in adhesion.
Q: Why do my breadcrumbs fall off during cooking?
A: This usually indicates the chicken wasn’t dry enough or the egg mixture was too thin. Pat chicken completely dry and ensure your egg mixture has good consistency.
Q: Can I prep these ahead for a party?
A: You can bread them up to 4 hours ahead and refrigerate. For best results, apply the final cooking spray just before baking.
Q: What’s the best way to reheat leftovers?
A: Use your oven’s broil setting for 2-3 minutes. This restores the crispy exterior better than microwaving.
Q: Are these suitable for meal prep?
A: Definitely! They reheat well and can be used in salads, wraps, or eaten as snacks throughout the week.
Q: Can I use regular breadcrumbs instead of panko?
A: Panko creates superior texture, but regular breadcrumbs work in a pinch. You might need to adjust cooking time slightly.
Q: How do I prevent burning the breadcrumbs during toasting?
A: Watch carefully during the final 2 minutes and shake the pan if you see uneven browning. Every oven heats differently.
Q: What oil spray works best?
A: Olive oil spray provides the best flavor, but any neutral cooking spray will work effectively.
Q: Can I add cheese to the coating?
A: Grated parmesan cheese can be added to the breadcrumb mixture for extra flavor. Use about 2-3 tablespoons.
These healthy baked chicken nuggets have become my go-to solution for satisfying comfort food cravings without compromise. The technique is foolproof once you understand the key principles, and the results consistently impress both kids and adults. Whether you’re meal prepping for the week or preparing a family dinner, this recipe delivers restaurant-quality results in your own kitchen.
The beauty of this recipe lies in its adaptability – you can modify spices, cooking methods, and serving styles while maintaining the core technique that ensures success. Once you master these fundamentals, you’ll never need to rely on store-bought nuggets again.
I encourage you to make this recipe your own by experimenting with different spice combinations and serving suggestions. The foundation technique remains constant, but the flavor possibilities are endless. Happy cooking!