When it comes to indulgent desserts that make your taste buds sing, few creations can compete with the magnificent marriage of doughnuts and crème brûlée. I’ve spent years perfecting this recipe, and today I’m thrilled to share my ultimate crème brûlée doughnuts with you. These are not your average doughnuts from the corner shop—they’re a sophisticated dessert experience that will impress even the most discerning sweet tooth.
What Makes These Doughnuts Special
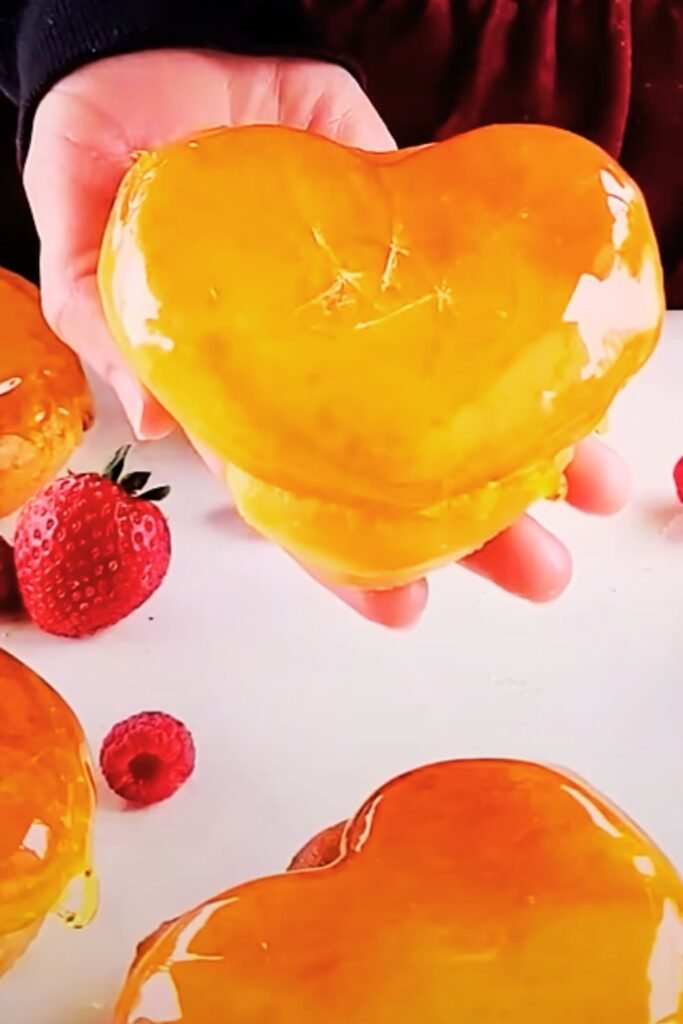
The beauty of crème brûlée doughnuts lies in their perfect contrast of textures: a pillowy soft yeast doughnut filled with silky vanilla bean custard, topped with a thin layer of caramelized sugar that provides that signature “crack” when tapped with a spoon. Each bite delivers the comfort of a freshly made doughnut with the elegant sophistication of a French classic dessert.
I first encountered these delightful creations at a specialty bakery in Paris and became obsessed with recreating them at home. After countless batches and refinements, I’ve developed a recipe that captures all the magic without requiring professional pastry chef skills.
Essential Ingredients
What elevates these doughnuts from good to extraordinary are quality ingredients. Here’s what you’ll need:
For the Dough:
- 500g (4 cups) bread flour
- 60g (¼ cup) granulated sugar
- 7g (2¼ teaspoons) active dry yeast
- 3 large eggs, room temperature
- 120ml (½ cup) whole milk, warmed
- 85g (6 tablespoons) unsalted butter, softened
- 1 teaspoon vanilla extract
- ½ teaspoon fine sea salt
- Vegetable oil for frying (about 2 liters/2 quarts)
For the Crème Pâtissière (Custard Filling):
- 6 egg yolks
- 100g (½ cup) granulated sugar
- 45g (⅓ cup) cornstarch
- 500ml (2 cups) whole milk
- 1 vanilla bean, split and scraped (or 2 teaspoons vanilla extract)
- Pinch of salt
- 30g (2 tablespoons) unsalted butter
For the Brûlée Topping:
- 150g (¾ cup) granulated sugar or superfine caster sugar
- Kitchen torch
The Science Behind Perfect Doughnuts
Before diving into the recipe, let’s understand what makes a truly exceptional doughnut. The key lies in the development of gluten (giving structure) and proper fermentation (providing flavor and airy texture).
Bread flour contains more protein than all-purpose flour, resulting in stronger gluten development and a chewier texture that can withstand the weight of the custard filling. The milk and butter in the dough add richness and tenderness, while the eggs provide structure and color.
The oil temperature for frying is absolutely critical. Too hot (above 190°C/375°F), and the doughnuts will brown too quickly before cooking inside. Too cool (below 175°C/350°F), and they’ll absorb too much oil and become greasy. Using a reliable thermometer is non-negotiable for this recipe.
Detailed Recipe Instructions
Step 1: Prepare the Dough
- In a small bowl, combine the warm milk (not hot, around 110°F/43°C) with a teaspoon of the sugar and sprinkle the yeast on top. Let sit for 5-10 minutes until foamy and activated.
- In the bowl of a stand mixer fitted with the dough hook, combine the flour, remaining sugar, and salt.
- With the mixer on low speed, add the yeast mixture, eggs, and vanilla.
- Mix until the dough comes together, about 2 minutes.
- Increase speed to medium-low and gradually add the softened butter, 1 tablespoon at a time, waiting until each addition is incorporated before adding the next.
- Once all butter is added, increase speed to medium and knead until the dough is smooth, elastic, and pulls away from the sides of the bowl, about 8-10 minutes.
- Transfer the dough to a lightly oiled bowl, cover with plastic wrap, and let rise in a warm place until doubled in size, about 1-1½ hours.
Step 2: Make the Crème Pâtissière
While the dough is rising, prepare your custard filling:
- In a medium bowl, whisk together the egg yolks, sugar, and cornstarch until pale and thick.
- In a saucepan, heat the milk with the vanilla bean (if using) and salt until it just comes to a simmer.
- Remove the vanilla bean (if using) and slowly pour about a third of the hot milk into the egg mixture, whisking constantly to prevent scrambling.
- Pour the tempered egg mixture back into the saucepan with the remaining milk.
- Cook over medium heat, whisking constantly, until the mixture thickens and begins to bubble, about 2-3 minutes.
- Continue cooking and whisking for another minute to ensure the cornstarch is fully cooked.
- Remove from heat and stir in the butter and vanilla extract (if not using a vanilla bean).
- Transfer to a bowl, press plastic wrap directly onto the surface to prevent a skin from forming, and refrigerate until completely chilled, at least 2 hours or overnight.
Step 3: Shape the Doughnuts
- Once the dough has doubled in size, punch it down gently to release excess air.
- Turn the dough out onto a lightly floured surface and roll it to about ½-inch (1.25 cm) thickness.
- Using a 3-inch (7.5 cm) round cutter, cut out circles of dough.
- Transfer the dough circles to parchment-lined baking sheets, leaving about 2 inches between each.
- Cover loosely with plastic wrap and let rise again until puffy, about 30-45 minutes.
Step 4: Fry the Doughnuts
- Heat vegetable oil in a heavy-bottomed pot or dutch oven to 350°F (175°C). Use a candy/deep-fry thermometer to monitor the temperature closely.
- Carefully lower 2-3 doughnuts into the hot oil using a slotted spoon or spider.
- Fry until golden brown on one side, about 2 minutes, then flip and fry the other side for another 1-2 minutes.
- Transfer to a wire rack lined with paper towels to drain excess oil.
- Continue with the remaining doughnuts, adjusting the heat as needed to maintain the temperature.
- Allow the doughnuts to cool completely before filling.
Step 5: Fill the Doughnuts
- Transfer the chilled crème pâtissière to a piping bag fitted with a long filling tip (or use a bismarck tip).
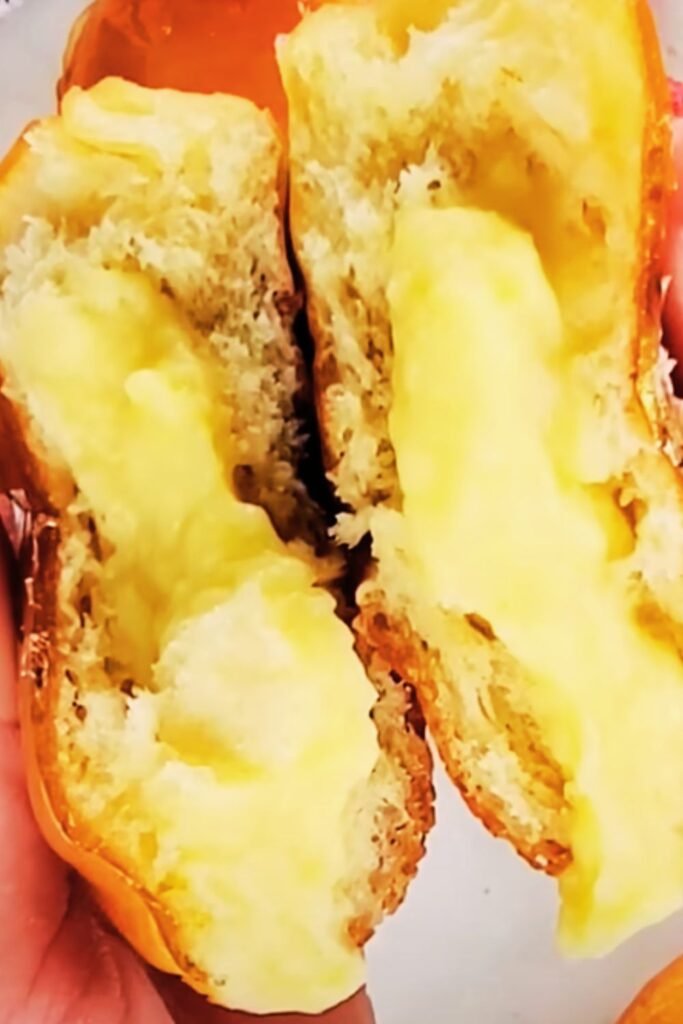
- Insert the tip into the side of each doughnut and gently squeeze to fill with custard. You’ll feel the doughnut getting heavier as it fills.
- Rotate the doughnut and fill from the opposite side to ensure even distribution of custard.
- Place filled doughnuts on a baking sheet or wire rack.
Step 6: Create the Brûlée Topping
This is where the magic happens:
- Sprinkle a thin, even layer of sugar over the top of each filled doughnut.
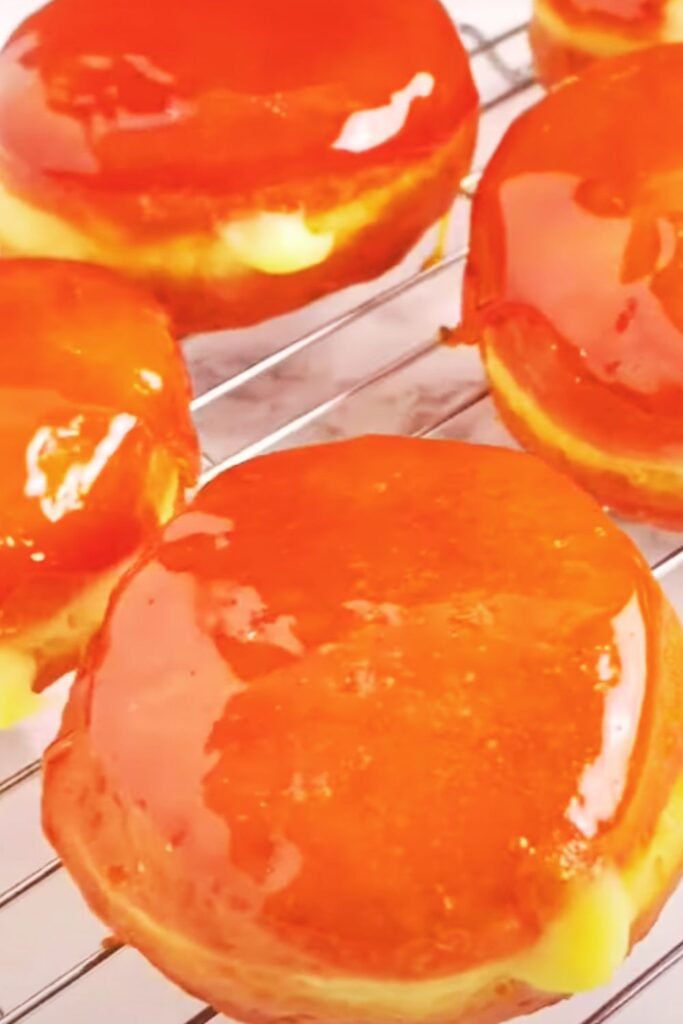
- Using a kitchen torch, carefully caramelize the sugar by moving the flame continuously across the surface until it melts and turns amber. Keep the torch moving to avoid burning.
- Allow the caramelized sugar to harden for about 1 minute.
- Repeat with a second layer of sugar for a thicker crust if desired.
Troubleshooting Common Issues
| Problem | Cause | Solution |
|---|---|---|
| Doughnuts too dense | Dough underproofed or overmixed | Allow proper rising time; knead just until smooth and elastic |
| Doughnuts too greasy | Oil not hot enough | Maintain oil temperature at 350°F (175°C) |
| Custard too runny | Insufficient cooking time or cornstarch | Cook until properly thickened; increase cornstarch slightly |
| Custard lumpy | Eggs curdled during cooking | Temper eggs properly; whisk constantly |
| Sugar won’t caramelize | Too thick or uneven layer | Apply thin, even layer; use finer sugar |
| Burnt sugar topping | Torch held too close or in one spot | Keep torch moving; hold further away |
| Filling leaking out | Too much filling or weak dough | Fill less; ensure proper gluten development |
| Doughnuts collapse | Overfilled or pierced both sides | Fill carefully; don’t overfill |
Expert Tips for Perfect Results
After making hundreds of these doughnuts, I’ve learned a few tricks that make a world of difference:
- Cold butter technique: For the dough, use butter straight from the refrigerator and grate it in, rather than using softened butter. This creates flakier layers within the doughnut.
- Double caramelization: For an extra-thick crackable crust, caramelize one layer of sugar, let it harden, then add another thin layer and caramelize again.
- Custard consistency: The custard should be thick enough to hold its shape when piped but smooth enough to flow through a piping tip. If too thick after refrigeration, whisk vigorously to loosen.
- Oil freshness: Never reuse oil more than once for doughnuts, as it can impart off-flavors.
- Sugar selection: Superfine (caster) sugar works best for caramelizing as it melts more quickly and evenly than regular granulated sugar.
- Strategic filling: Fill from two opposite sides but never pierce all the way through the doughnut.
Variations to Explore
While the classic vanilla bean custard is divine, I’ve experimented with several delicious variations:
- Chocolate Crème Brûlée: Add 85g (3oz) of melted dark chocolate to the custard after cooking.
- Coffee Infusion: Steep 2 tablespoons of coarsely ground coffee beans in the milk for 30 minutes before straining and proceeding with the custard recipe.
- Matcha Twist: Add 1-2 teaspoons of high-quality matcha powder to the custard.
- Citrus Zest: Add freshly grated orange or lemon zest to both the dough and custard.
- Spiced Version: Infuse the milk with a cinnamon stick, star anise, and a few cardamom pods.
Storing and Serving Suggestions
Crème brûlée doughnuts are best enjoyed the same day they’re made, ideally within a few hours of assembling. The contrast between the freshly caramelized sugar and the soft doughnut is most pronounced when fresh.
If you need to prepare components ahead:
- The dough can be refrigerated after the first rise for up to 12 hours.
- The custard can be made up to 3 days in advance and kept refrigerated.
- Fried (unfilled) doughnuts can be stored at room temperature for one day.
For the best experience, serve these doughnuts with:
- Fresh seasonal berries
- A dusting of powdered sugar on the plate
- High-quality hot chocolate or coffee
- Fruit coulis for dipping
- Vanilla bean ice cream for an over-the-top dessert experience
Nutritional Information
For those who are curious about the nutritional content (though let’s be honest, these are a treat, not a health food):
| Nutrient | Amount per Doughnut |
|---|---|
| Calories | Approximately 320 |
| Total Fat | 15g |
| Saturated Fat | 7g |
| Cholesterol | 145mg |
| Sodium | 120mg |
| Total Carbohydrates | 42g |
| Dietary Fiber | 1g |
| Sugars | 18g |
| Protein | 6g |
Making These Doughnuts Ahead for Events
If you’re planning to serve these at a special event, here’s my timeline for perfect results:
Day 1:
- Make the crème pâtissière and refrigerate overnight
- Prepare the dough and refrigerate after the first rise
Day 2 (Event Day):
- Remove dough from refrigerator 1-2 hours before shaping
- Shape, proof, and fry doughnuts
- Fill with custard 1-2 hours before serving
- Caramelize the sugar topping no more than 30 minutes before serving
Frequently Asked Questions
Can I make these without a stand mixer? Yes, you can mix the dough by hand, but be prepared for a workout! The dough is quite enriched and will be sticky at first. Kneading by hand will take about 15-20 minutes to achieve the right consistency.
What if I don’t have a kitchen torch? While a kitchen torch gives the best control, you can carefully use a broiler instead. Place the sugar-topped doughnuts on a baking sheet and broil for 30-60 seconds, watching very carefully to prevent burning.
Can I bake these instead of frying? While you can technically bake the dough, the texture won’t be the same. If you must bake, arrange the proofed doughnuts on a parchment-lined baking sheet and bake at 375°F (190°C) for about 12-15 minutes until golden brown.
How do I know when the doughnuts are properly proofed? Gently press a doughnut with your finger. If the indentation fills back slowly, they’re ready to fry. If it springs back immediately, they need more time. If the indentation stays completely, they’re overproofed.
Can I freeze these doughnuts? I don’t recommend freezing the finished product, but you can freeze the unfilled fried doughnuts for up to one month. Thaw at room temperature, then fill and caramelize before serving.
What’s the best oil for frying? Neutral oils with high smoke points work best: vegetable, canola, or peanut oil are ideal. Avoid oils with distinct flavors like olive oil.
Why did my custard curdle? This typically happens when the eggs cook too quickly. Always temper the eggs by slowly adding hot milk while whisking constantly, and keep whisking vigorously once the mixture is combined and back on the heat.
Can I use vanilla extract instead of vanilla beans? Absolutely! Use 2 teaspoons of high-quality vanilla extract or vanilla bean paste as a substitute.
Final Thoughts
Creating crème brûlée doughnuts at home is certainly a project, but the result is a showstopping dessert that combines the best of two worlds. There’s something magical about breaking through that crackling caramelized sugar into a cloud-like doughnut filled with luscious custard.
The process may seem intimidating at first, but break it down into manageable steps, and you’ll find it’s within reach of any dedicated home baker. Take your time, enjoy the process, and prepare to wow everyone who takes a bite.
I hope you enjoy making these as much as I enjoy sharing this recipe. Remember that practice makes perfect, and even if your first batch isn’t picture-perfect, they’ll still be delicious!