When I first attempted to make cream puffs in my kitchen, I honestly thought they were some kind of magical pastry that only professional bakers could master. The idea of creating those perfectly puffed, golden shells that could hold luscious cream seemed impossible. However, after years of experimenting, failing, learning, and perfecting my technique, I’ve discovered that cream puffs are actually quite approachable once you understand the science behind them.
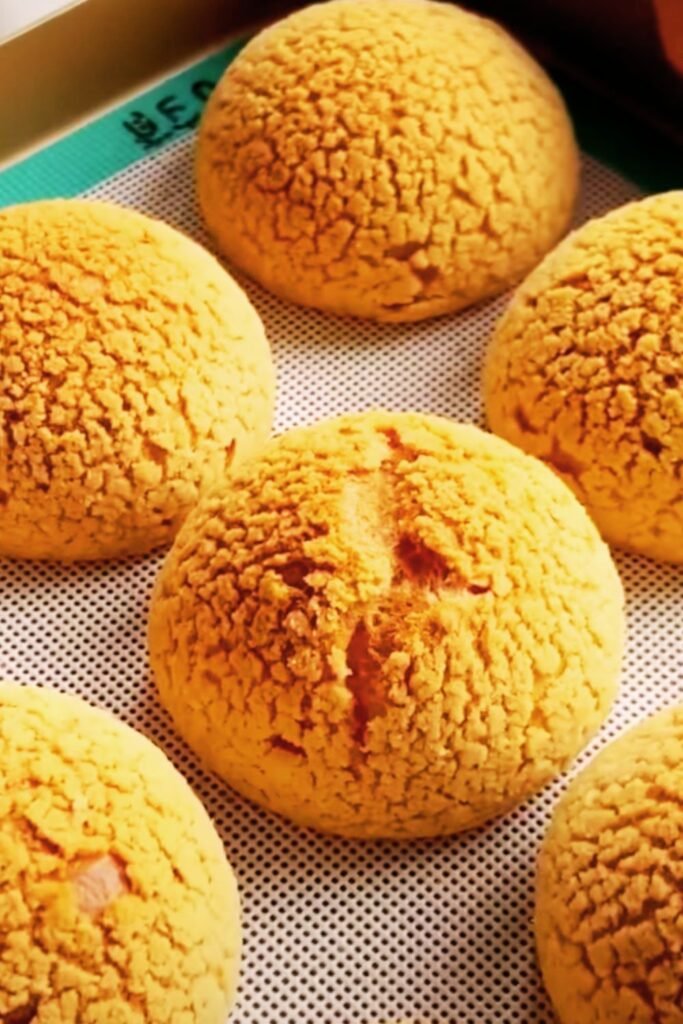
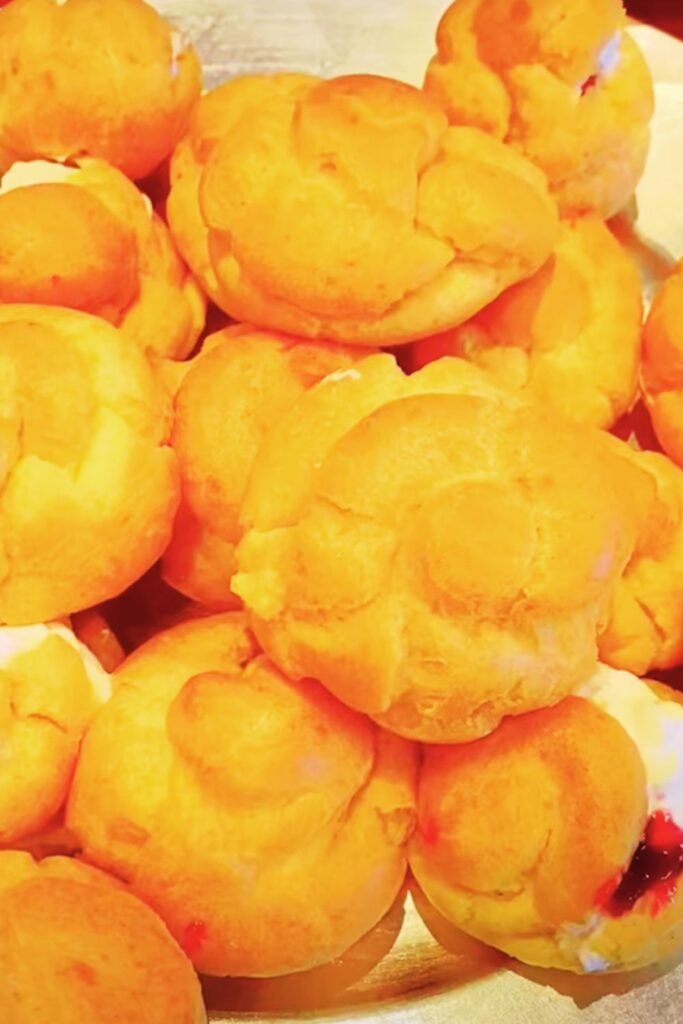
Cream puffs represent one of the most elegant yet simple desserts in the pastry world. These delicate, airy pastries consist of choux pastry shells filled with sweet cream, custard, or other delicious fillings. What makes them truly special is their versatility – they can be dressed up for fancy dinner parties or enjoyed as a casual afternoon treat with coffee.
The magic of cream puffs lies in their unique pastry base called choux pastry or pâte à choux. Unlike other pastries that rely on chemical leaveners or mechanical methods for lift, choux pastry uses steam as its primary leavening agent. This creates those characteristic hollow shells that are perfect for filling with all sorts of delicious creams and custards.
Understanding Choux Pastry: The Foundation of Great Cream Puffs
Choux Pastry (Pâte à Choux) : A light pastry dough used to make cream puffs, éclairs, and profiteroles. Made by cooking flour, water, butter, and salt together, then incorporating eggs to create a smooth, pipeable paste.
Steam Leavening : The process by which moisture in the choux pastry converts to steam during baking, creating the hollow interior characteristic of cream puffs.
Panade : The cooked mixture of flour, water, butter, and salt that forms the base of choux pastry before eggs are added.
The beauty of choux pastry lies in its simplicity and the science behind its success. When I make choux pastry, I’m essentially creating a vehicle for steam. The high moisture content in the dough, combined with the heat of the oven, creates powerful steam that inflates the pastry like tiny balloons. Understanding this process has been crucial to my success in making consistently perfect cream puffs.
Essential Ingredients for Perfect Cream Puffs
The ingredient list for cream puffs is remarkably short, but each component plays a crucial role in the final result. I’ve learned that using the right ingredients in the correct proportions makes all the difference between success and disappointment.
| Ingredient | Purpose | Quality Notes | Measurement Tips |
|---|---|---|---|
| Water | Creates steam for leavening | Use filtered water for best taste | Measure precisely; too much creates soggy pastry |
| Butter | Adds richness and helps with browning | Use unsalted, high-quality butter | Must be fresh; rancid butter ruins flavor |
| Salt | Enhances flavor and strengthens gluten | Fine sea salt or table salt work best | Small amount but essential for taste balance |
| All-Purpose Flour | Provides structure | Unbleached flour gives better results | Measure by weight for accuracy |
| Large Eggs | Provides moisture, richness, and binding | Room temperature eggs incorporate better | Use eggs that are 1-2 weeks old for stability |
The Water-to-Flour Ratio Mystery
One thing I’ve discovered through countless batches is that the water-to-flour ratio is absolutely critical. Too much water creates pastry that doesn’t hold its shape, while too little results in dense, heavy puffs that refuse to rise properly. I always use a kitchen scale to measure my ingredients because even small variations can significantly impact the final result.
The eggs deserve special attention in this recipe. I’ve found that the number of eggs needed can vary slightly depending on their size and the humidity in my kitchen. The key is achieving the right consistency in the final dough – it should be smooth, glossy, and fall from a spoon in a thick ribbon that slowly disappears back into the mixture.
Step-by-Step Guide to Making Cream Puff Shells
Equipment You’ll Need:
- Heavy-bottomed saucepan
- Wooden spoon or sturdy spatula
- Stand mixer or hand mixer (optional but helpful)
- Piping bag with round tip
- Baking sheets
- Parchment paper
The Foolproof Method:
Step 1: Prepare Your Workspace I always start by preheating my oven to 425°F (220°C) and lining my baking sheets with parchment paper. Having everything ready before I start cooking is essential because choux pastry waits for no one.
Step 2: Create the Panade In my heavy-bottomed saucepan, I combine 1 cup of water, ½ cup of butter, and ½ teaspoon of salt. I bring this mixture to a rolling boil, ensuring the butter is completely melted. The moment it reaches a full boil, I remove it from heat and immediately add 1 cup of flour all at once.
Step 3: Cook the Flour Mixture This is where many people go wrong. I stir vigorously until the mixture forms a ball and pulls away from the sides of the pan. Then – and this is crucial – I return the pan to medium heat for 1-2 minutes, stirring constantly. This additional cooking step removes excess moisture and develops the proper texture.
Step 4: Cool and Add Eggs I transfer the hot mixture to my stand mixer bowl (or keep it in the saucepan if mixing by hand) and let it cool for about 5 minutes. Then I add eggs one at a time, beating well after each addition. The first egg might make the mixture look curdled, but I keep beating until it becomes smooth before adding the next egg.
Step 5: Test the Consistency The finished choux pastry should be smooth, glossy, and pipeable. When I lift some on a spoon, it should fall in a thick ribbon that slowly settles back into the mixture. If it’s too thick, I add another egg, beaten, a little at a time until I reach the right consistency.

Piping and Shaping Techniques
Round Cream Puffs : Pipe 1½-inch mounds of dough, spacing them 2 inches apart to allow for expansion during baking.
Mini Profiteroles : Create ¾-inch mounds for bite-sized treats perfect for parties or as components in larger desserts.
Éclair Shapes : Pipe 4-inch long strips for traditional éclairs, maintaining consistent width throughout.
I’ve found that consistent sizing is key to even baking. I use a large round piping tip (about ½ inch in diameter) and apply steady, even pressure. After piping, I gently smooth any peaks with a damp finger to prevent burning.
Baking Secrets for Perfect Puffs
Temperature and Timing Strategy
| Baking Stage | Temperature | Duration | What’s Happening |
|---|---|---|---|
| Initial Rise | 425°F (220°C) | 15 minutes | Steam creates lift and structure |
| Setting Phase | 375°F (190°C) | 15-20 minutes | Pastry sets and browns |
| Drying Phase | 350°F (175°C) | 5-10 minutes | Interior moisture evaporates |
The baking process is where science meets art. I start at a high temperature to create maximum steam for lift, then reduce the heat to allow the pastry to set and brown without burning. The key is never opening the oven door during the first 20 minutes – the sudden temperature drop can cause the delicate pastry to collapse.
Signs of Properly Baked Cream Puffs:
- Golden brown color all over
- Firm to the touch (not squishy)
- Hollow sound when tapped gently
- No beads of moisture on the surface
I always test one puff by removing it from the oven and letting it cool for a minute. If it maintains its shape and feels light, the batch is ready. If it starts to deflate or feels heavy, I continue baking for a few more minutes.
Mastering Cream Fillings
The filling is where creativity truly shines in cream puff making. Over the years, I’ve experimented with countless variations, from classic pastry cream to innovative flavor combinations that surprise and delight.
Classic Pastry Cream (Crème Pâtissière)
Pastry Cream : A thick, rich custard made with milk, eggs, sugar, and starch, flavored with vanilla or other extracts.
My go-to pastry cream recipe has never failed me:
Ingredients:
- 2 cups whole milk
- 6 large egg yolks
- ½ cup granulated sugar
- ⅓ cup cornstarch
- 4 tablespoons butter
- 2 teaspoons vanilla extract
The secret to smooth pastry cream is constant whisking and patience. I heat the milk to just below boiling while whisking the egg yolks, sugar, and cornstarch in a separate bowl. The tempering process – gradually adding hot milk to the egg mixture while whisking – prevents curdling and ensures a silky texture.
Filling Variations and Flavor Profiles
| Filling Type | Base | Flavor Additions | Texture Notes |
|---|---|---|---|
| Vanilla Bean | Pastry cream | Real vanilla bean paste | Rich, aromatic, classic |
| Chocolate | Pastry cream | Melted dark chocolate | Decadent, smooth |
| Coffee | Pastry cream | Espresso powder | Bold, sophisticated |
| Lemon Curd | Butter, eggs, citrus | Fresh lemon juice and zest | Tart, bright, creamy |
| Whipped Cream | Heavy cream | Various extracts | Light, airy, delicate |
| Diplomat Cream | Pastry cream + whipped cream | Gelatin for stability | Luxurious, stable |
Advanced Techniques and Troubleshooting
Common Problems and Solutions
Flat or Dense Puffs : Usually caused by insufficient steam or opening the oven door too early. Ensure your oven is properly preheated and resist the urge to peek.
Soggy Bottoms : Often results from underbaking or high humidity. Bake until completely crisp and store in a dry environment.
Cracked Tops : Typically caused by too high temperature or insufficient moisture. Try reducing oven temperature by 25°F and placing a small pan of water on the bottom rack.
Through my years of cream puff making, I’ve learned that consistency comes from understanding why things go wrong. Each failure has taught me something valuable about the process, and now I can usually predict and prevent most common issues.
Professional Tips for Consistent Results
I always make extra choux pastry because it freezes beautifully. I pipe the unbaked puffs onto parchment-lined baking sheets, freeze them solid, then transfer to freezer bags. They can be baked directly from frozen, adding just a few extra minutes to the baking time.
For filling, I’ve found that using a small round piping tip to inject cream through a tiny hole in the bottom of each puff gives the most professional appearance. This method prevents the shells from splitting and maintains their beautiful shape.
Creative Serving Ideas and Presentations
Individual Dessert Presentations
Profiterole Tower (Croquembouche) : A traditional French celebration cake made by binding cream puffs together with caramel to form a cone-shaped tower.
Cream Puff Swan : Cut the top third off each puff, slice the top piece in half for wings, fill the bottom with cream, and arrange the pieces to resemble elegant swans.
For special occasions, I love creating themed presentations. During holidays, I might dust the puffs with powdered sugar to resemble snow or drizzle them with colored glazes to match the celebration’s colors.
Flavor Pairing Suggestions
| Cream Puff Flavor | Complementary Elements | Serving Occasions |
|---|---|---|
| Vanilla | Fresh berries, chocolate sauce | Afternoon tea, casual dinners |
| Chocolate | Raspberry coulis, gold leaf | Elegant dinners, celebrations |
| Coffee | Caramel sauce, chopped nuts | After dinner, coffee service |
| Lemon | Blueberry compote, lavender | Spring brunches, garden parties |
Storage and Make-Ahead Strategies
Understanding how to properly store cream puffs has saved me countless times when preparing for parties or special events. The shells and fillings have different storage requirements, and timing their preparation correctly is crucial for the best results.
Shell Storage Guidelines
Unfilled Shells : Store in an airtight container at room temperature for up to 2 days. For longer storage, freeze for up to 3 months.
Filled Shells : Refrigerate and consume within 24 hours for best texture and food safety.
I always store unfilled shells separately from fillings until just before serving. This prevents the shells from becoming soggy and maintains their delightful crispy texture.
Make-Ahead Timeline
3 Days Before: Make and freeze unfilled shells 2 Days Before: Prepare pastry cream (store covered in refrigerator) Day Of: Thaw shells, prepare any whipped cream components, fill shells 2-4 hours before serving
Nutritional Considerations and Dietary Adaptations
While traditional cream puffs are undeniably indulgent, I’ve successfully adapted the recipe for various dietary needs without sacrificing too much of their essential character.
| Adaptation | Modification | Result Notes |
|---|---|---|
| Gluten-Free | Replace flour with gluten-free blend | Slightly denser texture, still delicious |
| Dairy-Free | Use plant-based butter and milk | Works well with coconut or oat milk |
| Reduced Sugar | Cut sugar in filling by half, use stevia | Maintains sweetness with fewer calories |
| Egg-Free Filling | Use cornstarch-thickened plant milk | Different texture but still creamy |
Questions and Answers
Q: Why did my cream puffs collapse after baking? The most common cause is opening the oven door too early in the baking process. The sudden temperature drop causes the steam inside to condense rapidly, leading to collapse. I never open my oven door for the first 20 minutes of baking, and I always ensure the puffs are completely set before removing them.
Q: Can I make cream puffs without a piping bag? Absolutely! While a piping bag gives the most professional appearance, I’ve successfully made cream puffs using a large spoon or even an ice cream scoop. The key is making them roughly the same size so they bake evenly. You can also use a large zip-lock bag with a corner cut off as an improvised piping bag.
Q: How do I know when my choux pastry has the right consistency? The perfect choux pastry should be smooth, glossy, and pipeable. When I lift some on a spoon, it should fall in a thick ribbon that slowly settles back into the mixture. If it’s too stiff and holds its shape on the spoon, I add another beaten egg gradually. If it’s too loose and runs off the spoon like water, I may need to cook it a bit more to remove excess moisture.
Q: Why are my cream puffs not browning evenly? Uneven browning usually indicates hot spots in your oven or overcrowding on the baking sheet. I always rotate my baking sheets halfway through the baking process and ensure there’s at least 2 inches between each puff. If your oven has persistent hot spots, consider using an oven thermometer to check for temperature variations.
Q: Can I freeze filled cream puffs? I don’t recommend freezing filled cream puffs because the filling tends to separate and the shells become soggy when thawed. However, unfilled shells freeze excellently for up to 3 months. I freeze them on baking sheets, then transfer to freezer bags once solid.
Q: What’s the difference between cream puffs and profiteroles? This is largely a matter of size and presentation. Cream puffs are typically larger individual servings, while profiteroles are smaller, bite-sized versions often served multiple to a portion. Both use the same choux pastry base and similar fillings, but profiteroles are often presented in more elaborate arrangements.
Q: My pastry cream has lumps. Can I fix it? Yes! Lumpy pastry cream can usually be saved by straining it through a fine-mesh sieve while it’s still warm, then whisking vigorously. For stubborn lumps, I use an immersion blender to smooth the texture. The key to preventing lumps is constant whisking during the cooking process and proper tempering of the eggs.
Q: How far in advance can I fill cream puffs? I recommend filling cream puffs no more than 4 hours before serving for optimal texture. The shells will start to soften if filled too far in advance. For events, I often prepare all components separately and do a quick assembly line filling just before guests arrive.
Q: Can I use cream puff shells for savory applications? Definitely! Unfilled cream puff shells make excellent vehicles for savory mousses, chicken salad, or cheese-based fillings. I reduce the sugar in the choux pastry slightly and add herbs or spices to complement the savory filling. These make impressive appetizers for parties.
Q: What should I do if my choux pastry is too thick to pipe? If your choux pastry seems too thick, you likely need to add more egg. Beat another egg in a separate bowl and add it gradually, mixing well after each addition, until you achieve the proper ribbon consistency. Remember, the exact number of eggs can vary based on their size and environmental factors like humidity.
The journey to mastering cream puffs has been one of my most rewarding culinary adventures. These seemingly simple pastries have taught me patience, precision, and the importance of understanding the science behind baking. Every batch I make reminds me why I fell in love with baking in the first place – the magic of transforming simple ingredients into something extraordinary.
Whether you’re making your first batch or your hundredth, remember that each cream puff is an opportunity to create something special. The techniques I’ve shared come from years of experimentation and countless batches, but your own journey with cream puffs will undoubtedly lead to discoveries and preferences that are uniquely yours.
The beauty of cream puffs lies not just in their elegant appearance or delicious taste, but in their ability to bring joy to both the baker and those lucky enough to enjoy them. There’s something deeply satisfying about watching a batch of perfectly puffed shells emerge from the oven, knowing that you’ve harnessed the power of steam and science to create these little golden treasures.
As you embark on or continue your cream puff journey, remember to embrace both the successes and the learning opportunities that come with each batch. The skills you develop making cream puffs will serve you well in countless other baking endeavors, and the confidence you gain from mastering this fundamental pastry technique will open doors to even more exciting culinary adventures.