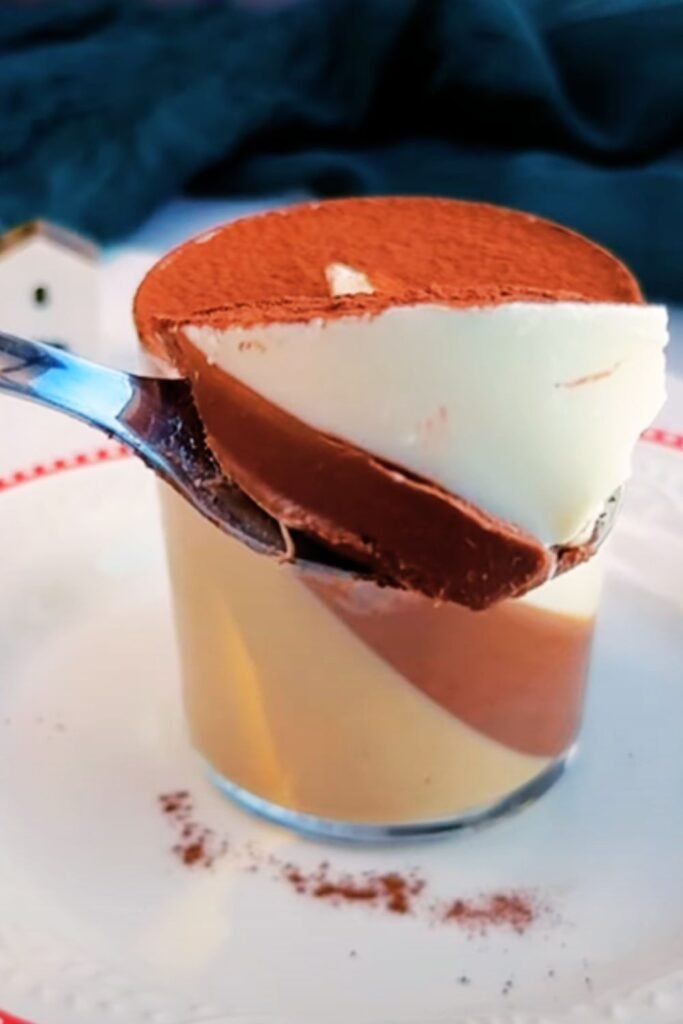
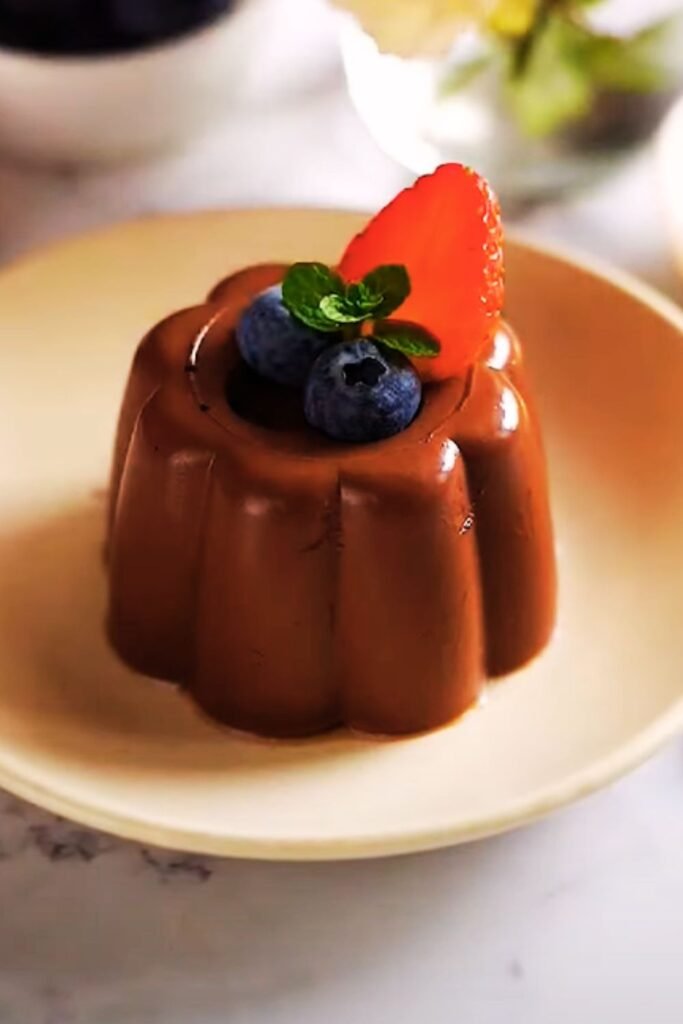
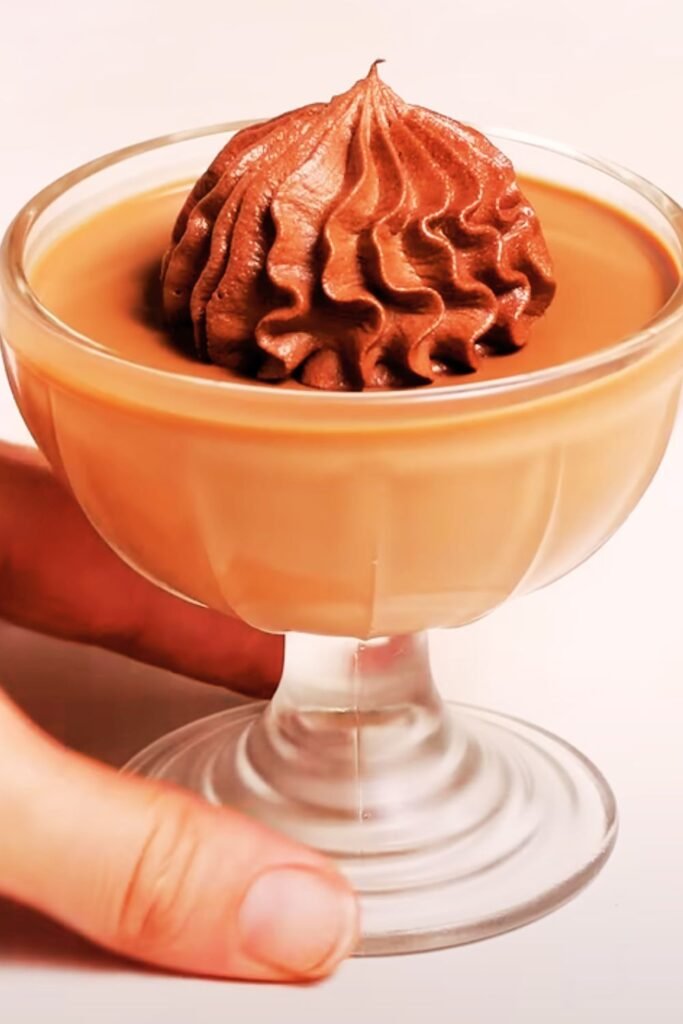
There’s something magical about the way a perfectly crafted chocolate panna cotta trembles on a spoon before melting into pure velvet on your tongue. I’ve been making this exquisite Italian dessert for over a decade, and I can confidently say it’s one of those recipes that transforms any ordinary meal into an extraordinary dining experience.
Panna cotta, which literally translates to “cooked cream” in Italian, originated in the Piedmont region of Northern Italy. While traditional panna cotta is vanilla-scented, my chocolate version elevates this classic dessert to new heights of indulgence. What I love most about this recipe is its deceptive simplicity – with just a handful of ingredients, you can create something that looks and tastes like it came straight from a high-end restaurant.
What Makes Chocolate Panna Cotta Special
Unlike other chocolate desserts that can be heavy or overly sweet, chocolate panna cotta strikes the perfect balance between richness and lightness. The gelatin creates that signature wobble that makes panna cotta so distinctive, while the chocolate adds depth and sophistication to each spoonful.
Key Characteristics:
- Texture: Silky, smooth, and barely set
- Flavor Profile: Rich chocolate with subtle vanilla undertones
- Appearance: Glossy, elegant, and restaurant-quality
- Difficulty Level: Surprisingly easy for such an impressive result
Essential Ingredients for Perfect Chocolate Panna Cotta
The beauty of panna cotta lies in its minimal ingredient list, but each component plays a crucial role in achieving that perfect texture and flavor.
Primary Ingredients
Gelatin : The backbone of any panna cotta. I prefer unflavored powdered gelatin over sheets for consistency and ease of use.
Heavy Cream : Provides the luxurious mouthfeel. Use cream with at least 35% fat content for best results.
Whole Milk : Balances the richness of the cream while helping to bloom the gelatin.
Dark Chocolate : The star of the show. I recommend using chocolate with 60-70% cocoa content for optimal flavor without overwhelming bitterness.
Sugar : Granulated sugar dissolves easily and doesn’t interfere with the chocolate’s flavor profile.
Vanilla Extract : A small amount enhances the chocolate without competing with it.
Quality Considerations
I’ve learned through years of experimentation that ingredient quality directly impacts the final result. When I use premium chocolate with a smooth texture and complex flavor profile, the difference in my panna cotta is immediately noticeable. Similarly, fresh heavy cream creates a much silkier texture than cream that’s been sitting in the refrigerator for weeks.
Detailed Chocolate Panna Cotta Recipe
Ingredients (Serves 6)
| Ingredient | Quantity | Purpose | Quality Notes |
|---|---|---|---|
| Unflavored gelatin | 2 packets (14g) | Setting agent | Must be fresh and properly bloomed |
| Whole milk | 1/2 cup (120ml) | Gelatin blooming medium | Room temperature works best |
| Heavy cream | 2 cups (480ml) | Main base | 35% fat minimum |
| Dark chocolate | 6 oz (170g) | Primary flavor | 60-70% cocoa recommended |
| Granulated sugar | 1/3 cup (67g) | Sweetener | Dissolves completely when heated |
| Pure vanilla extract | 1 teaspoon | Flavor enhancer | Use real vanilla, not imitation |
| Pinch of salt | 1/8 teaspoon | Flavor balancer | Enhances chocolate notes |

Step-by-Step Instructions
Phase 1: Preparing the Gelatin Base
- Bloom the gelatin: Pour the milk into a small bowl and sprinkle the gelatin evenly over the surface. Let it sit for 5-10 minutes until the gelatin absorbs the liquid and becomes spongy. This step is crucial – rushing it will result in lumpy panna cotta.
- Heat gently: Warm the bloomed gelatin mixture in a small saucepan over low heat, stirring constantly until the gelatin completely dissolves. Don’t let it boil, as this can break down the gelatin’s setting properties.
Phase 2: Creating the Chocolate Base
- Prepare the chocolate: Chop the dark chocolate into small, uniform pieces. I find that smaller pieces melt more evenly and prevent any grittiness in the final product.
- Heat the cream: In a medium saucepan, combine the heavy cream and sugar. Heat over medium-low heat, stirring occasionally, until the sugar dissolves and the mixture is steaming but not boiling.
- Melt the chocolate: Remove the cream from heat and add the chopped chocolate. Let it sit for 2 minutes, then whisk gently until the chocolate is completely melted and the mixture is smooth.
Phase 3: Combining and Setting
- Incorporate gelatin: Whisk the dissolved gelatin mixture into the chocolate cream until fully combined. Add the vanilla extract and salt, whisking until smooth.
- Strain the mixture: Pour the mixture through a fine-mesh strainer to remove any lumps or undissolved chocolate pieces. This step ensures your panna cotta will have that signature silky texture.
- Portion and chill: Divide the mixture evenly among six 4-ounce ramekins or glasses. Cover with plastic wrap, making sure the wrap doesn’t touch the surface, and refrigerate for at least 4 hours or overnight.
Professional Tips for Perfect Results
Through years of making panna cotta, I’ve discovered several techniques that separate good results from exceptional ones.
Temperature Control
The biggest mistake I see home cooks make is overheating the gelatin or cream mixture. I always keep my heat on the lower side and use a thermometer when needed. The mixture should never exceed 180°F (82°C) during any phase of preparation.
Texture Secrets
Double straining: I often strain the mixture twice – once after combining all ingredients and again just before pouring into serving vessels. This extra step eliminates any possibility of lumps.
Gentle incorporation: When adding the gelatin to the chocolate mixture, I whisk slowly and steadily rather than vigorously. Aggressive mixing can incorporate air bubbles that mar the smooth surface.
Timing Considerations
While the recipe calls for 4 hours of chilling time, I’ve found that overnight refrigeration produces superior results. The extra time allows the flavors to meld and the texture to reach optimal firmness.

Troubleshooting Common Issues
Problem: Lumpy Texture
Cause: Usually results from inadequately bloomed gelatin or chocolate that wasn’t properly melted.
Solution: Always allow gelatin to fully bloom before heating, and ensure chocolate is completely melted before combining with other ingredients.
Problem: Too Firm or Rubbery
Cause: Too much gelatin or overheating the gelatin mixture.
Solution: Stick to the exact measurements and never let the gelatin mixture boil.
Problem: Won’t Set Properly
Cause: Expired gelatin, insufficient chilling time, or mixture was too hot when refrigerated.
Solution: Check gelatin freshness, ensure adequate refrigeration time, and allow mixture to cool slightly before chilling.
Serving Suggestions and Presentation Ideas
The presentation of chocolate panna cotta can be as simple or elaborate as the occasion demands. Here are my favorite approaches:
Classic Presentation
Serve directly in the ramekins or glasses used for setting. I like to garnish with a small dollop of lightly sweetened whipped cream and a few fresh berries. The contrast of colors creates an elegant visual appeal.
Unmolded Elegance
To unmold panna cotta, briefly dip the bottom of each ramekin in warm water for 10-15 seconds, then run a thin knife around the edges and invert onto serving plates. This presentation works best when you want to drizzle sauces around the dessert.
Garnish Options
| Garnish Type | Flavor Profile | Visual Impact | Preparation Notes |
|---|---|---|---|
| Fresh berries | Tart contrast | Bright color pop | Use at room temperature |
| Candied orange peel | Citrus complexity | Golden accents | Homemade preferred |
| Toasted hazelnuts | Nutty crunch | Textural interest | Chop just before serving |
| Gold leaf | Neutral | Ultimate elegance | Handle with tweezers |
| Cocoa powder dusting | Pure chocolate | Sophisticated simplicity | Use finest quality cocoa |
Flavor Variations and Adaptations
One of the aspects I love most about this base recipe is its versatility. Over the years, I’ve developed several variations that maintain the essential character while offering new taste experiences.
Coffee-Chocolate Panna Cotta
Add 2 tablespoons of strong espresso to the cream mixture. The coffee enhances the chocolate’s complexity without overwhelming it. I often serve this variation with a small biscotti on the side.
Spiced Chocolate Version
Incorporate 1/4 teaspoon ground cinnamon and a pinch of cayenne pepper with the chocolate. This creates a subtle warmth that builds with each spoonful.
White Chocolate Alternative
Replace dark chocolate with high-quality white chocolate, reducing sugar to 1/4 cup since white chocolate is sweeter. Add the zest of one lemon for brightness.
Nutritional Information and Dietary Considerations
Understanding the nutritional profile helps when planning menus or accommodating dietary restrictions.
Standard Serving Analysis
| Nutrient | Per Serving | Daily Value % | Notes |
|---|---|---|---|
| Calories | 385 | 19% | Primarily from cream and chocolate |
| Total Fat | 28g | 43% | Mostly saturated from dairy |
| Carbohydrates | 22g | 7% | From sugar and chocolate |
| Protein | 6g | 12% | From milk and cream |
| Calcium | 156mg | 16% | Excellent source |
Dietary Modifications
Dairy-Free Version: I’ve successfully made this using full-fat coconut milk in place of dairy, though the texture is slightly different. The key is using the thick cream from the top of chilled coconut milk cans.
Sugar Alternatives: Honey or maple syrup can replace granulated sugar, but reduce the liquid slightly and add these sweeteners when the cream is warm enough to dissolve them completely.
Vegan Adaptation: Use agar powder instead of gelatin (follow package instructions for conversion ratios) and plant-based milk alternatives.

Storage and Make-Ahead Tips
Chocolate panna cotta is an ideal make-ahead dessert, which makes it perfect for entertaining. Here’s what I’ve learned about optimal storage:
Short-Term Storage
Properly covered panna cotta keeps in the refrigerator for up to 4 days. I always cover with plastic wrap, ensuring the wrap doesn’t touch the surface to prevent condensation from marring the smooth top.
Freezing Guidelines
While not traditional, panna cotta can be frozen for up to one month. The texture changes slightly upon thawing – it becomes a bit denser but still delicious. Thaw overnight in the refrigerator before serving.
Party Planning
For large gatherings, I make panna cotta up to 3 days in advance. This actually improves the flavor as the chocolate notes develop more fully over time.
Equipment Essentials
Having the right tools makes the process smoother and results more consistent:
Must-Have Tools:
- Fine-mesh strainer
- Digital thermometer
- Multiple sizes of whisks
- Heavy-bottomed saucepans
- 4-ounce ramekins or glasses
Nice-to-Have Equipment:
- Immersion blender for ultra-smooth texture
- Silicone molds for easy unmolding
- Kitchen scale for precise measurements
Seasonal Adaptations
I love adapting this recipe to reflect seasonal flavors and occasions:
Spring Version
Add fresh strawberry puree swirled through the mixture before setting. The pink and brown marbling creates a beautiful presentation.
Summer Presentation
Serve with fresh mint leaves and a light berry compote. The cool temperature and fresh garnishes make it perfect for warm weather entertaining.
Holiday Enhancement
During winter months, I incorporate seasonal spices like cardamom or add a splash of peppermint extract for a festive twist.
Frequently Asked Questions
Q: Can I make chocolate panna cotta without gelatin? A: While gelatin provides the characteristic texture, you can substitute with agar powder for a vegetarian version. Use about 1 teaspoon of agar powder per packet of gelatin, but note that the texture will be slightly firmer and less creamy.
Q: Why did my panna cotta separate into layers? A: This usually happens when the mixture is too hot when refrigerated or when ingredients aren’t properly incorporated. Make sure to let the mixture cool slightly before chilling and whisk thoroughly during preparation.
Q: How do I know when the panna cotta has set properly? A: It should have a gentle wobble when you shake the container but shouldn’t be liquid in the center. The surface should spring back lightly when touched with your finger.
Q: Can I use milk chocolate instead of dark chocolate? A: Yes, but reduce the sugar to 2-3 tablespoons since milk chocolate is sweeter. The flavor will be milder and the color lighter.
Q: What’s the best way to unmold panna cotta? A: Dip the bottom of the container in warm water for 10-15 seconds, run a thin knife around the edges, and invert quickly onto your serving plate. If it doesn’t release immediately, repeat the warm water dip.
Q: How far in advance can I make this dessert? A: Chocolate panna cotta is best made 1-3 days ahead. This allows flavors to develop fully while maintaining the optimal texture.
Q: Why does my panna cotta taste grainy? A: Graininess usually results from chocolate that wasn’t completely melted or mixture that was heated too quickly. Always melt chocolate gently and strain the final mixture.
Q: Can I add alcohol to this recipe? A: Yes, a tablespoon of liqueur like Grand Marnier or Kahlua can be added, but reduce other liquids slightly to maintain proper setting consistency.
Q: What type of chocolate gives the best flavor? A: I prefer chocolate with 60-70% cocoa content for the best balance of flavor and sweetness. Avoid chocolate chips as they contain stabilizers that can affect texture.
Q: How do I prevent a skin from forming on top? A: Press plastic wrap directly onto the surface of each panna cotta before refrigerating. This prevents air exposure that causes skin formation.
This chocolate panna cotta recipe has become my go-to dessert for special occasions and dinner parties. Its elegant presentation, make-ahead convenience, and universally appealing flavor make it a reliable crowd-pleaser. The silky texture and rich chocolate flavor create a memorable ending to any meal, while the simple preparation means I can focus on enjoying time with my guests rather than stressing in the kitchen.
Remember, like any skill worth developing, making perfect panna cotta improves with practice. Don’t be discouraged if your first attempt isn’t restaurant-perfect – each time you make it, you’ll develop a better feel for the process and timing. Soon, you’ll be creating these elegant desserts with the confidence of a seasoned pastry chef.