When autumn arrives and pumpkin spice everything fills the shelves, I find myself craving desserts that capture the essence of the season without being overly complicated. That’s exactly what led me to discover pumpkin lush – a show-stopping layered dessert that combines the warm spices of fall with the creamy indulgence of a no-bake treat. I’ve been making this recipe for over five years now, and it never fails to impress at dinner parties, potlucks, and family gatherings.
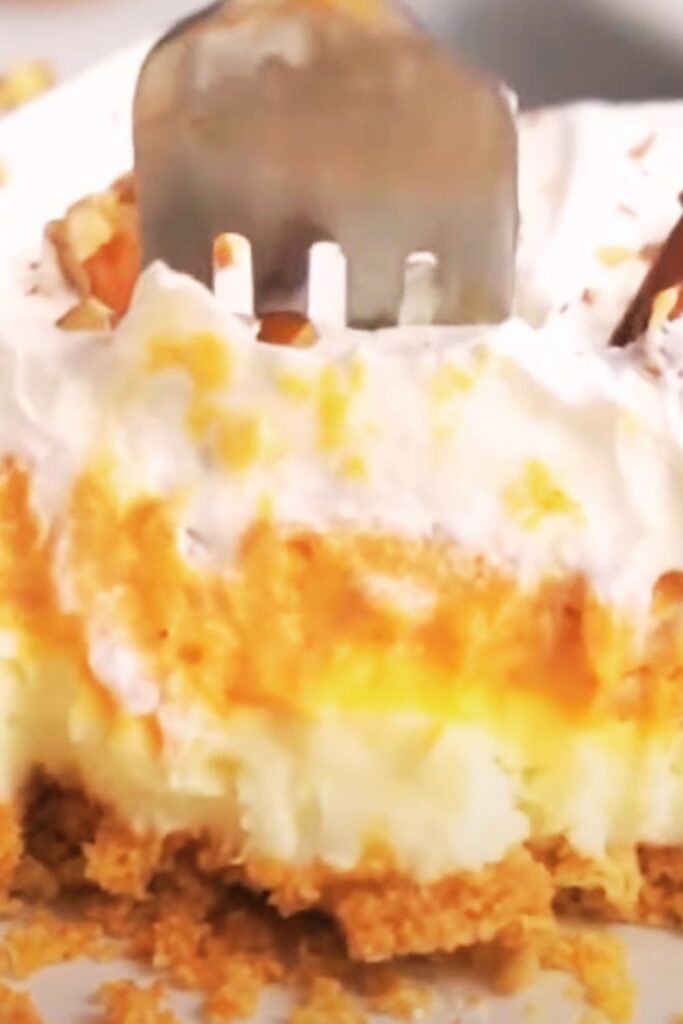
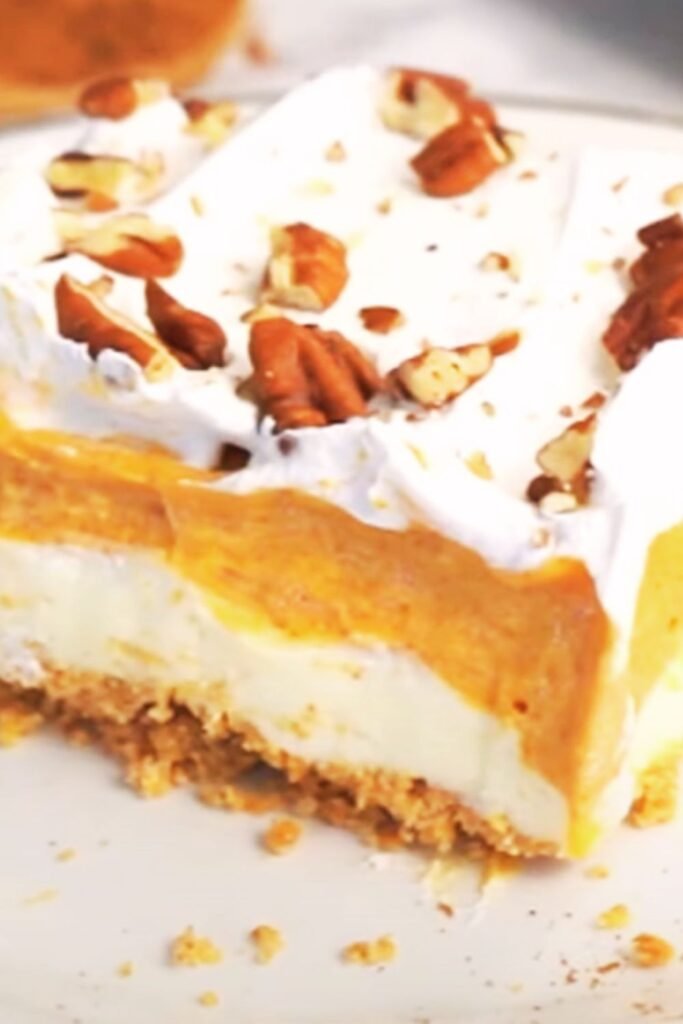
Pumpkin lush is essentially a layered dessert that starts with a nutty crust, followed by a cream cheese layer, a spiced pumpkin layer, and topped with whipped cream. What makes this dessert so appealing is its perfect balance of textures and flavors – you get the crunch from the crust, the tanginess from the cream cheese, the warm spice from the pumpkin, and the lightness from the whipped topping. It’s like having pumpkin pie, cheesecake, and whipped cream all in one perfect bite.
What Makes Pumpkin Lush So Special
The beauty of pumpkin lush lies in its versatility and ease of preparation. Unlike traditional pumpkin pie that requires precise baking times and temperatures, this dessert is completely no-bake, making it perfect for busy schedules or when you want to avoid heating up the kitchen. I’ve served this at Thanksgiving when my oven was already occupied with turkey and sides, and it was a complete hit.
The layered presentation makes it visually stunning, especially when served in a clear glass dish where guests can see each distinct layer. I remember the first time I brought this to my neighbor’s potluck – people were actually taking pictures of their slices before eating them because it looked so impressive.
Essential Ingredients and Their Roles
Creating the perfect pumpkin lush requires understanding how each ingredient contributes to the final result. Let me break down the key components that make this dessert extraordinary:
Foundation Layer:
- Pecans or walnuts: 1 cup finely chopped
- All-purpose flour: 1 cup
- Butter: 1/2 cup melted
- Brown sugar: 2 tablespoons
Cream Cheese Layer:
- Cream cheese: 8 oz, softened to room temperature
- Powdered sugar: 1 cup
- Heavy whipping cream: 1 cup
Pumpkin Layer:
- Pumpkin puree: 15 oz can
- Instant vanilla pudding mix: 3.4 oz package
- Pumpkin pie spice: 1 tablespoon
- Cold milk: 1 cup
- Heavy whipping cream: 1 cup
Topping:
- Heavy whipping cream: 1 cup
- Powdered sugar: 3 tablespoons
- Vanilla extract: 1/2 teaspoon
Detailed Nutritional Breakdown
Understanding the nutritional content helps you make informed decisions about serving sizes and dietary accommodations. Here’s a comprehensive breakdown per serving (assuming 12 servings):
| Nutrient | Amount per Serving | % Daily Value |
|---|---|---|
| Calories | 385 | 19% |
| Total Fat | 28g | 36% |
| Saturated Fat | 17g | 85% |
| Cholesterol | 89mg | 30% |
| Sodium | 245mg | 11% |
| Total Carbohydrates | 32g | 12% |
| Dietary Fiber | 2g | 7% |
| Sugars | 26g | – |
| Protein | 6g | 12% |
| Vitamin A | 184% | 184% |
| Calcium | 8% | 8% |
| Iron | 6% | 6% |
Step-by-Step Preparation Guide
Preparing the Crust Layer
I always start with the crust because it needs time to cool completely before adding the other layers. Preheat your oven to 350°F (175°C). In a medium bowl, combine the chopped pecans, flour, melted butter, and brown sugar. Mix until the mixture resembles coarse crumbs and holds together when pressed.
Press this mixture firmly into the bottom of a 9×13 inch baking dish. I use the bottom of a measuring cup to ensure an even layer. Bake for 15-18 minutes until the edges are lightly golden. Remove from oven and let cool completely – this usually takes about 30 minutes.
Creating the Cream Cheese Layer
While the crust cools, prepare the cream cheese layer. Make sure your cream cheese is at room temperature – this is crucial for avoiding lumps. I often forget to take it out early, so I’ve learned to soften it quickly by placing the wrapped package in warm water for 10 minutes.
In a large bowl, beat the softened cream cheese until smooth and fluffy, about 2-3 minutes. Gradually add the powdered sugar, beating until well combined. In a separate bowl, whip 1 cup of heavy cream to stiff peaks. Gently fold the whipped cream into the cream cheese mixture using a rubber spatula. Spread this layer evenly over the cooled crust.
Making the Pumpkin Layer
This is where the magic happens. In a large bowl, whisk together the pumpkin puree, instant pudding mix, pumpkin pie spice, and cold milk. Whisk vigorously for 2 minutes until the mixture thickens slightly. In another bowl, whip 1 cup of heavy cream to stiff peaks and fold it into the pumpkin mixture.
The key here is to work quickly once you add the pudding mix, as it will start to set. Spread this layer carefully over the cream cheese layer, being gentle to avoid disturbing the layer beneath.
Final Whipped Topping
For the final layer, whip the remaining cup of heavy cream with powdered sugar and vanilla until soft peaks form. Don’t overwhip – you want it to be spreadable but not stiff. Spread evenly over the pumpkin layer.
Professional Tips for Perfect Results
Over the years, I’ve learned several tricks that make the difference between a good pumpkin lush and an exceptional one:
Temperature Control: Each layer should be at room temperature when you add the next one. Cold layers can cause the whipped cream to deflate or create uneven spreading.
Whipping Technique: When whipping cream, start slowly and gradually increase speed. Over-whipped cream can become grainy and separate.
Layering Strategy: Use an offset spatula to spread each layer gently. Start from the center and work outward to avoid disturbing lower layers.
Chilling Time: Allow at least 4 hours for the dessert to set properly. Overnight chilling produces the best texture and allows flavors to meld beautifully.
Seasonal Variations and Adaptations
| Variation | Key Changes | Best Season |
|---|---|---|
| Chocolate Pumpkin Lush | Add 1/4 cup cocoa powder to pumpkin layer | Fall/Winter |
| Maple Pumpkin Lush | Replace 1/4 cup sugar with maple syrup | Fall |
| Spiced Apple Lush | Replace pumpkin with apple butter, add cinnamon | Fall |
| Cranberry Orange Lush | Add orange zest and dried cranberries | Winter |
| Mini Individual Lush | Use mason jars for single servings | Any season |
The chocolate variation has become my personal favorite for Halloween parties. I simply add unsweetened cocoa powder to the pumpkin layer and sometimes drizzle melted chocolate between layers for an extra indulgent touch.
Storage and Serving Guidelines
Proper storage is essential for maintaining the dessert’s texture and flavor. I always cover the dish tightly with plastic wrap, ensuring the wrap doesn’t touch the surface of the whipped cream. The dessert keeps beautifully in the refrigerator for up to 4 days, though it’s usually gone within 2 days in my house.
For serving, I use a sharp knife dipped in warm water and wiped clean between cuts. This prevents the layers from smearing and creates clean, attractive slices that showcase each layer.
Portion Recommendations:
- Regular servings: Cut into 12 pieces (approximately 3×4 grid)
- Party servings: Cut into 15-18 smaller pieces
- Special occasion servings: Cut into 9 generous pieces
Troubleshooting Common Issues
| Problem | Likely Cause | Solution |
|---|---|---|
| Soggy crust | Not cooled completely | Always cool crust before adding layers |
| Lumpy cream cheese layer | Cold cream cheese | Ensure cream cheese is room temperature |
| Runny pumpkin layer | Not enough whipping | Whip cream to stiff peaks before folding |
| Layers mixing together | Warm ingredients | Let each layer cool before adding next |
| Deflated whipped cream | Over-whipping or warm temperature | Whip to soft peaks, keep ingredients cool |
I’ve made every one of these mistakes at least once, and each taught me something valuable about the process. The most important lesson I learned was patience – rushing between layers almost always leads to problems.
Creative Presentation Ideas
The visual appeal of pumpkin lush makes it perfect for creative presentations. I’ve experimented with various serving styles over the years:
Glass Trifle Bowl: Layer the components in a large glass trifle bowl for a stunning centerpiece that shows off each layer.
Individual Mason Jars: Create single-serving portions in 8-oz mason jars. This works especially well for parties where people are mingling.
Pumpkin-Shaped Dish: During Halloween season, I sometimes use a pumpkin-shaped ceramic dish for a themed presentation.
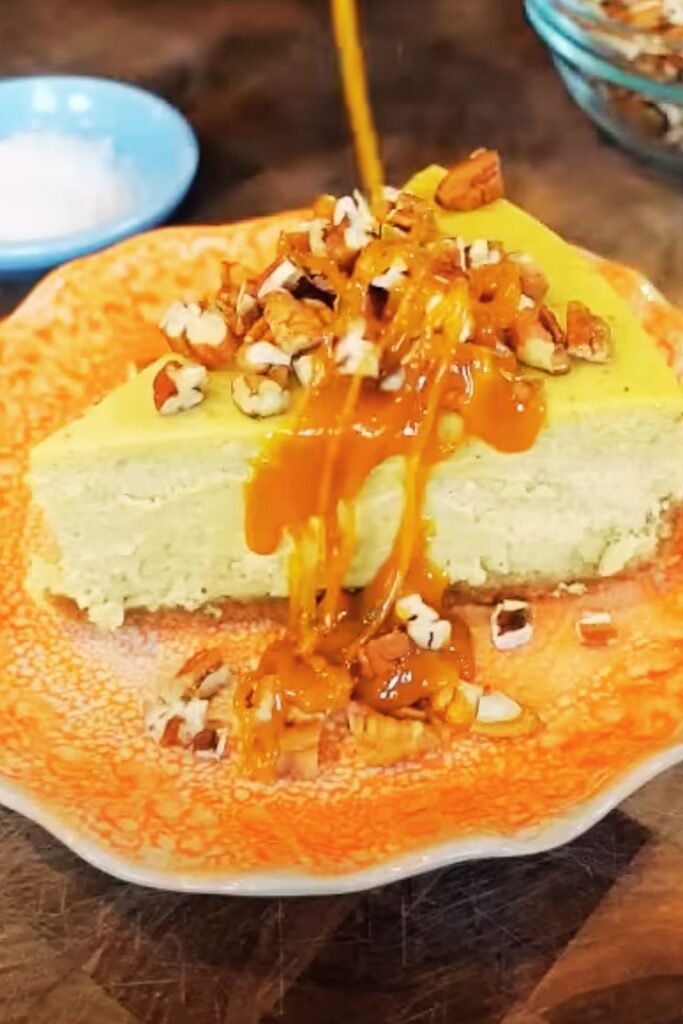
Garnish Options: Toasted pecans, cinnamon sticks, candied orange peel, or even a light dusting of cinnamon can add visual interest and complement the flavors.
Dietary Modifications
I’ve successfully adapted this recipe for various dietary needs:
Gluten-Free Version: Replace the flour in the crust with almond flour or gluten-free flour blend. The texture remains excellent.
Reduced Sugar: Use sugar-free pudding mix and reduce powdered sugar by half in the cream cheese layer. The dessert is still delicious.
Dairy-Free Alternative: Substitute coconut cream for heavy cream and use dairy-free cream cheese. Chill the coconut cream overnight before whipping.
Pairing and Serving Suggestions
Pumpkin lush pairs beautifully with various beverages and complementary desserts:
Hot Beverages: Coffee, spiced chai, hot chocolate, or apple cider Cold Options: Iced coffee, cold brew, or sparkling apple juice Complementary Desserts: Serve alongside gingersnap cookies or cinnamon sugar donuts
For special occasions, I sometimes create a dessert table featuring pumpkin lush as the centerpiece, surrounded by complementary fall treats like caramel apple bars and spiced snickerdoodles.
Advanced Techniques for Experienced Bakers
Once you’ve mastered the basic recipe, there are several advanced techniques that can elevate your pumpkin lush:
Flavor Layering: Add different spices to each layer – cardamom in the cream cheese layer, nutmeg in the pumpkin layer, and cinnamon in the whipped topping.
Texture Contrasts: Incorporate crushed gingersnap cookies between layers for added crunch and spice.
Temperature Play: Serve with a warm caramel sauce drizzled over individual slices for a temperature contrast.
Professional Plating: Use a ring mold to create perfectly shaped individual portions on dessert plates.
Seasonal Shopping Tips
| Ingredient | Peak Season | Storage Tips | Cost-Saving Strategies |
|---|---|---|---|
| Pumpkin Puree | October-December | Pantry stable, buy in bulk | Stock up during sales |
| Heavy Cream | Year-round | Use within 7-10 days | Buy when needed |
| Pecans | October-January | Freeze for longer storage | Buy in bulk during harvest |
| Cream Cheese | Year-round | Keep refrigerated | Watch for sales |
| Spices | Fall restocking | Store in cool, dark place | Buy whole spices, grind fresh |
I always stock up on canned pumpkin during fall sales and freeze nuts when they’re at their peak freshness and lowest price.
Making It a Family Tradition
This dessert has become a cornerstone of my family’s fall celebrations. My children love helping with the preparation – there’s something satisfying about the layering process that appeals to their sense of order and creativity. I’ve found that involving them in the kitchen creates lasting memories and teaches valuable cooking skills.
We’ve established a tradition where each family member gets to choose one modification for the year – last year, my daughter suggested adding mini marshmallows between layers, which was surprisingly delicious. These personal touches make the recipe feel uniquely ours while maintaining the classic appeal that makes pumpkin lush so beloved.
Questions and Answers
Q: Can I make pumpkin lush ahead of time for a party? A: Absolutely! Pumpkin lush actually improves with time as the flavors meld together. I recommend making it at least 4 hours before serving, but it’s even better when made the day before. The dessert will keep beautifully in the refrigerator for up to 4 days, making it perfect for advance party preparation.
Q: What’s the best way to prevent the layers from mixing together? A: The key is ensuring each layer is completely cool and set before adding the next one. I always let the crust cool for at least 30 minutes, and I chill each subsequent layer for 15-20 minutes before adding the next. Using gentle folding motions when spreading also helps maintain distinct layers.
Q: Can I use fresh pumpkin instead of canned pumpkin puree? A: Yes, you can use fresh pumpkin, but canned pumpkin puree actually works better for this recipe. Fresh pumpkin often has more water content, which can make the layers runny. If you prefer fresh, roast and puree your pumpkin, then strain it through cheesecloth to remove excess moisture before using.
Q: Why does my whipped cream sometimes deflate when I fold it in? A: This usually happens when the whipped cream is over-whipped or when it’s folded too vigorously. Whip cream only to soft or medium peaks, and use a gentle folding motion with a rubber spatula. Also, make sure all your ingredients are properly chilled – warm ingredients can cause whipped cream to collapse.
Q: Can I freeze pumpkin lush for longer storage? A: I don’t recommend freezing pumpkin lush because the whipped cream layers don’t freeze well and can become grainy when thawed. However, you can freeze individual components separately and assemble fresh when needed. The crust freezes beautifully for up to 3 months.
Q: What size dish should I use for this recipe? A: A 9×13 inch dish is perfect for this recipe and serves 12-15 people. If you want to make individual servings, you can use 8-10 mason jars or ramekins. For a larger crowd, you can double the recipe and use a half-sheet pan, but you’ll need to adjust the layering technique.
Q: How can I tell when each layer is properly set? A: The crust should be lightly golden and firm to the touch. The cream cheese layer should hold its shape when gently pressed with a finger. The pumpkin layer should be set enough that it doesn’t jiggle when you gently shake the dish. Each layer typically needs 15-30 minutes of chilling time.
Q: Can I substitute the instant pudding mix with something else? A: While instant pudding mix provides the perfect texture and stability for the pumpkin layer, you can make a homemade version using cornstarch, sugar, and milk cooked to a pudding consistency, then cooled completely before adding to the pumpkin. However, the texture might be slightly different from the original recipe.
This pumpkin lush recipe has brought joy to countless gatherings in my home, and I’m confident it will become a cherished part of your fall baking repertoire. The combination of ease, elegance, and incredible flavor makes it a winner every time. Whether you’re hosting a casual family dinner or an elaborate holiday feast, this dessert never fails to impress and satisfy.