When I first tasted authentic tiramisu in a small Roman café fifteen years ago, I knew my life had changed forever. The delicate balance of coffee-soaked ladyfingers, creamy mascarpone, and that perfect hint of cocoa created an experience that transcended mere dessert. Since then, I’ve dedicated countless hours to perfecting my own tiramisu recipe, and today I’m sharing everything I’ve learned about creating this magnificent Italian masterpiece.
Tiramisu, which literally translates to “pick me up” in Italian, is more than just a dessert—it’s a celebration of simple ingredients transformed into something extraordinary. Through trial, error, and guidance from Italian nonnas, I’ve discovered the secrets that separate good tiramisu from truly exceptional tiramisu.
Understanding Tiramisu: Key Terms and Concepts
Mascarpone : A rich, creamy Italian cheese with a mild, slightly sweet flavor and velvety texture. Unlike cream cheese, mascarpone has a higher fat content (around 75%) and a more delicate taste that doesn’t overpower other ingredients.
Savoiardi (Ladyfingers) : Light, spongy Italian cookies that are essential for authentic tiramisu. These elongated biscuits have the perfect texture for absorbing coffee while maintaining their structure.
Zabaglione : A traditional Italian custard made with egg yolks, sugar, and sometimes wine. In tiramisu, we create a modified zabaglione that forms the base of our cream mixture.
Espresso : Strong Italian coffee that provides the signature flavor. The quality of your espresso directly impacts your tiramisu’s taste.
Cocoa Powder : Unsweetened cocoa powder dusted on top provides the finishing touch. I prefer Dutch-processed cocoa for its smooth, rich flavor.
Essential Ingredients for Perfect Tiramisu
Creating exceptional tiramisu starts with selecting the right ingredients. Through my years of experimentation, I’ve learned that quality makes an enormous difference in the final result.
Core Ingredients Table
| Ingredient | Quantity | Quality Notes | Substitution Options |
|---|---|---|---|
| Mascarpone cheese | 500g (17.6 oz) | Use authentic Italian mascarpone when possible | High-quality cream cheese + heavy cream (emergency only) |
| Large egg yolks | 6 | Fresh, room temperature | Pasteurized egg yolks for safety concerns |
| Granulated sugar | 150g (3/4 cup) | Fine granulated works best | Caster sugar |
| Heavy cream | 300ml (1 1/4 cups) | 35% fat content minimum | Whipping cream (35%+ fat) |
| Strong espresso | 400ml (1 2/3 cups) | Freshly brewed, cooled | Strong coffee concentrate |
| Savoiardi cookies | 300g (2 packages) | Authentic Italian preferred | High-quality ladyfingers |
| Dark rum | 3 tablespoons | Optional but recommended | Coffee liqueur, brandy |
| Unsweetened cocoa powder | 2 tablespoons | Dutch-processed preferred | Regular cocoa powder |
| Dark chocolate | 100g | For shaving (optional) | Semi-sweet chocolate |
My Step-by-Step Tiramisu Method
After countless attempts and refinements, I’ve developed this foolproof method that consistently produces restaurant-quality results.
Preparing the Cream Mixture
The cream mixture is the heart of tiramisu, and getting it right requires patience and attention to detail.
- Create the zabaglione base: In a large mixing bowl, whisk egg yolks and sugar until the mixture becomes pale and thick. This usually takes about 5-7 minutes of vigorous whisking. The mixture should fall in ribbons when you lift the whisk.
- Incorporate mascarpone: Add mascarpone to the egg mixture gradually, whisking gently to avoid lumps. The key is to fold rather than beat aggressively, which can cause the mixture to break.
- Whip the cream: In a separate bowl, whip heavy cream to soft peaks. Don’t overwhip, as you’ll continue mixing it with other ingredients.
- Combine everything: Gently fold the whipped cream into the mascarpone mixture using a rubber spatula. Use a figure-eight motion and work slowly to maintain the airy texture.
Coffee Preparation
The coffee component deserves special attention because it’s what gives tiramisu its distinctive flavor profile.
- Brew strong espresso: Make approximately 400ml of strong espresso. If you don’t have an espresso machine, use a moka pot or French press with a coffee-to-water ratio of 1:4.
- Cool and enhance: Allow the coffee to cool to room temperature. Add rum if using, which adds complexity and depth to the flavor.
- Taste and adjust: The coffee should be strong enough to penetrate the cookies but not so bitter that it overwhelms the cream. Adjust with a small amount of sugar if needed.
Assembly Process
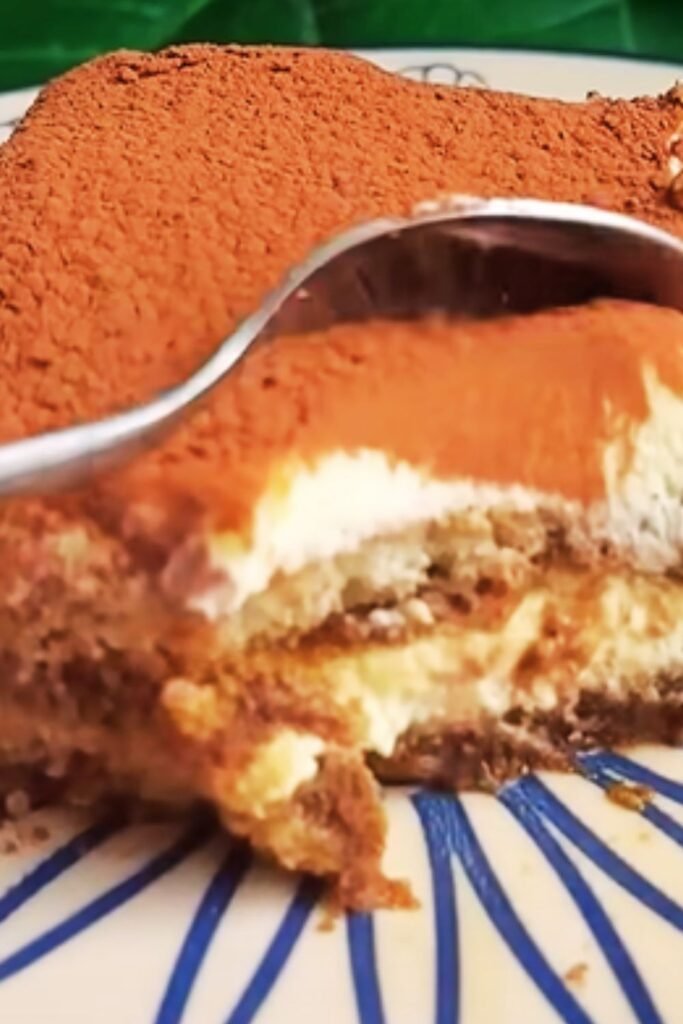
This is where the magic happens. Proper assembly ensures even distribution of flavors and the perfect texture balance.
- Prepare your dish: Use a 9×13 inch dish or individual serving glasses. I prefer glass dishes because they showcase the beautiful layers.
- First layer of cookies: Quickly dip each ladyfinger into the coffee mixture—about 2-3 seconds per side. They should be moist but not falling apart. Arrange them in a single layer.
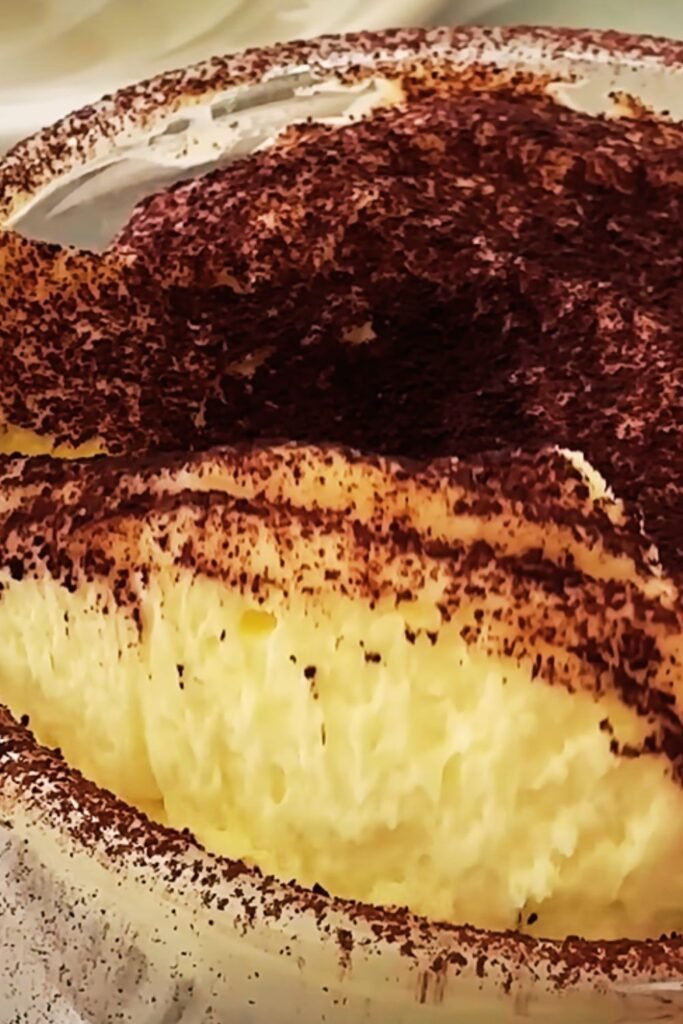
- First cream layer: Spread half of the mascarpone mixture over the cookies, ensuring even coverage. Use an offset spatula for smooth, professional-looking layers.
- Repeat layering: Add another layer of coffee-dipped cookies, followed by the remaining cream mixture.
- Final touches: Smooth the top layer and cover with plastic wrap, ensuring the wrap doesn’t touch the surface.
The Crucial Chilling Period
This step tests your patience, but it’s absolutely essential for proper tiramisu development.
Refrigeration Guidelines
| Time Period | What Happens | Texture Development |
|---|---|---|
| 0-2 hours | Initial setting | Cream firms slightly |
| 2-4 hours | Flavor melding begins | Cookies soften appropriately |
| 4-8 hours | Optimal development | Perfect texture balance |
| 8-24 hours | Peak flavor | Ideal serving condition |
| 24+ hours | Over-development | May become too soft |
I always recommend chilling tiramisu for at least 8 hours, but overnight is even better. The waiting allows the coffee to penetrate the cookies fully while the flavors meld into that signature tiramisu taste.
Finishing and Presentation
The final presentation elevates your tiramisu from homemade dessert to restaurant-quality masterpiece.
Dusting Technique
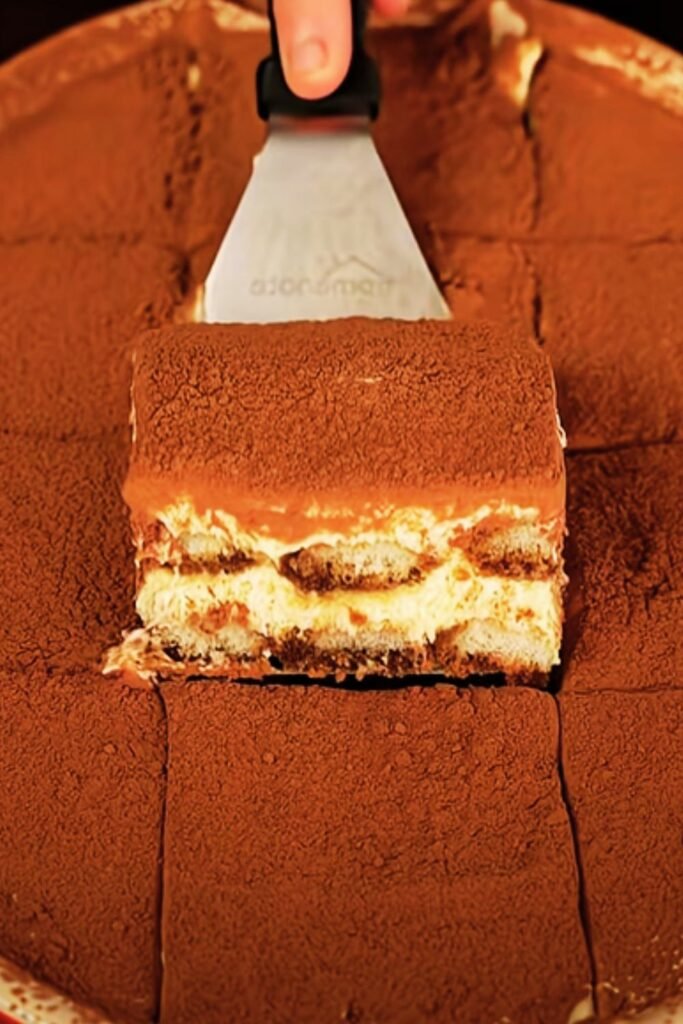
Just before serving, dust the top with unsweetened cocoa powder using a fine-mesh sieve. I’ve found that tapping the sieve gently creates the most even distribution. For special occasions, I create patterns using stencils or simply dust one half more heavily than the other for an elegant gradient effect.
Serving Suggestions
- Individual portions: Cut clean squares using a sharp knife dipped in warm water between cuts
- Garnish options: Fresh berries, chocolate shavings, or a single espresso bean
- Accompaniments: Serve with strong espresso or cappuccino to complement the coffee flavors
- Temperature: Serve chilled but not ice-cold—about 10 minutes out of the refrigerator is perfect
Troubleshooting Common Issues
Through my tiramisu-making journey, I’ve encountered and solved numerous problems. Here are the most common issues and my solutions:
Texture Problems
Grainy cream mixture: This usually happens when mascarpone is too cold or when you overbeat the mixture. Always use room-temperature mascarpone and fold gently.
Soggy cookies: Either the coffee was too strong, cookies were dipped too long, or the tiramisu was stored too long. Aim for 2-3 second dips maximum.
Separated mixture: This occurs when ingredients are at different temperatures or when overbeaten. Start over with room-temperature ingredients and gentle folding.
Flavor Issues
Too bitter: Your coffee might be over-extracted or too strong. Balance with a small amount of sugar in the coffee mixture.
Lacks coffee flavor: Increase espresso strength or ensure cookies are properly moistened with coffee mixture.
Too sweet: Reduce sugar in the cream mixture or use darker cocoa powder for contrast.
Variations I’ve Perfected
Over the years, I’ve developed several variations that maintain the essence of traditional tiramisu while offering unique twists.
Seasonal Adaptations
| Season | Variation | Key Changes | Special Notes |
|---|---|---|---|
| Spring | Berry Tiramisu | Add fresh strawberries between layers | Use lighter coffee, less rum |
| Summer | Lemon Tiramisu | Lemon zest in cream, limoncello instead of rum | Refreshing and lighter |
| Fall | Pumpkin Spice | Pumpkin puree in cream, spiced coffee | Perfect for holidays |
| Winter | Chocolate Tiramisu | Chocolate shavings, mocha coffee | Rich and indulgent |
Dietary Modifications
I’ve successfully adapted this recipe for various dietary needs without compromising the authentic taste:
Egg-free version: Replace egg yolks with additional whipped cream and a stabilizer like gelatin Lower sugar: Reduce sugar by half and add natural sweeteners like stevia Alcohol-free: Simply omit rum and enhance coffee with vanilla extract
Storage and Make-Ahead Tips
One of tiramisu’s greatest advantages is that it actually improves with time, making it perfect for entertaining.
Storage Guidelines
- Short-term: Cover tightly and refrigerate for up to 3 days
- Long-term: Freeze for up to 1 month (texture may change slightly)
- Individual portions: Store in airtight containers for easy serving
Make-Ahead Strategy
I often prepare tiramisu 2-3 days before serving. The extended chilling time allows flavors to develop fully, and it reduces last-minute preparation stress. Just remember to add the cocoa dusting right before serving to maintain its appearance.
Professional Tips from My Experience
After making hundreds of tiramisus, these insights have proven invaluable:
Temperature Control
Everything should be at room temperature when you start. Cold mascarpone won’t incorporate smoothly, and cold eggs won’t whip properly. I take ingredients out of the refrigerator 2-3 hours before starting.
Quality Matters
Invest in high-quality mascarpone and authentic savoiardi cookies. The difference in taste is remarkable, and your guests will notice. I’ve tried many brands, and authentic Italian products consistently deliver superior results.
Patience is Key
Don’t rush any step. Proper whisking, gentle folding, and adequate chilling time are non-negotiable for exceptional results. I’ve learned that hurrying leads to disappointing outcomes.
Frequently Asked Questions
Q: Can I make tiramisu without raw eggs? A: Yes, you can pasteurize the eggs by creating the zabaglione over a double boiler, heating the egg-sugar mixture to 160°F while whisking constantly. Alternatively, use pasteurized eggs from the store.
Q: How long does tiramisu last in the refrigerator? A: Properly stored tiramisu lasts 3-4 days in the refrigerator. The flavor actually improves for the first 2 days, making it perfect for advance preparation.
Q: Can I freeze tiramisu? A: While possible, freezing changes the texture slightly. If you must freeze, wrap tightly and consume within one month. Thaw in the refrigerator overnight before serving.
Q: What if I can’t find mascarpone cheese? A: In emergencies, you can make a substitute by mixing 8 oz cream cheese with 1/4 cup heavy cream. However, the texture and flavor won’t be identical to authentic mascarpone.
Q: Should I use decaf coffee? A: I don’t recommend decaf as it lacks the robust flavor that makes tiramisu special. The coffee is essential to the dessert’s character, and decaf simply doesn’t provide the same impact.
Q: Can children eat tiramisu? A: Traditional tiramisu contains raw eggs and alcohol, which some parents prefer to avoid for children. You can make child-friendly versions using pasteurized eggs and omitting the rum.
Q: Why is my tiramisu runny? A: Runny tiramisu usually results from under-whipped cream, overbeaten mascarpone mixture, or insufficient chilling time. Ensure proper whipping techniques and allow adequate setting time.
Q: Can I use different cookies instead of ladyfingers? A: Savoiardi cookies are specifically designed for tiramisu due to their texture and absorption properties. Other cookies may become too soggy or not absorb enough coffee, affecting the final result.
My Final Thoughts on Mastering Tiramisu
Creating perfect tiramisu has been one of my most rewarding culinary journeys. This dessert teaches patience, precision, and the importance of quality ingredients. Every time I serve homemade tiramisu, I’m reminded of that first magical taste in Rome and how it inspired me to master this incredible dessert.
The key to exceptional tiramisu lies not in complicated techniques but in respecting each ingredient and process. Take your time, use quality components, and don’t be afraid to practice. Each attempt brings you closer to your own perfect version.
Remember that tiramisu is forgiving—small variations in technique or ingredients can still yield delicious results. The most important ingredient is the love and care you put into making it. Whether you’re preparing it for a special occasion or simply treating yourself, this timeless dessert never fails to impress.
I encourage you to try this recipe and make it your own. Pay attention to how your ingredients behave, adjust to your taste preferences, and most importantly, enjoy the process. Tiramisu isn’t just about the destination—it’s about savoring every step of the journey.